
Workflows Made Visible: Introducing Joomla's Workflow Graph Editor

Workflows in Joomla have always been powerful, but never this visible. The new Workflow Graph Editor pulls that power onto the canvas, turning abstract configurations into something you can see, drag, connect, explain and edit in seconds.
The End of Workflow Juggling
Traditional workflow management in Joomla required administrators to jump between separate screens - first defining the workflow, then creating stages in one section, transitions in another, and mentally connecting the dots.
For complex processes with multiple approval stages and content types, administrators often relied on external notes or even paper diagrams to keep track of everything. With the new Graph Editor, all of this tracking now happens visually, right inside Joomla.
Built with Vue.js and VueFlow, Workflow Graph Editor presents your entire workflow as a live flowchart. Stages appear as draggable nodes, transitions as arrows. Everything happens in a single view - no reloads, no tab switching, no mental gymnastics.
See Your Workflow, Build Your Workflow
Step 1: Access the Graph Editor
Start by navigating to:
Content → Workflows → Select your workflow → Click the Graph button.
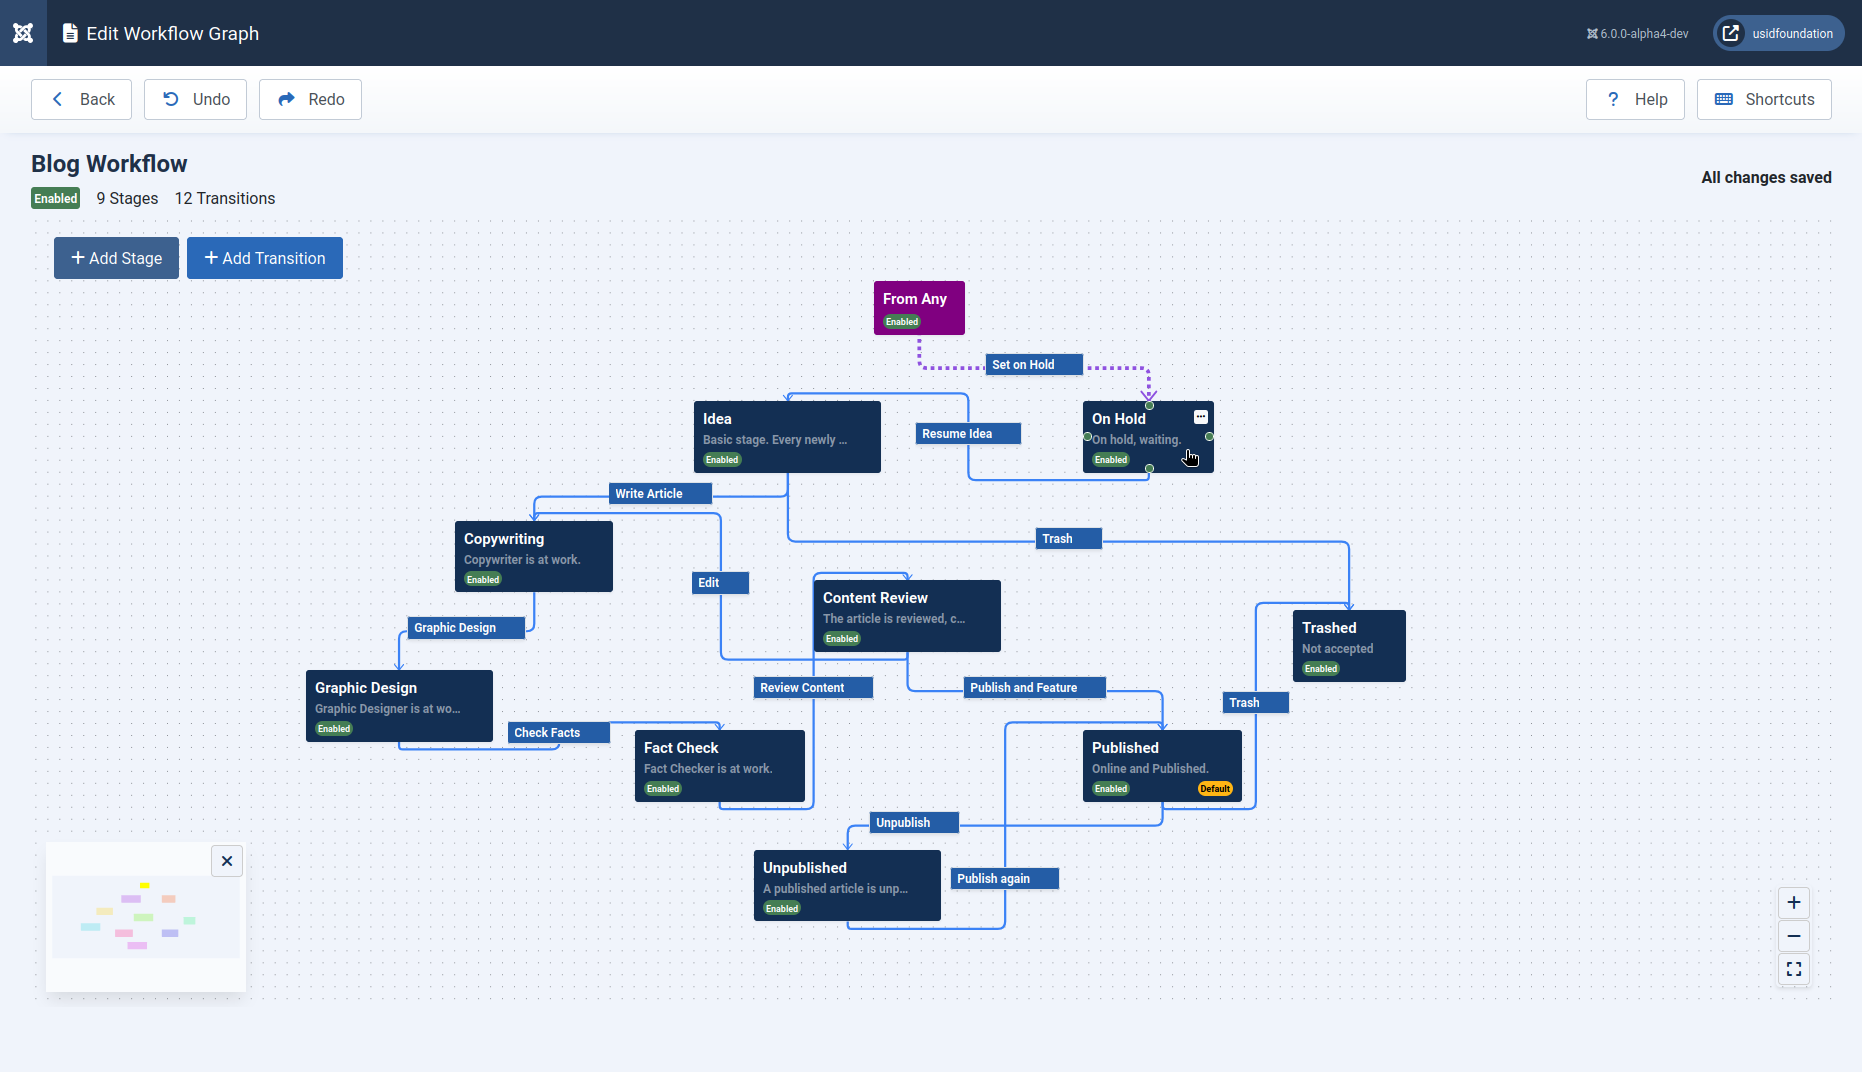
The Workflow Graph Editor will open, displaying your workflow as an interactive diagram. If you already have stages or transitions defined, they’ll appear as draggable nodes and connecting arrows on the canvas. If it’s a new workflow, you’ll see a blank canvas, ready for building.
Step 2: Create Your Stages
- Click + Add Stage at the top, or use the keyboard shortcut Alt + N. Each stage you add appears as a node on the canvas.
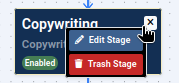
- To edit a stage, either click the menu icon on the node or press E when it’s selected. You can rename it, assign permissions (who can move content in or out), and configure its properties.
- To delete a stage, select it and press the Delete key, or use the menu option.
Tip: You can freely move nodes around. Layout changes are saved automatically and don’t affect the workflow logic.
Step 3: Connect with Transitions
Transitions define how content moves between stages. Creating them is as simple as drawing arrows:
- Hover over a stage node until you see the small connector dot.
- Drag from this dot to another stage to create a transition.
- Alternatively, click + Add Transition and select the start and end stages.
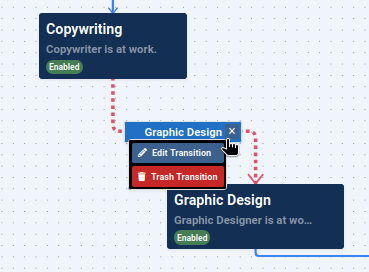
Each transition appears as an arrow between stages. Click the arrow to edit its name, permissions, and conditions.
Step 4: Arrange Your Layout
With the stages and transitions in place, tidy up the canvas so it’s easy to understand:
- Drag nodes into a logical flow (e.g., left to right).
- Use the zoom controls in the bottom-right corner to fit everything on screen.
- The mini-map (bottom corner) gives you an overview for large, complex workflows.
Pro Tip: Press Ctrl + Z (undo) if you move something by mistake. Redo with Ctrl + Y.
At the end of this process, you’ll have a clear, visual workflow
(eg: Draft → Review → Approval → Published). Every stage and transition is visible at a glance, and your team will immediately understand the process.
Transparency for Your Team: View-Only Graphs
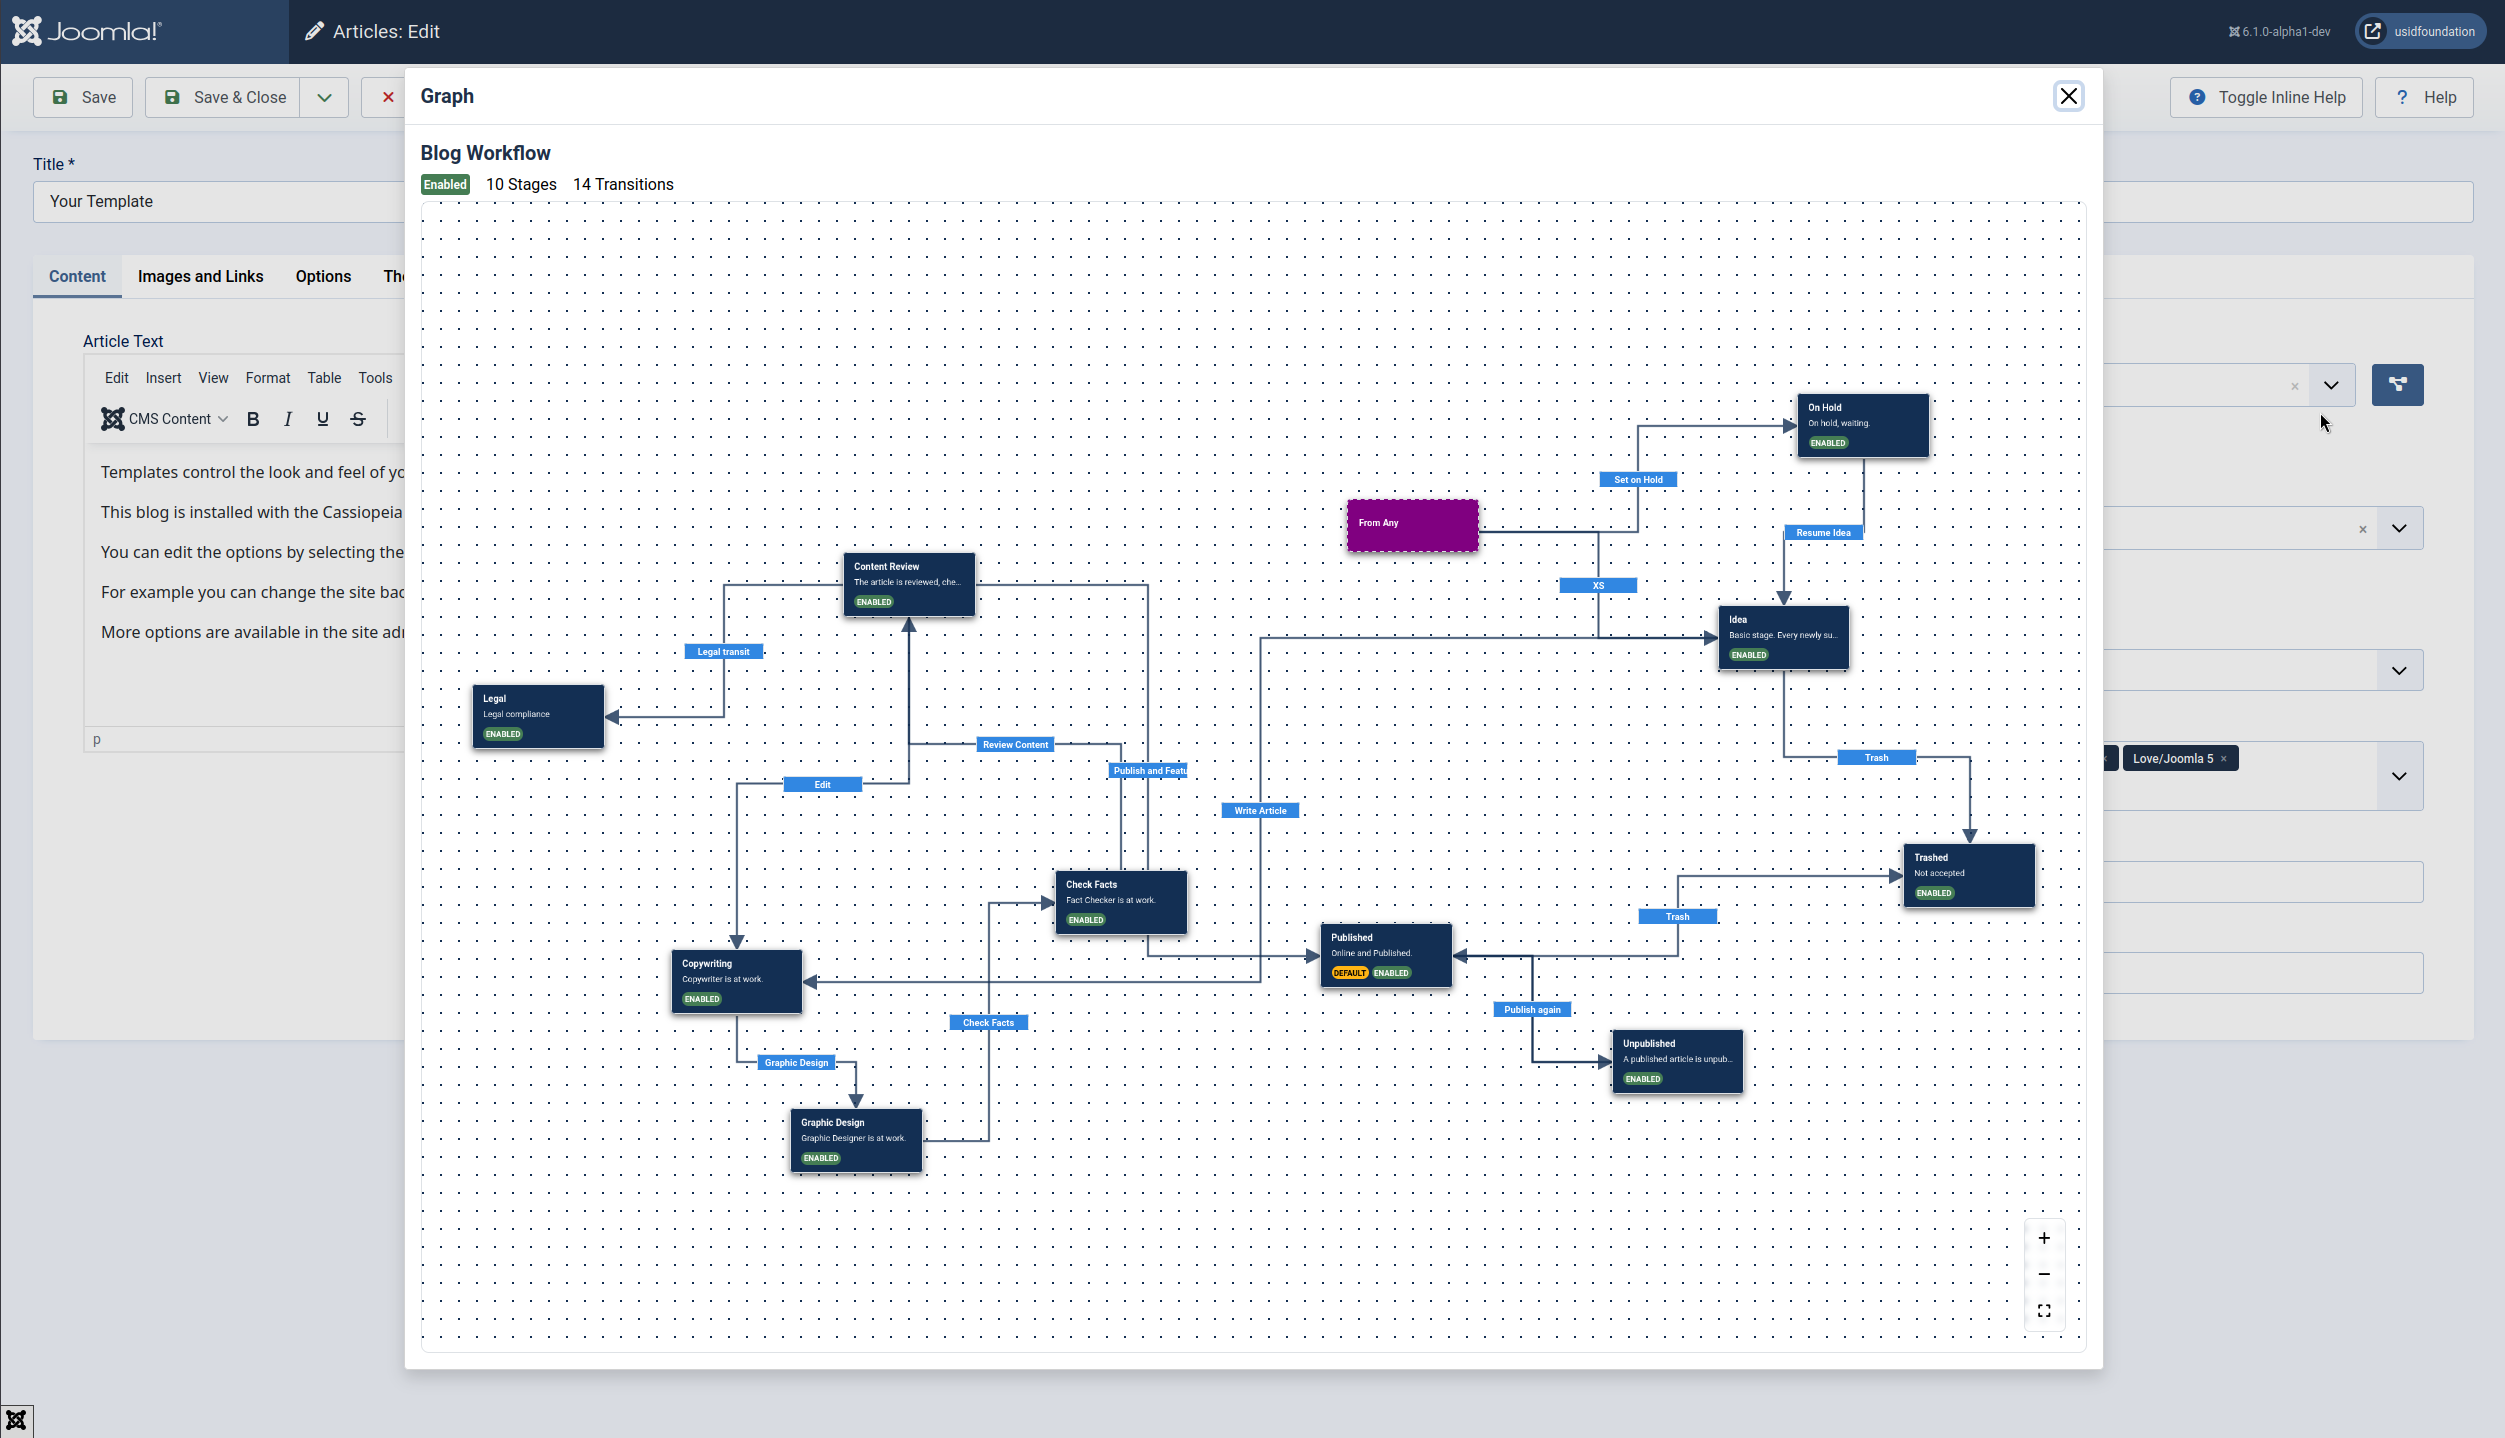
Workflows aren’t just for admins. Authors and editors need visibility too. With the new View-Only Graph, non-admin users can open a workflow map directly from the article edit screen (Publishing tab → Graph).
They’ll see where their article sits and which transitions are available to them - without the ability to alter the workflow itself. This makes processes transparent, consistent, and easier to follow.
Smart Content Organization: Category Transition Plugin
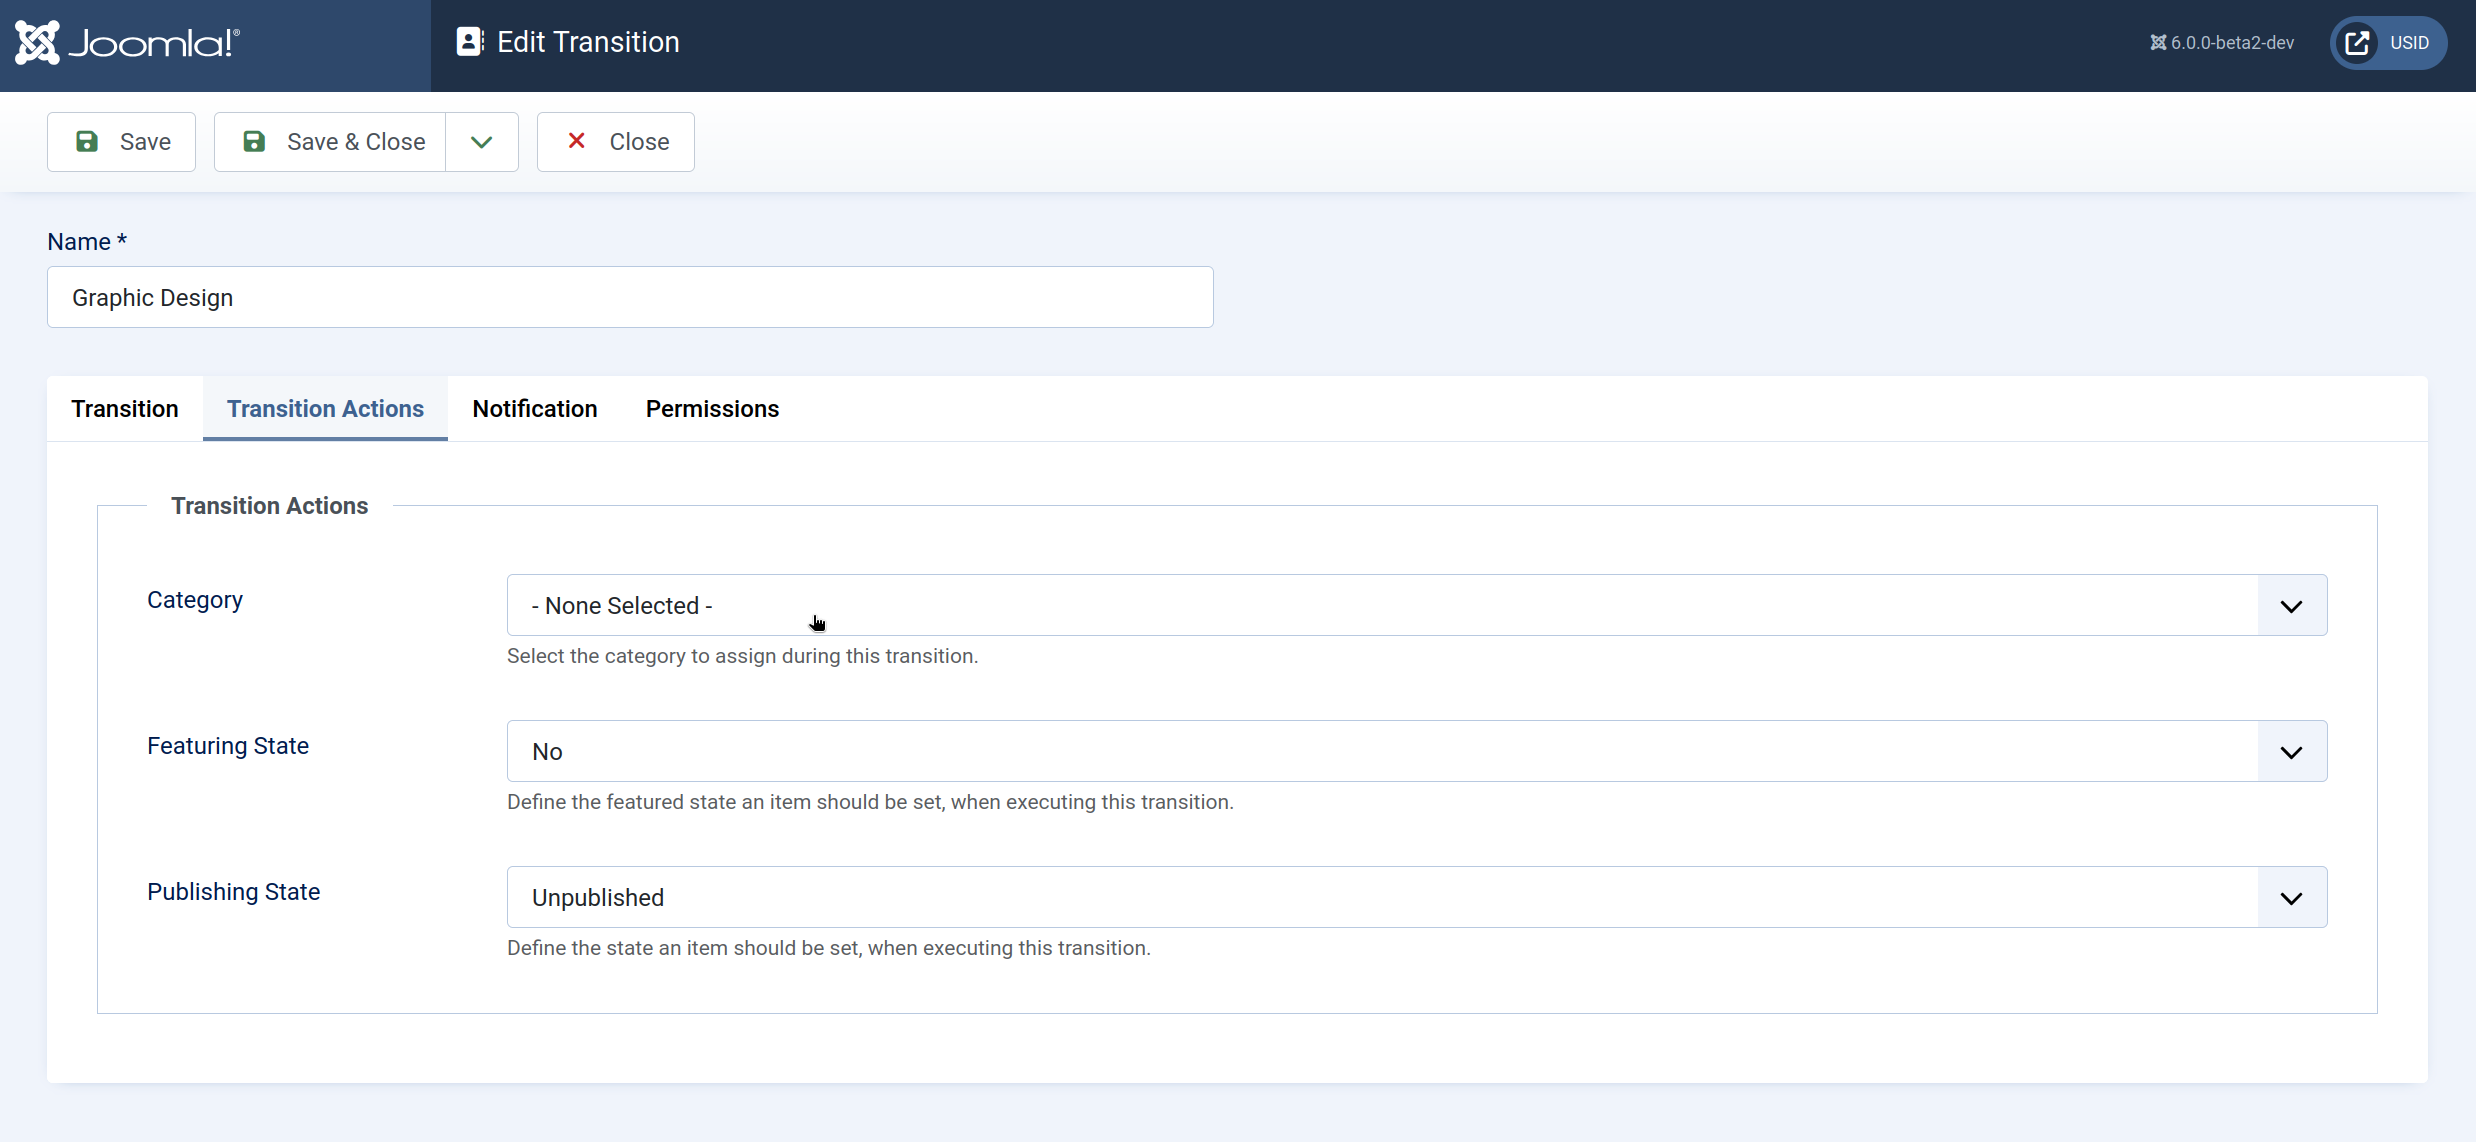
Processes often require articles to move between categories as they progress. The Workflow - Category Transition Plugin automates this:
- Draft articles start in Uncategorized.
- When published, they automatically move to News.
This reduces errors and keeps content organized without manual intervention. Enable it via System → Plugins → Search workflow - Category, then configure per transition which category should be assigned.
Try them out
The Workflow Graph Editor is currently under development and not yet merged into Joomla 6.1. If you’d like to explore it today, you can find the code in the GitHub repository at pr 46021.
The Category transition plugin is currently under testing. If you’d like to explore it today, you can find the code in the GitHub repository at pr 45968.
The Bottom Line
The Workflow Graph Editor isn't just a developer experiment anymore - it's a tool ready for Joomla administrators, authors, and editors to use every day. If you've been waiting for a more intuitive way to manage complex content processes, now's the time to try it. Enable workflows, open the Graph Editor, and start building visually. And if you haven’t yet read the background story of how this project came to life, check out my earlier article "Joomla! Workflows, Reimagined: My GSoC Journey from Form Fields to Flowcharts".
The age of workflow juggling is over - welcome to Joomla’s new visual workflows.
Some articles published on the Joomla Community Magazine represent the personal opinion or experience of the Author on the specific topic and might not be aligned to the official position of the Joomla Project
About the author
By accepting you will be accessing a service provided by a third-party external to https://magazine.joomla.org/
Comments 1
this will be a very valuable improvement!
joomla workflows are very useful in my intranet site. This takes workflow design to another level.. Looks great, can't wait to try it.
Not exactly related to this, but I would love to be able to run.a transition from the front end