 Community Magazine
In episode 3 of our series about building custom plugins we will look at workflow plugins. With a workflow plugin you can create actions that are executed at a workflow transition. In this article we’ll show how to create your own plugins to adjust the publishing workflow or create completely custom workflows. We'll end with three concrete examples.
Stages, transitions and actions
In a workflow something transitions from a start stage via intermediate stages to an end stage. For instance an e-commerce workflow could have the following stages: order → pay → pack → ship → invoice. A code contributions workflow could be: pull request → code review → test → merge or close. A print production workflow could be: design → pre-press → print → finish.
In core Joomla we have a plugin for a Publishing workflow. The original idea was that this workflow would eventually replace the “state” field of an article (published, unpublished, trashed, or archived). But as that state field is used everywhere, there was a huge backwards compatibility problem. Ultimately, it ended with renaming the original workflow ‘states’ to ‘stages’ and having the Workflow Publishing plugin set the state field of content. When you activate the workflow for content (at the Options, under Integrations), You’ll have a Basic Workflow available, with only one stage, the Basic Stage. All transitions will go from that Basic Stage to that Basic Stage; it is a way to have all transition actions available, without first having to define any stage.
For the basics of the Joomla Publishing Workflow feature see Patrick Jackson’s 2021 Magazine article Joomla 4: The new Workflow feature and the Publishing Workflow article in the user guide. To play with the existing publishing workflow in core Joomla, you can install the blog example.
A basic philosophy that has been followed so far with workflows in Joomla is:
- Users trigger transitions.
- Transitions trigger actions.
Another way would be that a specific transition is automatically triggered by some result of an action. In an e-commerce workflow, you could for instance trigger the transition to the next stage when someone has paid. In the current GSoC project for automated workflows, a transition can be triggered by an amount of time that has passed.
You can define your own workflow plugin or adjust the existing one. This article shows you how.
Add action options to the transition form
For a general setup of a Joomla plugin, see the previous two episodes of this series about custom plugins: General Overview and about the Task Plugin. The only special thing in the setup of workflow plugin files is the use of a form with the name ‘action.xml’. A MyWorkflow plugin would then have the following files:
plg_workflow_myworkflow

├─── forms
│     └─── action.xml
├─── language
│     └─── en-GB
│           ├─── plg_task_myworkflow.ini
│           └─── plg_task_myworkflow.sys.ini
├─── services
│     └─── provider.php
├─── src
│     └─── Extension
│           └─── MyWorkflow.php
└─── myworkflow.xml
The fields of the form that are defined in that action.xml are added to the form in which you specify values for variables that you want to use during a transition to the next stage.
With the Fieldset name and label you can put the fields on a tab in the transition form. For instance for the “Transition Actions” tab:
<fieldset name="actions" label="COM_WORKFLOW_TRANSITION_ACTIONS_LABEL">The core Workflow Notifications plugin puts its fields on the “Notification” tab:
<fieldset name="notification" label="COM_WORKFLOW_NOTIFICATION_FIELDSET_LABEL">In the plugin class itself (under src/Extension) you add the WorkflowPluginTrait, with some handy utility methods. You can add the transition action fields in your forms/action.xml file to the transition form via the onContentPrepareForm event. The boilerplate work can simply be done by the enhanceWorkflowTransitionForm() method that is available in the WorkflowPluginTrait.
There are some other utility methods available in that WorkflowPluginTrait, to get all information of the workflow, or to check permissions and which extensions support that workflow plugin.
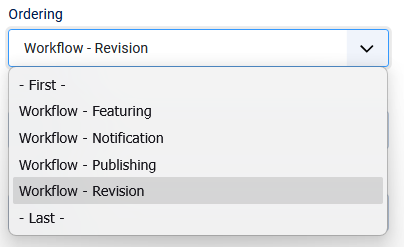
The order in which actions are added to the transition form is dependent on the order of the workflow plugins. You can set that in the list of plugins (filter on workflow plugins), or in the plugin itself:
At the start of the workflow plugin you have to load the language strings, otherwise the language strings won’t work. This should be done in all plugins that use language strings:
    /**
     * Load the language file on instantiation.
     *
     * @var    boolean
     */
    protected $autoloadLanguage = true;
Execute the transition actions
Do the actions after the transition
With transition actions you let the plugin do specific actions during transitions. For instance publish some content or not (with the core Workflow Publishing plugin), or feature an article or not (with the core Workflow Featuring plugin). Those actions have to be executed, using the values that you have given in the transition actions form. The actual execution, based on the values that were set for that transition, is done in the handling of the onWorkflowAfterTransition event.
Check things before the transition
By handling the onWorkflowBeforeTransition event you can prevent the transition to be done, save some old values or prepare the data. Preventing the transition to happen can be done by calling the setStopTransition() method of the WorkflowTransitionEvent. I added an onWorkflowBeforeTransition() method to the example Workflow Revision plugin, to warn you that an item is not copied to the Revision Draft, because someone else is already revising it.
The Transition Event
Both before and after the transition, the WorkflowTransitionEvent is sent. It has the following arguments:
- extension: the context in which this transition takes place, generally in the form extensionName.tableName (for instance: com_content.article). So it is broader than only the extension. That’s why you generally see
$context = $event->getArgument('extension') - extensionName: the name of the extension that uses this workflow transition (for instance: com_content).
- transition: information about this specific transition.
$transition = $event->getArgument('transition');
Attributes of transitions:- The id of the transition:
$transition->id. - The id of the stage we came from:
$transition->from_stage_id. - The id of the stage we go to:
$transition->to_stage_id. - And options:
$transition->options, an array with all the values of the fields that are added in the actions.xml form definition file. So, if we added a some_variable field to the transition form, we can retrieve it in our event handler with$transition->options[‘some_variable’].
- The id of the transition:
- pks: the primary keys of the items in this transition. It is an array and can have multiple values, because a transition can also be done in a batch.
onWorkflowFunctionalityUsed
The onWorkflowFunctionalityUsed event can be used to set the ‘used’ functionality (if supported by the extension that implements the workflow). With WorkflowFunctionalityUsedEvent ->setUsed() you can stop propagation to the next plugin.
Disable setting values other than via the transition
With the transitions actions some values are set during the transition from one stage to the next. And you only give some user groups permission to do that transition. In those cases you want to prevent that that value (for instance published, or featured) is directly set in the content by someone who is not authorised to do that. That’s why those fields have to be disabled in the forms where they are normally set directly.
To manipulate detail/form view we (again) use the onContentPrepareForm event. The manipulation of the list views is triggered by the onAfterDisplay event.
Some other events that are handled in the core workflow plugins:
- onContentBeforeSave: an extra check if the variable that is changed by the transition action, is not also set in the submitted form.
- onContentVersioningPrepareTable: to remove the variable from the versioning that can only be set via a workflow transition.
- onTableBeforeStore: also used to remove a field from the history table (that should only be changed via a workflow transition).
- onContentBeforeChangeState (in Publishing.php) and onContentBeforeChangeFeatured (in Featuring.php): extra check if for these items a change of the state property, respectively of featured property, is allowed.
See the list of events in manual (list is not yet complete at the moment, as the above mentioned onAfterDisplay, onContentVersioningPrepareTable, and the specific workflow events are missing).
Is the extension supported by your plugin?
The WorkflowPluginTrait has a isSupported() method that returns false by default. You have to override that method to get your plugin working. You can check against the $context parameter. Most of the time you can just copy the isSupported() method of the core workflow plugins. But if you would need some special check, you know where to put it.
Example Workflow plugin: Notification extended
In the workflow for the user documentation I needed a notification to be sent to the original author about the stage their article is in. That is not in the core workflow notification plugin. You cannot just extend a plugin, so the simplest way to do it is “copy-paste programming”: copy the workflow-notification plugin and add what you want to add. Disable the original plugin and install your own.
- Change the name (I now changed notification to notificationext) and the namespace.
- Add the language files to the plugin and adjust them to the new name
- Give credit to the core workflow notification plugin and state what you changed and why.
- Enhance the form with a Yes/No field to notify the author of the article.
<field name="notification_send_author" type="radio" label="PLG_WORKFLOW_NOTIFICATIONEXT_SEND_AUTHOR_LABEL" layout="joomla.form.field.radio.switcher" default="1" filter="boolean" showon="notification_send_mail:1" > <option value="0">JNO</option> <option value="1">JYES</option> </field> - In Notificationext.php change the
onWorkflowAfterTransition()method. Because the plugin can also be used in a batch, there can be several items that are transitioned in one go. That’s why$pks, the primary keys of the transitioned items, is an array. Each item in that batch can have a different original author. So I added the original author to the receivers of the notification on a per item basis, within the foreach loop of$pks:
// Add original author to recipients, if applicable
if ($transition->options['notification_send_author'] && !empty($item)) {
    $extraRecipients[] = $item->created_by;
}
// merge the extra recipients with the other users
$userIdsPlus = array_unique(array_merge($userIds, $extraRecipients));
I’ve put this Workflow Notification Extended plugin in a Github repository with the examples in this article.
In the repository I also implemented the possibility to notify the last user that modified the article, and the current user. The Wicked Workflow Notification plugin, that is used by the Magazine, does something comparable.
Three different ways to send a message
Booting com_messages
In the core Workflow Notification plugin, and also in our extended version, the message is sent by booting com_messages:
$model_message = $this->getApplication()->bootComponent('com_messages')
    ->getMVCFactory()->createModel('Message', 'Administrator');
Upon saving a $message array in this Model, we will send the notification.
Using a Mailer
In the last episode of this series, about custom Task Plugins, we sent messages by injecting the MailerFactory via the service provider. That MailerFactory produces a Mailer, with which we send messages.
Using a MailTemplate
In the core Task UpdateNotification plugin yet another method is used: there a new Joomla\CMS\Mail\MailTemplate is instantiated. Nice that it uses Joomla’s MailTemplate feature, but … it is not injected into the plugin. It’s just a detail, but in the service provider a new MailTemplate could be injected via a setter or via the constructor into the plugin. In the plugin you could clone a new MailTemplate every time you need a fresh one. Or, as is more usual in these cases: you create a MailTemplateFactory, inject that into your plugin and let that produce a new MailTemplate every time you need one. A MailTemplateFactory doesn’t exist (yet) in core Joomla, so at the moment you’d have to make that yourself.
In principle, with dependency injection you never use the “new” keyword in the plugin itself (except for classes that are part of the core PHP language, like \DateTime). You instantiate the class in the service provider to inject it into the plugin. In cases where you need multiple instances of an object, or if you only know the details needed for instantiation, in the plugin, you use a Factory to produce the object. So you can inject a UserFactory if you need a User object, you can inject a MailerFactory if you need a Mailer object, etc. See my December 2025 Magazine article Dependency Injection: What and Why?.
Example Workflow plugin: Category transitions
You can give user groups permission to do a specific transition. But you cannot give permissions and view rights per workflow stage to user groups. For instance for user documentation we needed a different visibility of articles and different editing rights per workflow stage. Because you can do that per category, the idea came up to assign an article to a different category per workflow stage. That same idea was implemented in the Joomla Community Magazine when the EasyBlog extension was dumped in favour of a core Joomla workflow.
For this we needed a workflow plugin with the transition action to change a category. Dileep Adari, who did the GSoC 2025 workflow project with the graphical view, made such a plugin as a new core Joomla workflow plugin. You can find it in the still open pull request #45968 in the Joomla CMS repo. I’ve put an installable version of that proposed core Workflow Category plugin in the repository with example custom workflow plugins for this article. An adapted version of such a Workflow Category plugin is used for the User Guide and for the Magazine.
Another example:
Revise a published article with a draft stage
Say, you use a workflow to add articles, where a separate group of editors have to review an author’s article before it is published. Like we do with our User Guide and with this Magazine. When an article is published and someone wants to revise it, then you’d want to keep the published article online, while a separate draft is made to do the revision. That draft then first has to be reviewed again before it is published. When approved the original article has to be replaced by the revised and reviewed article, where comments and likes of the original article are kept. In WordPress you have the Revisions plugin (repo). In Joomla we can accomplish that with a workflow plugin.
This Workflow Revision plugin that I present here uses the same principle as the Workflow Category plugin: work on a draft in a category that is not publicly accessible. I made this plugin for “items” of any component that implements the workflow, but in this overview I’ll talk about “articles” of com_content, because that was my specific use case.
The plugin copies the original article to a RevisionDraft category, for review it is transferred to a RevisionReview category, and when approved it is copied back as a new version of the original article.
- After the transition the plugin makes a copy of the article, and places it in the RevisionDraft category (not publicly accessible).
- I added a table to keep track of the articles in revision, and their original article that is still published.
- That new article is edited, using versioning, saving it, etc. It is just a new com_content article. It is in the RevisionDraft stage of the workflow.
- In the RevisionDraft stage there also is a "Submit for Approval" button, but now the article is sent to the RevisionReview stage. There you have an approval button, which triggers the workflow plugin to copy the edited and approved article back over the original.
- The versioning stack of the temporary draft copy is copied on top of the original article stack.
- The temporary draft article is deleted after it is copied back to the original article. All in one go (copy back, copy the versioning stack of the draft, and delete the temporary article).
After installing the plugin, you need to create categories for the revision draft and revision review, and set them in the plugin parameters. To make it easily workable in the frontend, you should create a template override of the list of published articles of an author. In the current situation, an author is not allowed to edit their own articles, once they are published. So you’ll have to add a button to those articles to trigger the transition of a copy of an article to the RevisionDraft stage.
The plugin should hide the manual setting of the categories for revision draft and revision review. I use this plugin in combination with the Workflow Category plugin, which already takes care of that.
I’ve put this Workflow Revision plugin in the repo with the examples in this article.
Some useful snippets for workflow plugins
Get the transition options
$transition   = $event->getArgument('transition');
$varName      = $transition->options['name_of_the_transition_option'];
Get the name of the transition
$transition       = $event->getArgument('transition');
$model_transition = $this->getApplication()->bootComponent('com_workflow')
    ->getMVCFactory()->createModel('Transition', 'Administrator');
$transitionName   = $model_transition->getItem($transition->id)->title;
Generating plugins
I’m working on a plugin generator that generates the boilerplate code, including specific things for several types of plugins. Still working on both the Task plugin and the Workflow, accompanying this article. The plugin produces a skeleton, in which you fill in the parts that are specific for your custom plugin. You can find it at github.com/HermanPeeren/plug-gen.
Next episode
The next episode in this series will be about custom Finder plugins. To index content in your custom component for Joomla’s search component.
Resources
- Joomla 4: The new Workflow feature, Joomla Community Magazine (JCM) March 2021, Patrick Jackson.
- Explore the Core - Workflows, JCM January 2022, Chris Keen.
- Making workflows that work for you, JCM May 2024, Dan Atrill.
- The Publishing Workflow article in the user guide.
- A Github repository with the three example workflow plugins in this article.
- Work in progress: Plugin Generator.
General about plugins in developers manual
Articles in this series about custom plugins
- General Overview
- Task Plugin
- Workflow Plugin (this article)
- Finder plugin (next month)

Comments