

Today I'll give you a short overview of the contact component (com_contact) of Joomla! The contact component is a really powerful tool in your Joomla instance, which is underappreciated by most users.
It is a tool you can use to provide contact information about your company or project. But this is only a real simple usage, for example you can also provide organization diagrams, departments or members of an organization or department to the visitors of your website.
Because this is such a powerful component I will split this article into 3 parts. In the first part I’ll show how to use the backend of this component, in the second part I’ll show how to display the information in the frontend and expand the basic contact information with custom fields. In the third part I will show how to use the contact component to provide a basic contact form without a third party extension and how to display an organization diagram.
How to access the contact component
As described in the title of this article the contact component is part of the Joomla Core. So it is not necessary to install anything. Just login into your backend and go in the sidebar menu to the components section and select the “Contacts” entry. Now you are in the main view of the contact component. In the left menu you will see the submenu of the contact component. There are four entries in this submenu (Contacts, Categories, Fields and Field Groups). You should already know this structure from the content component (com_content). There you have an additional section for the media manager. Basically the function of the contact component is the same as the content component.
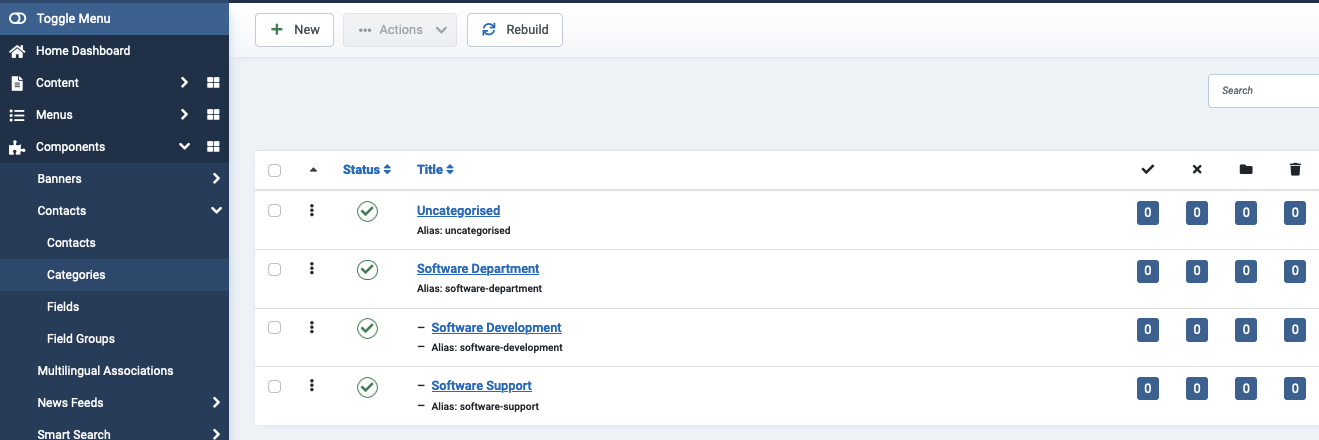
To get started with the contact component, I created 3 new categories, like you can see in figure 1. I made a new category called “Software Department” on the main level of the categories tree. This category has two childs, “Software Development” and “Software Support”. In my opinion this is a typical structure in many companies.
After I created the different categories I will create a single contact. So I click in the left sidebar menu on the Contacts link and start to create a contact by clicking on the “New” Button in the top left corner in the toolbar on the contacts dashboard. Here you will see an input screen to insert details of the new contact. From the basic setting it is organized like the article input screen. You can see the input screen in figure 2.
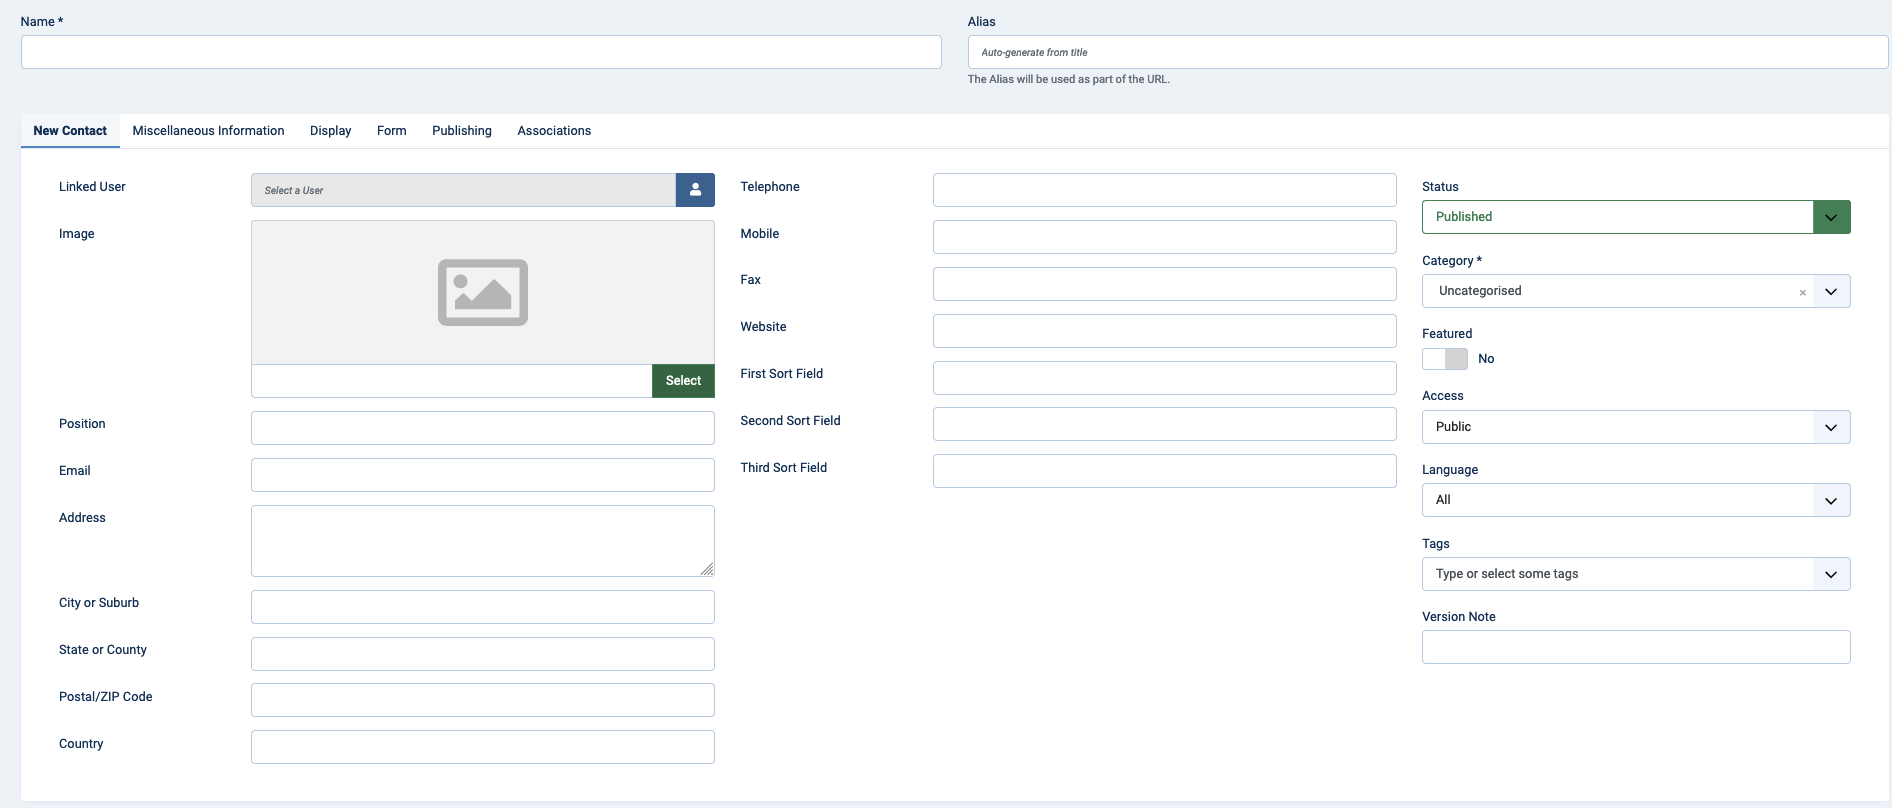
In the input screen are really many fields provided. But only two of them are required (Name and Category. All the other fields can be filled by you but you don’t have to.
I will only describe the mandatory fields and some special fields of the input screen. This are the fields to fill:
Name (mandatory): write down the name of the contact.
Category (mandatory): Select the category from the list where the contact should be sorted.
Linked User: You can connect the new contact to a user of the Joomla instance. This could be good for websites with many users and many contact, because it will simplify the organization of the contacts.
Image: You can select an image from the media manager or upload an image using the media manager.
First/Second/Third Sort Field: The content of these fields can be used for sorting the contacts in a list view for example.
Here is a short list of the other standard fields: Positon, E-Mail, Address, City or Suburb, State or Country, Postal/ZIP Code, Country, Telephone. Mobile, Fax and Website. In the second part I will show how to expand the provided fields with custom fields.
By using the input screen you can easily create as many contacts you need for your business or project. This was a short overview of the contact component and how it works in the backend. I hope you have enjoyed it, and will read my follow up article where I’ll go through the front end and the custom fields area in the second part. And finally in the third part I will show you how to use the contact component to provide a contact form and how to show an organization diagram.
Comments