Installing Joomla! has never been so easy and so fast
Let’s cook up a Joomla! 4 installation!
Welcome to the Joomla! 4 cooking school!
Today we’re going to whip up a copy of Joomla 4 for your tasting pleasure. It won’t take long, as the new Joomla 4 installer has been streamlined and optimised to cut down on preparation time and get you using Joomla quicker than before.
Ingredients
Before we begin, here’s a list of ingredients you’ll need.
- A place to install your Joomla site. Options include:
- Set up XAMPP or another local hosting environment.
- Have an existing hosting account such as a cPanel or Plesk account
- Give Joomla 4 a test via launch.joomla.org, where the wizard will do most of the work for you.
- Configure a MySQL database on your hosting environment.
- Last month’s article on Installing Git, which includes installing XAMPP covers doing this via a localhost.
- You can also follow this documentation item on Creating a Database for Joomla!
- If you’re using Launch.joomla.org this part’s done for you.
- Copy your password to use in a later step, as well as remembering the name of the database you created.
- A copy of Joomla 4
- Visit the Joomla CMS Releases page on Github to download the latest version of Joomla 4 (Joomla 4.0 Beta 2 at time of writing)
Preparation
Before we begin installing Joomla! 4, there are a few things to get ready for the installation process.
- With your hosting environment ready, upload the zip file into the public_html folder (or other folder you’re going to install the site in)
- Extract the zip file into the folder
- Optionally delete the zip file once you’ve extracted the Joomla files.
- Have your database name, database user name and database password ready from Step 2 in the ingredients list.
Get Cooking
Navigate to the URL for your Joomla 4 installation, and the installation wizard will begin.
For example:
- http://localhost/joomla4 if you were installing the site into a folder in xampp called joomla4
- http://<domain>/joomla4 if you were installing it into an existing site in a folder called joomla4
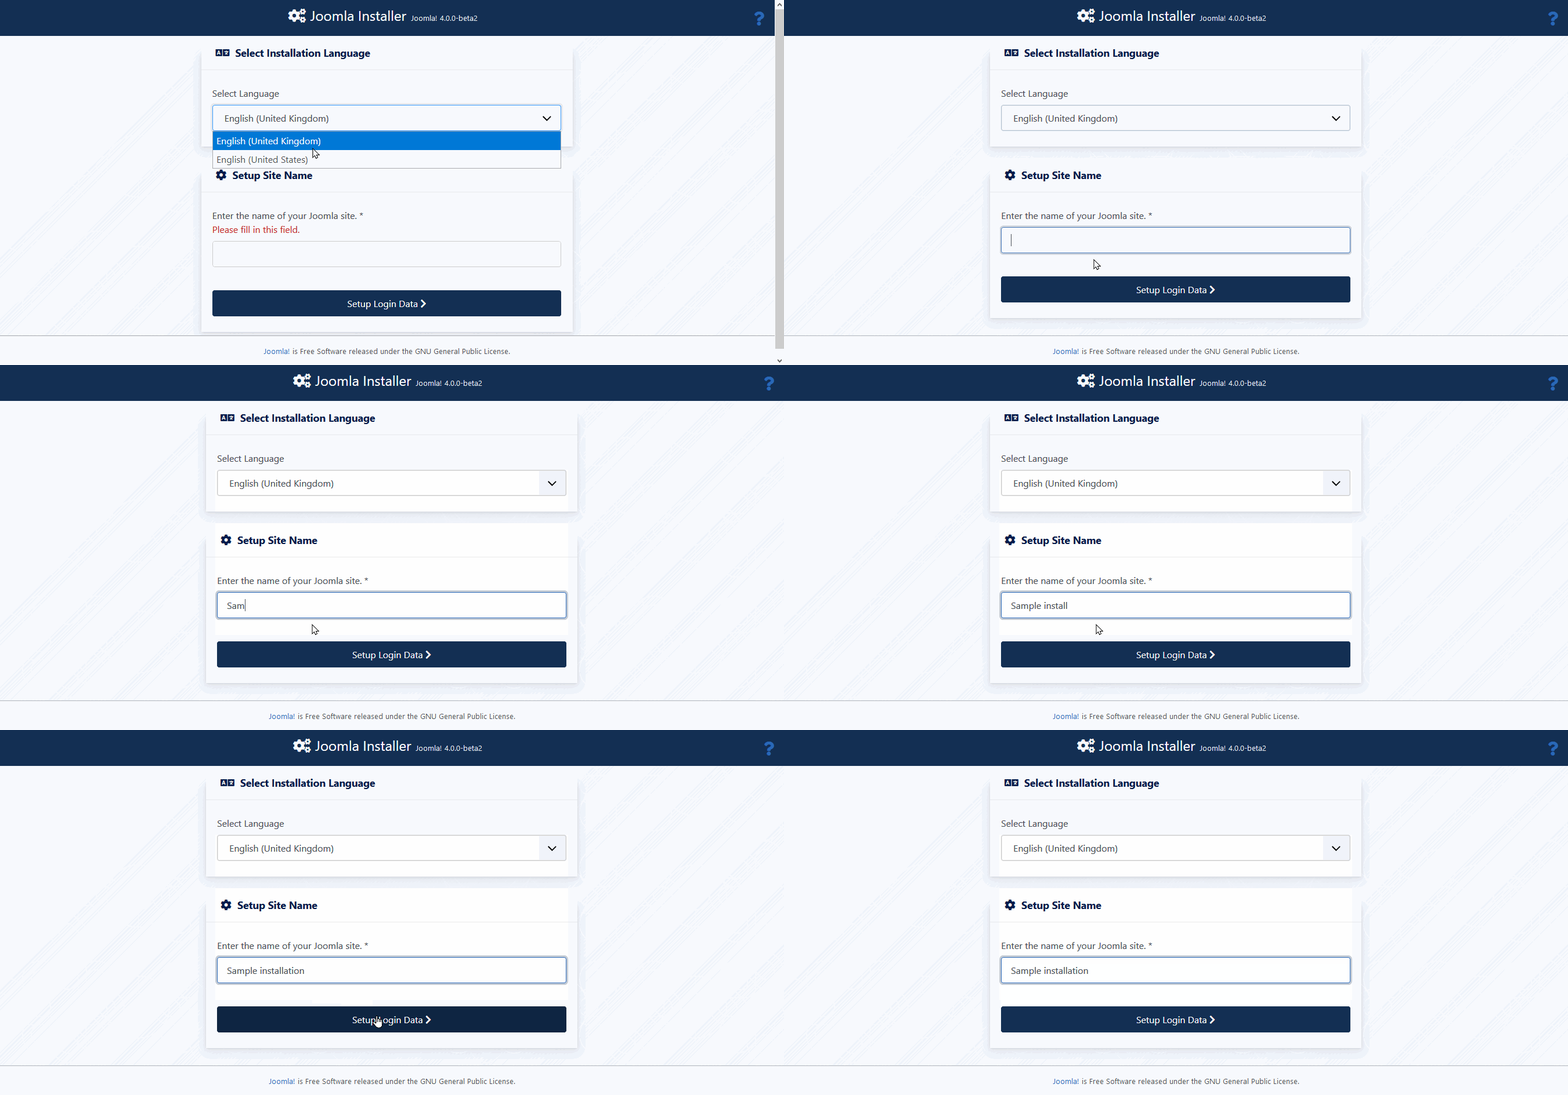
Step 1: Select the base language for your installation, and set your site name
You should then see the Joomla installer.
- Select an initial base installation language. Additional languages can be installed later.
- Enter the name of your Joomla site
- Click on Setup Login Data to continue
Step 2: Configure your Super User account details
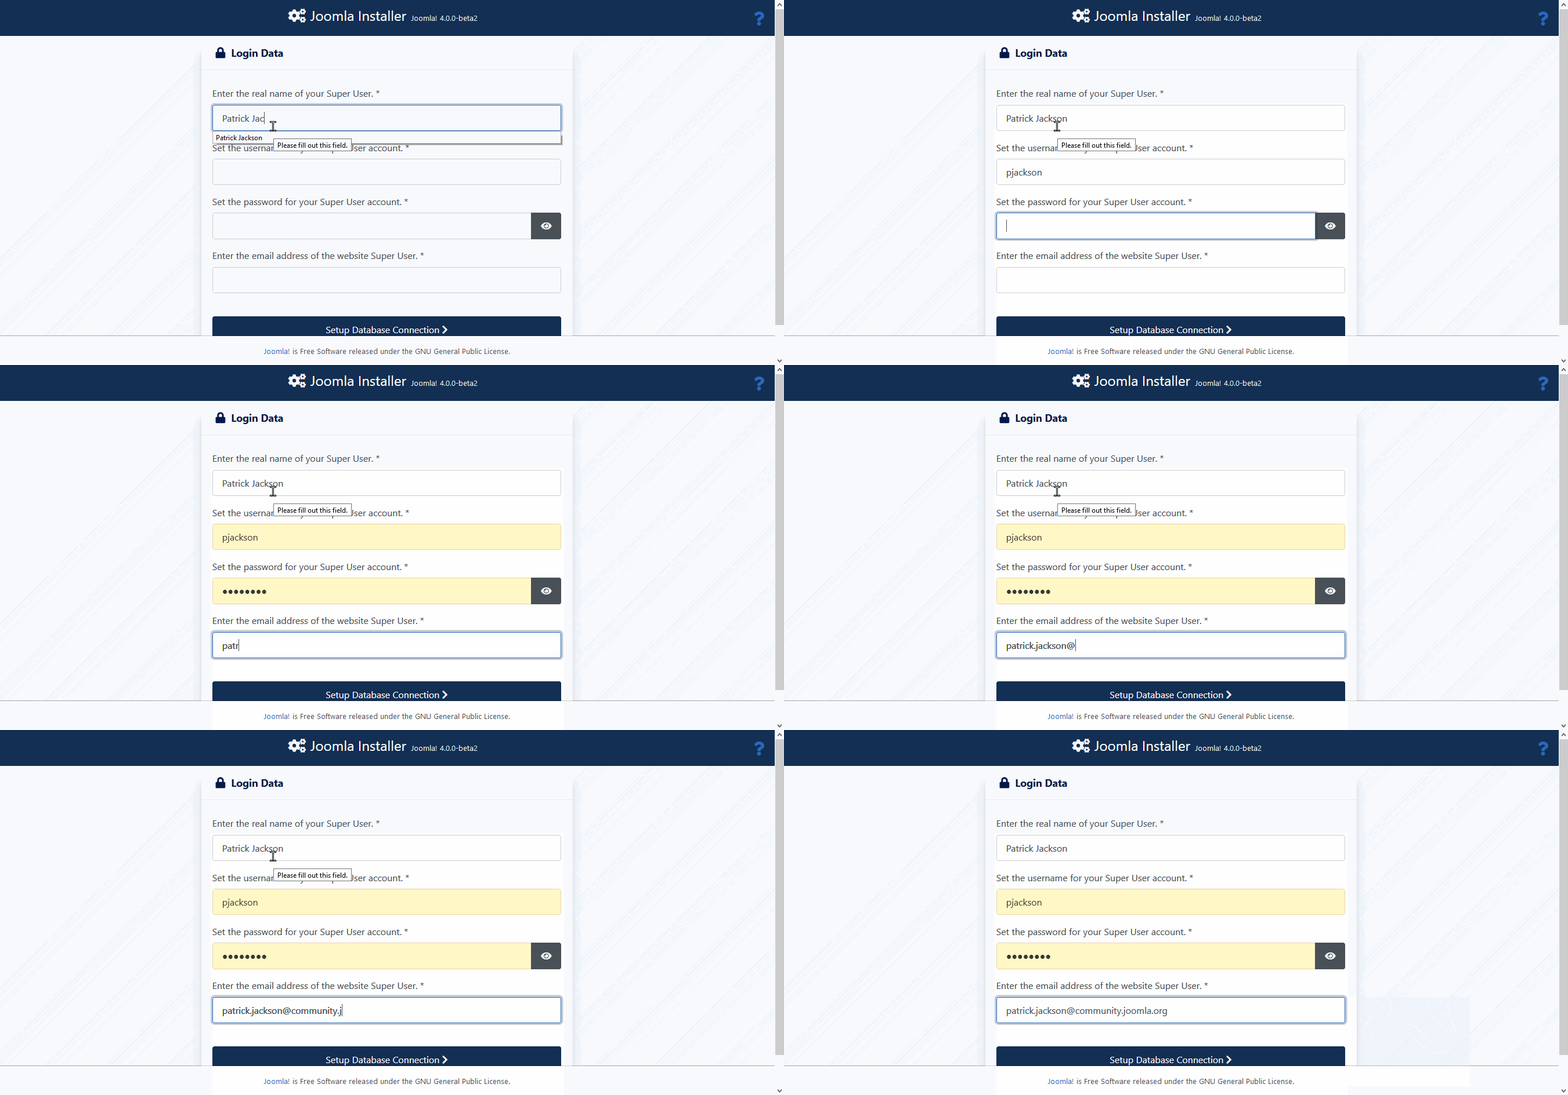
Next set up your Super User account details
- Enter the real name for your Super User account
- Enter the username for your Super User account
- Set the password for your Super User account
- Enter the email address for your Super User account.
- Click on Setup Database Connection to continue
Step 3: Configure the database connection
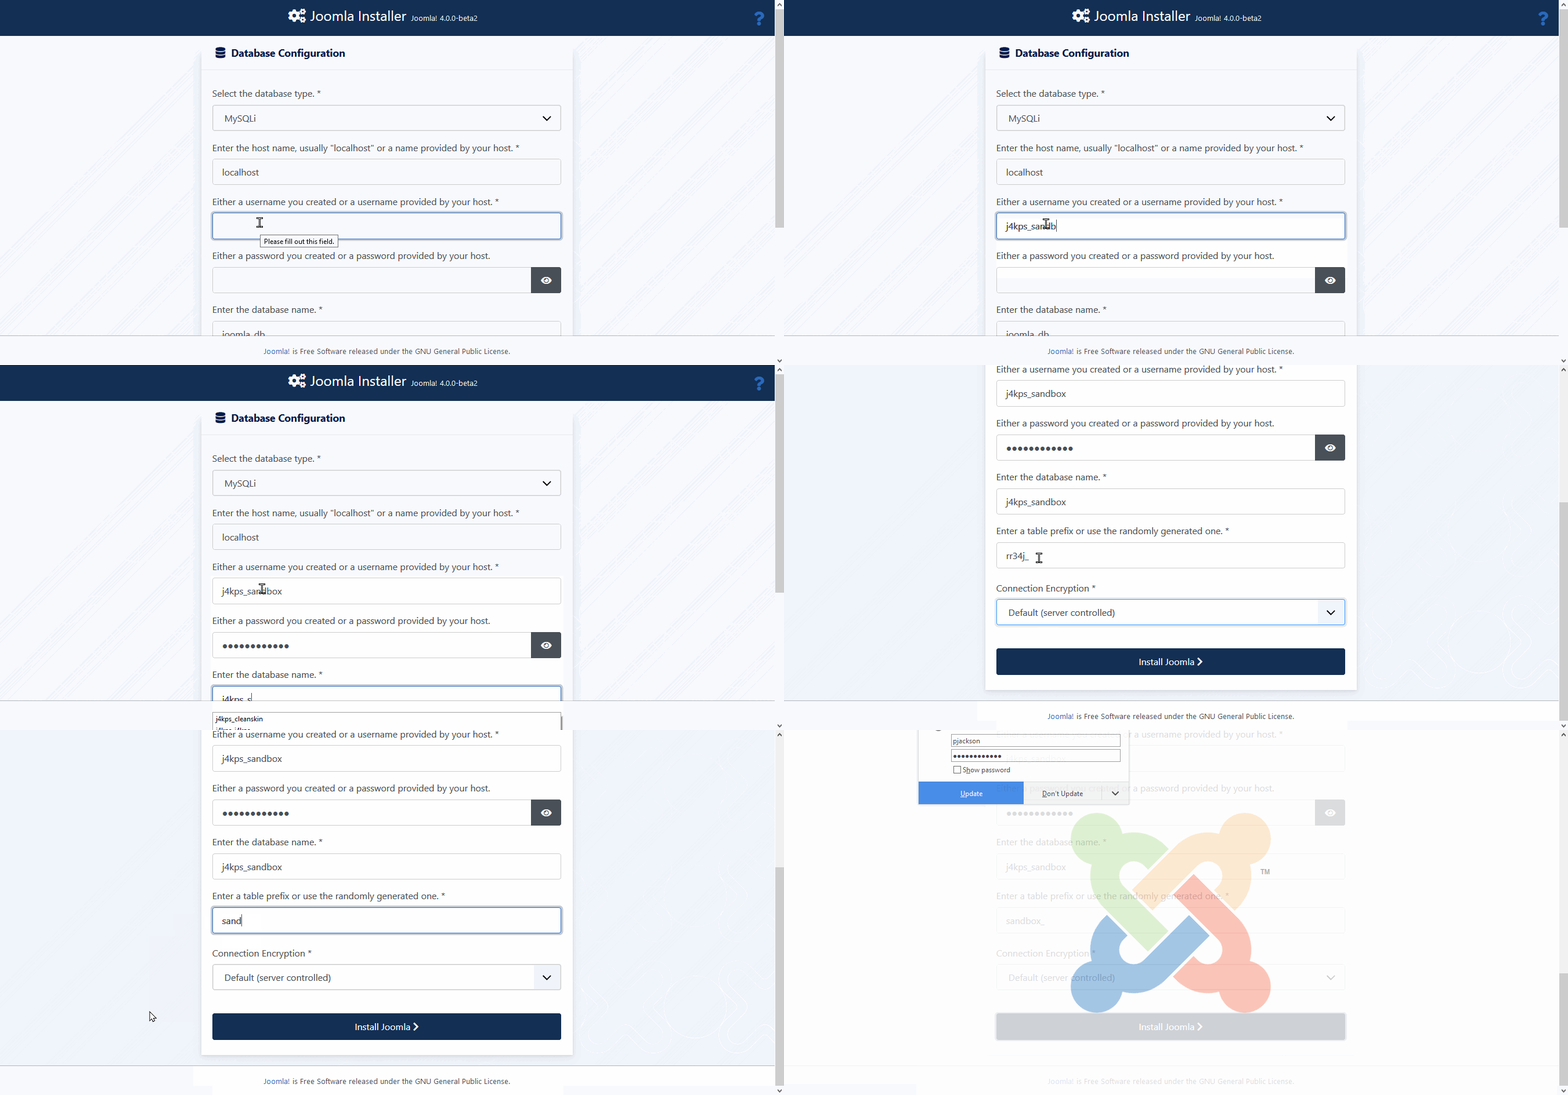
Configure the database settings
- The database type is typically MySQLi, so only change it if you need to.
- Usually, the server name will stay as localhost, so that’s set as a default.
- Type in the name of the database you created earlier
- Enter the password for the database you created earlier
- Enter the database name you created earlier
- Customise the database prefix or just use the randomly generated one
- Optionally change the Connection Encryption, though you can usually leave this as Default (server controlled)
- Click on Install Joomla to continue
Step 4: Install additional languages and remove the installation folder
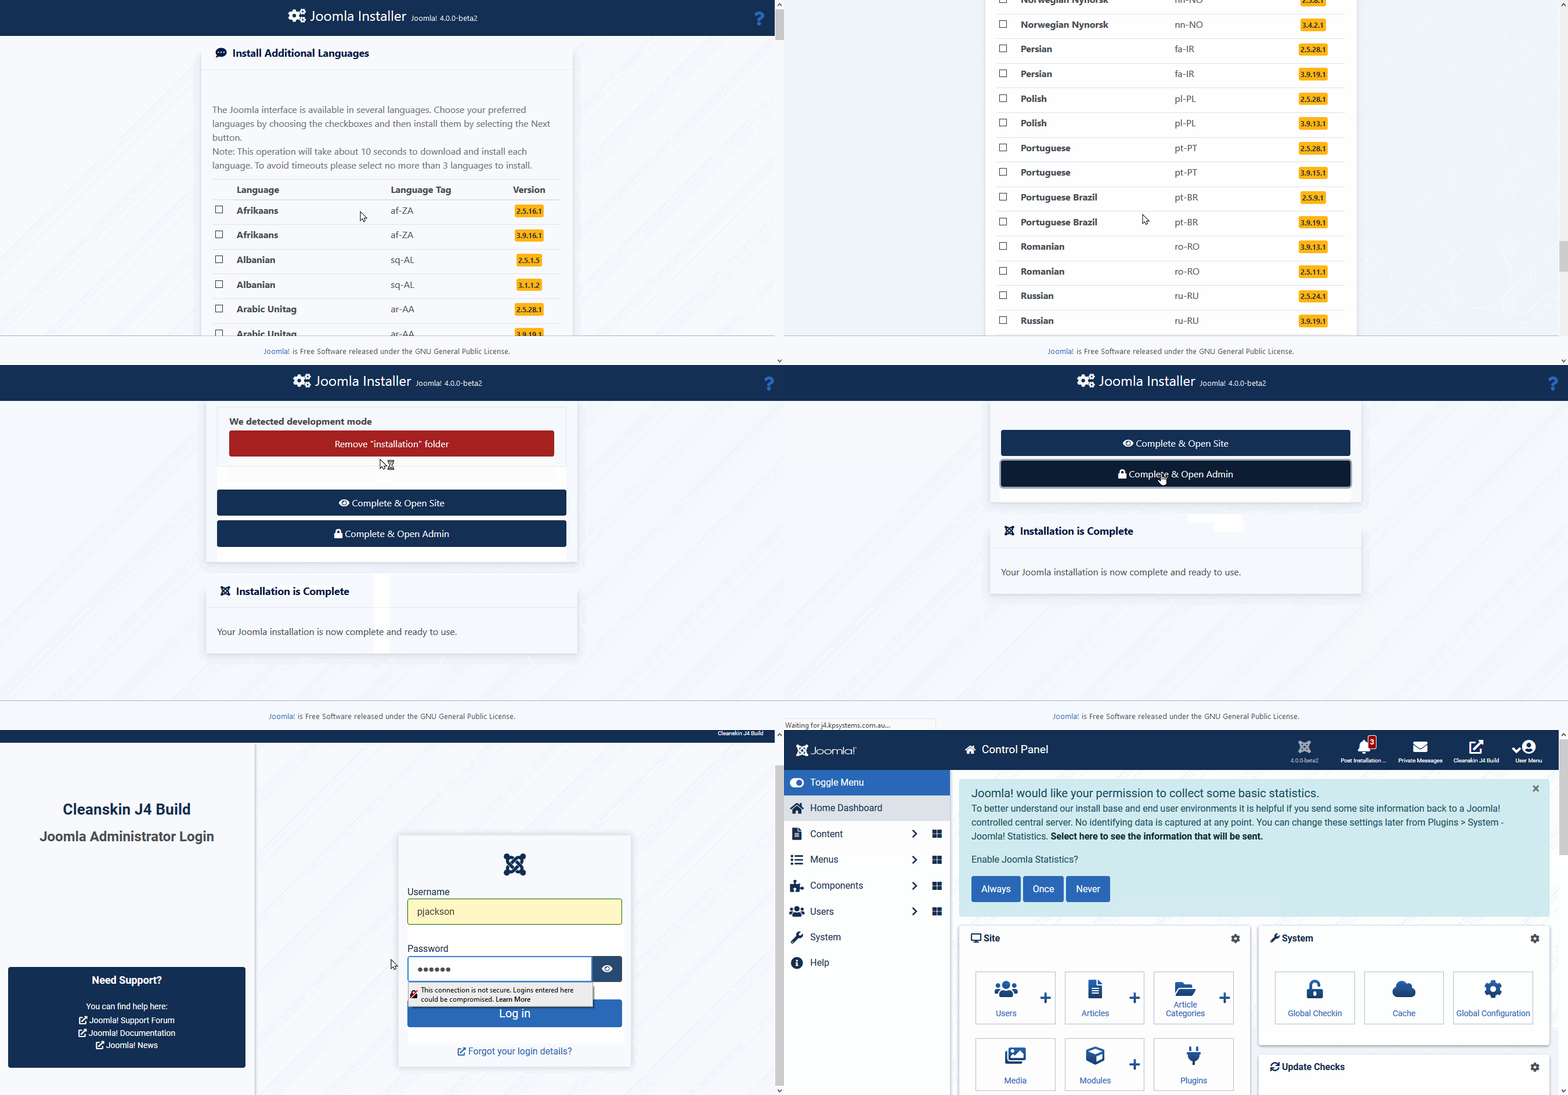
You’re now nearly done. Joomla’s installed, and you have just a few final options.
On the final screen:
- Optionally install additional languages if required
- Delete the Installation folder so that you can exit installation mode
- Open your front end or backend, and your installation is now completed!
Serving Suggestions
You’re now ready to use Joomla 4!
Once you’ve logged in, you can then get straight into configuring your Joomla 4 site like you would any other Joomla site, but we’d suggest you take a moment to look at some of these delicious serving suggestions:
- When you log in the first time, you’ll be prompted about whether or not you would like to share anonymous usage statistics with the Joomla project. Help the project out by clicking on “Always”. You can see the results of what’s collected here.
- If you have used Joomla before, take a little time to familiarise yourself with the new Joomla Administration template. Lots of things have moved around, and it might take you a little while to find some things.
- At the top of the screen you’ll see a bell icon for the Post Installation Messages indicator. Click on that and read through the recent messages. You’ll find useful information amongst the messages about new features, and once you’ve finished reading them, feel free to hide the messages so that they clear the icon.
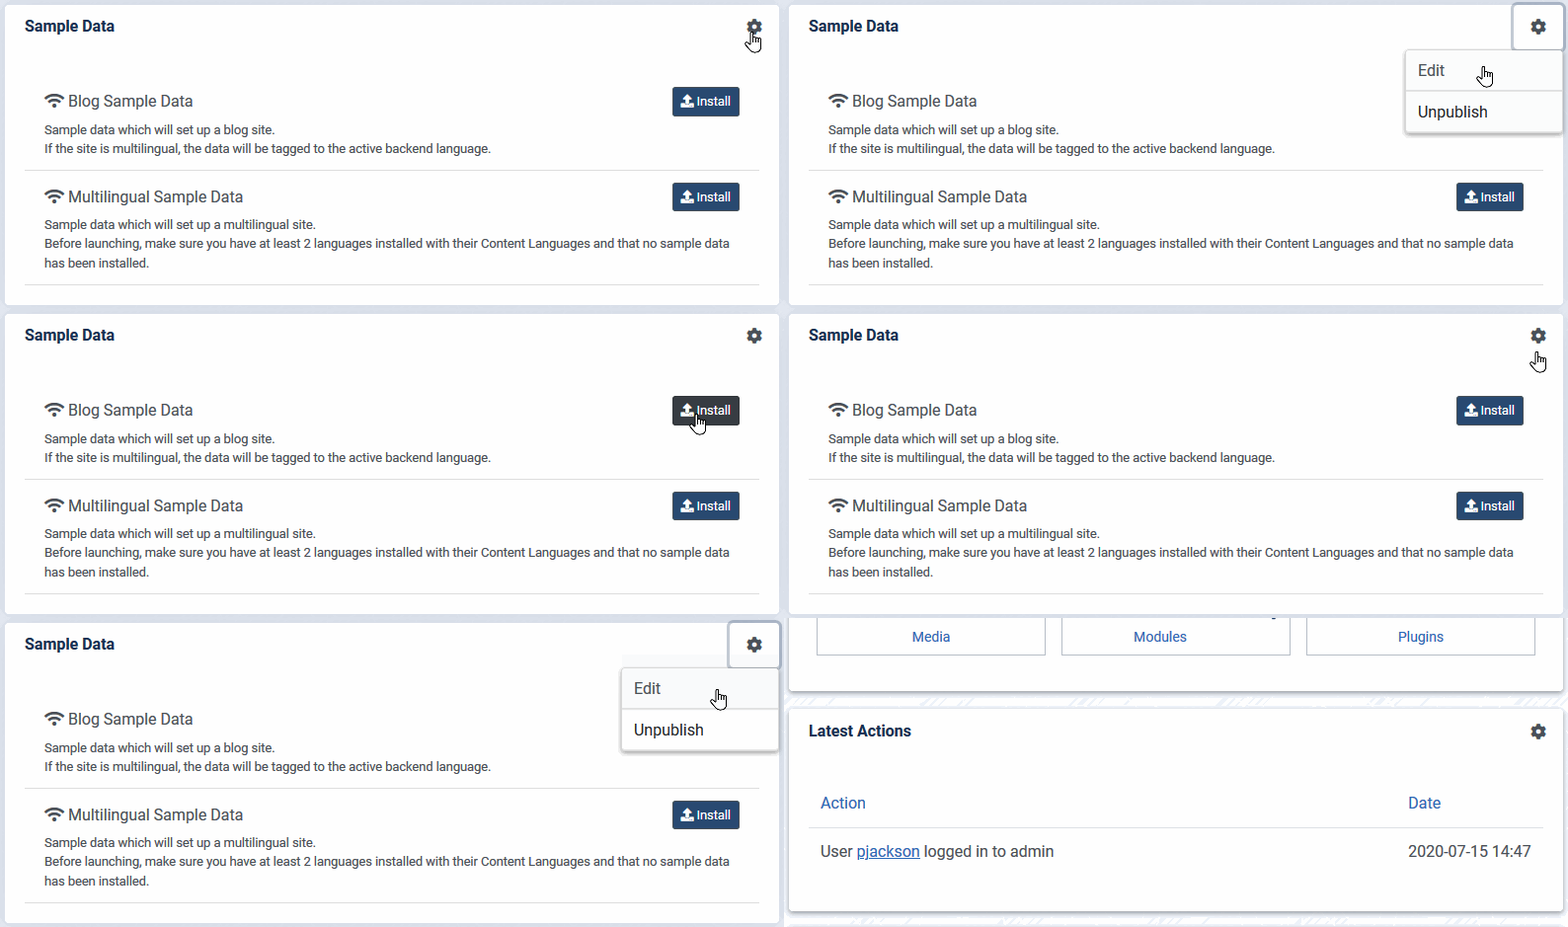
- If you’re trying out what’s new in Joomla 4, install the Blog Sample Data set, which includes the new Joomla Workflow component.
- If you’re building a Multilingual site, and installed another language pack during the installation, install the Multilingual Sample Data.
- If you’re building your own test site from scratch, you can unpublish the Administrator module for the Sample Data (you can always publish it again later).
Next time in the Joomla kitchen…
We’re looking at regularly producing engaging tutorials, informative case studies and quick step by step guides for lots of Joomla 4 features as we get closer to release.
What features you’d like to find out more about? Let us know in the comments!
Some articles published on the Joomla Community Magazine represent the personal opinion or experience of the Author on the specific topic and might not be aligned to the official position of the Joomla Project
By accepting you will be accessing a service provided by a third-party external to https://magazine.joomla.org/
 Community Magazine
Comments