I create the website for my business for free with Joomla - Part 2
Welcome on this 2nd episode of I create the website for my business for free with Joomla where you will learn amazing and useful things to continue building your project.
If you start to read this article, it's because the matter of creating a website interests you and that - for the challenge, for the intellectual curiosity or for the sake of savings - you would like to create it on your own. It still seems impossible to you for the moment but I bet you that after reading this series of tutorials, you will have made your website without anyone's help!
Thanks to the first episode of I create the website for my business for free with Joomla, you created a website with Joomla, created an article category, added a new article and displayed it on your website. And all this for free, as promised!
Today, you will continue to build your website by going one step further.
This second episode will be a little more copious than the previous one but rest assured, it will be just as easy and fun. In the program:
- Adding informations on the overview page of each book: the name of the author, the selling price, the ISBN code, the publisher, etc.
- Creating a page for each author and displaying their biography and their bibliography.
Let's translate this into Joomla language. Here is what you will learn to do thanks to the content of this tutorial:
- Create a Field Group
- Create different kind of Custom Fields
- Fill in the fields in the article created in the previous episode
- Customize the frontend display of these additional informations
- Create a new contact using the Contacts component
- Create and display the biography and the bibliography of each author
I know it can be scary but as for the previous episode, you will see that thanks to the native features of Joomla, you will have no difficulty in achieving all this.
Let's go, it's time to get started!
I create the website for my business for free
Custom fields allow you to display additional data on your pages, such as text, images, links, dates, integers, users, etc.
And you will see that we can really go far enough in customization without adding extensions and without making a lot of effort.
On the overview page of each book, we will display the following information: the author of the book, the languages available for the book, the selling price, the ISBN code, the publisher, etc.
This will give more complete information to the visitors to your online bookstore.
Information about the book
From the side menu of the Joomla administration panel, click on Contents then open Field group.
A field group allows you to group one or more custom fields into the same set. And you will see later that it is very practical to use.
Click the New button and fill in the Title field with the name of the group you want to create.
Click on the Save and Close button when you have finished typing.
Now, we will create the custom fields of this group.
In the side menu of the Joomla administration panel, click on Fields and then on the New button.
We'll start with the language of the book. As there can be several langagues available for the same book, we are therefore going to use a List type field.
Fill in the following parameters:
- Title: Language
- List values: click the + icon to create as many "language" options as needed. Specify the same option for the Text field and the Value field
On the right side of the screen, fill in the following parameters:
- Fields group: select the group you created earlier
- Category: select the category(ies) concerned
Click on the Save and Close button when you have finished typing.
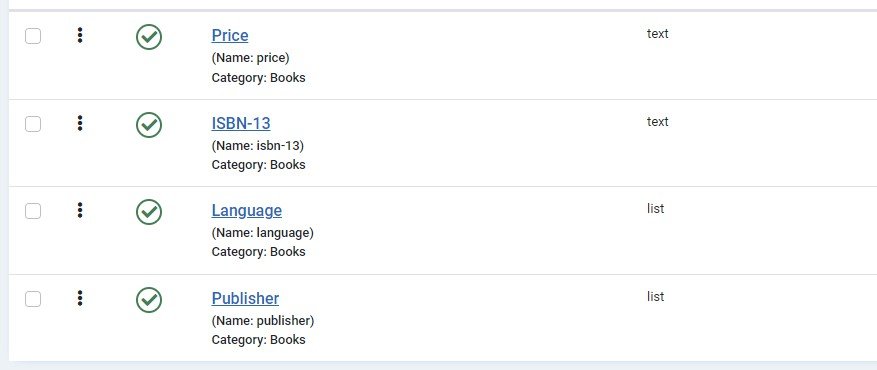
Do this to now create the other fields:
- Selling price: Text - Because the integer field does not allow adding a currency symbol
- ISBN-13: Text - you will simply indicate 13 for the maximum length
- Publisher: List - create as many "Publisher" options as necessary following the procedure described previously
Logically you should get something like this:
Let's improve the designs
Now, we will improve the display of this part with some aesthetic changes.
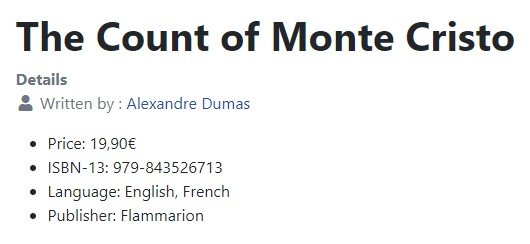
To start, we'll replace Details with Book Details.
This text is a translation, so we need to edit this translation to change the text displayed.
In the side menu of the administration panel, click on System then on Translation substitutions in the Management section.
As we want to edit a translation displayed in frontend, you choose your language (site) in the drop-down menu and then click on the New button.
Use the search options on the right side of the screen to find the translation to replace. Here it will be COM_CONTENT_ARTICLE_INFO as the translation string and Details as the text.
On the left side, you can now edit the translation as you see fit.
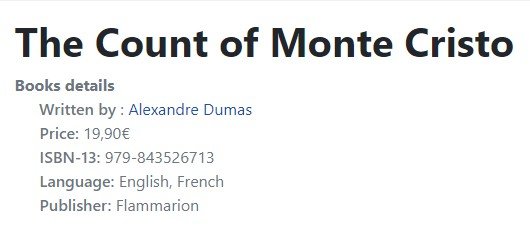
Replace Details with Book Details and save your entry.
While we're at it, we'll use the same technique to change the Written by translation as follows:
<span class="author">Written by</span> : %s.

Refresh the page displaying your article in frontend to see that the changes have been applied.
Now, let's add some CSS to the template's user.css or custom.css file to lightly change the look of this part.
main > div > dl > dd > span.icon-user.icon-fw::before{display: none;}
main > div > ul > li > span.field-label {font-weight: 600;}
.article-info-term {font-size:1.25em;}
.fields-container {list-style-type: none; color: #6d757e!important;margin-left:-7px;margin-top:-16px;}
.author {font-weight:600;}
You are free to adapt these CSS rules according to your needs.
Before:
After:
Of course, you can go (much) further in terms of aesthetic modifications.
Let's display the authors
Without authors, there would be no books. We must therefore give them the place they deserve in our bookstore.
For this, nothing beats dedicating a full page to them where your visitors will find the following information:
- The biography: text relating the life and literary journey of the author.
- The bibliography: list of books written by the author
You will see that all this is really very simple to achieve thanks to the native features of Joomla.
The author's page
In the previous episode, you learned how to create an article and display it through a menu link. This is exactly what we need to do now.
Create a new article with the following informations:
- Title: Author's name
- Text: Author's biography
- Category: Obviously, you've created a dedicated category for the authors isn't it.
If you need to display more information on this kind of page, custom fields hold no secrets for you now.
Remember, your article will need to be linked to a menu item to be displayed on your site. Once this menu link has been created, carefully note the URL generated to display your article.
From the side menu of the administration panel, open Users then Management to access the list of users of your Joomla site.
Click on the New button then fill in the various fields to create a new user.
Click on the Save and Close button when you have finished typing.
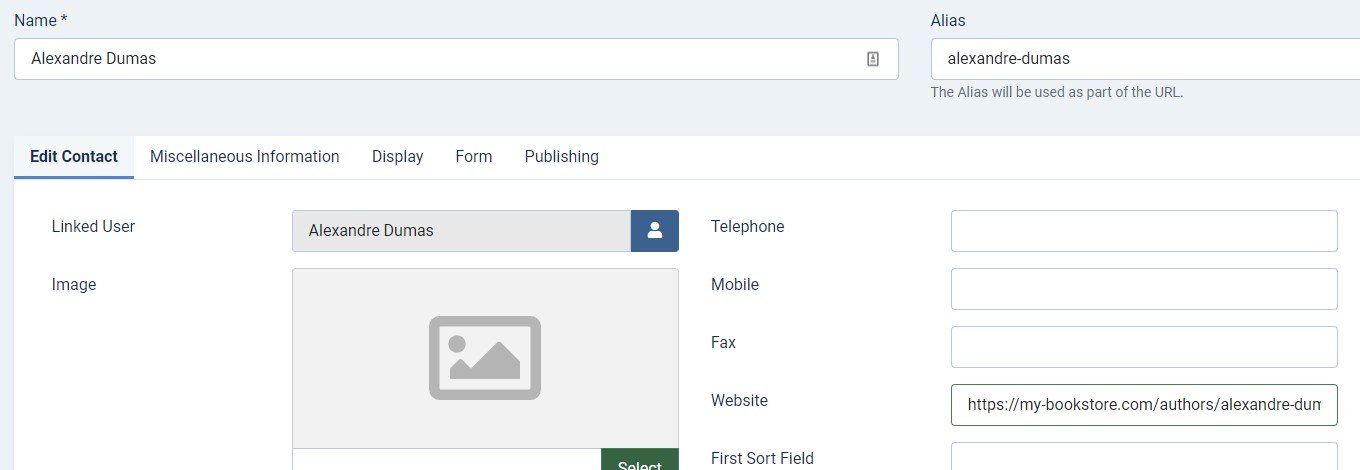
Now, click on Contacts in the side menu then click on the New button to create a new contact.
Fill in the following fields as:
- Title: Author's name
- User linked: select the user you've created earlier
- Website: indicate in this field, the URL of the article created in the previous step
Thus, when a user clicks on the author's name displayed in the article, he/she will be automatically redirected to the author's page. Note that the Content - contact plugin must be published for this to work.
Click on the Save and Close button when you have finished typing.
The author's book
Now we will also be able to link the author to his/her "books" by following these steps:
- #1 Open the article to edit
- #2 Open the Parameters tab
- #3 Select the author of the book in the parameter Created by (author)
Click on the Save and Close button when you have finished typing.

The author's bibliography
And that's it, we've already come to the last part of this tutorial.
We just have to display the author's bibliography on his page.
To do this, simply display the list of articles written by this author and published in the "Books" category of your website. Thus, we will only have those books displayed on the author's page.
You are lucky because Joomla has several core modules that can perfectly meet this need.
By default, these modules display the list of articles according to the criteria you define in the settings. And thanks to an override, you can easily transform this default display into something much more suited to the design of your site.
To save you time and to reward you for your diligence, here is a library of free Joomla 4 overrides
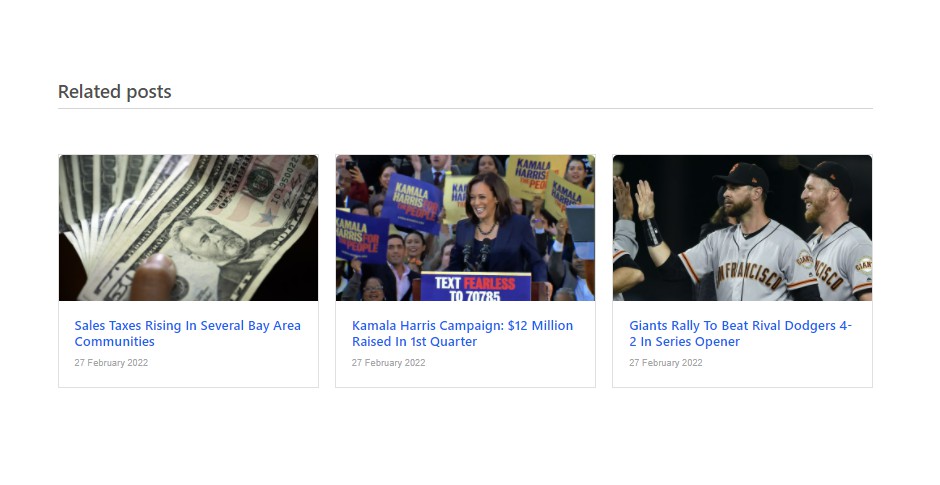
All you have to do is choose the one that seems most suitable to the design of your website, apply it to the module of your choice and display this module under the article presenting the author.
Admit that all this was ultimately not very complicated.
What you will learn next month
In the 3rd episode of this series, you will see how to create pages dedicated to a particular literary genre. You will also see how to highlight certain books and certain authors, for example.
And finally, I will suggest that you carry out a fun exercise around the template of your bookstore's website!
See you soon!
Bonus tip
You can do a lot with Joomla's custom fields. Do you want to learn more about the possibilities and how to use them? Check out these articles: https://magazine.joomla.org/all-issues/tags/custom-fields and become a custom fields pro!
About the author
By accepting you will be accessing a service provided by a third-party external to https://magazine.joomla.org/
Comments 2
The article assumes a great deal of Knowledge about Fields and Field Groups. It is clearly not for beginners.
I set followed the article, set up the field and field groups but mine doesn't look anything like the "before" as the fields Price, ISBN, Price, Publisher are not shown. Mind you as there was no instruction on how to enter that data so in those fields for each book, maybe not surprising.
Hello Philipp,
Thanks for reading and for your kind comment.
Custom fields and overrides aren't so complicated as it seems, even for beginners. It can be scary first but very quickly, it's very addictive.
Of course, it's always possible te explain every step very detailly but this article would be very long to read (and to write).
Beside this article, there are tons of ressources you can refer such as the official documentation of Joomla and the Community, of course.
Best and thanks