Installing Joomla 3.0 on local host using XAMPP
Joomla is an open source content management system which based on PHP and MySQL. You can work with it both online or offline. However, managing Joomla offline requires you to install a compatible web server and the Joomla package as well. Below are instructions to install Joomla on XAMPP - a good web server which can work well on local machine. This is an extract from the free ebook "Joomla 3.0 Made Easy".
Installing Joomla 3.0 on local host
Installing Joomla! 3.0.x on local host is straightforward but can be tricky the first time you attempt it. So for this step we’ve provided instructions on how to do it right from scratch.
First, let’s make clarify the meaning of “Localhost”. As you know, any website needs to be hosted on a web server in order to be shown to users. Normally, you would need to buy a hosting package from some hosting provider like Rackspace or GoDaddy. Depended on the package you choose, a hosting provider will install a web server for you on one of their server machines, which is accessible to the public. A localhost is basically the same type of web server but installed on your own computer.
Now, in order to run Joomla!, you need not only a web server, but also 2 more things: PHP script interpreter and MySQL database system. It sounds complicated but thankfully, there is a single package called XAMPP with all the elements included.
Let’s install XAMPP on your computer.
Installing XAMPP
- Download the XAMPP installer package at http://www.apachefriends.org/en/xampp.html
- Run the installation file as you do with regular software and follow the step by step instructions.
- Open “XAMPP Control Panel Application” and start “Apache” and “MySQL”.
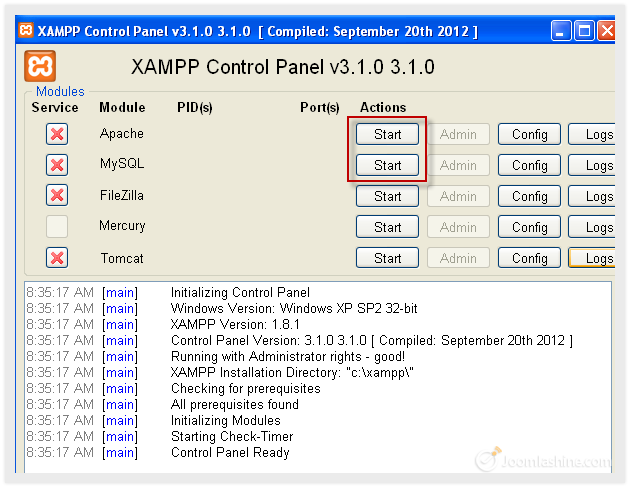
XAMPP Control Panel Application
That’s it, your localhost is now installed. You can check if it works or not by typing the address:
“http://localhost” in your web browser. You should see a page as illustrated below.
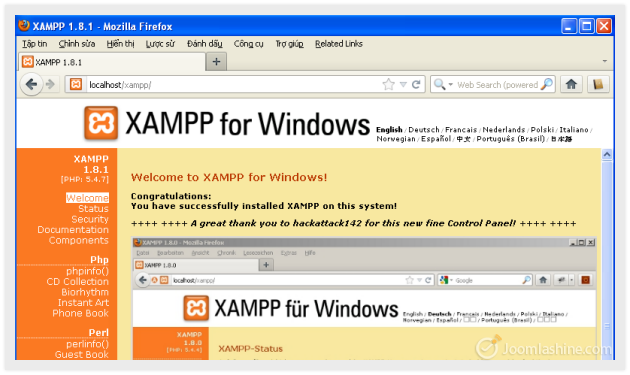
XAMPP for Windows interface
- Create a database in phpMyAdmin.
From the XAMPP interface, click phpMyAdmin to start creating database.
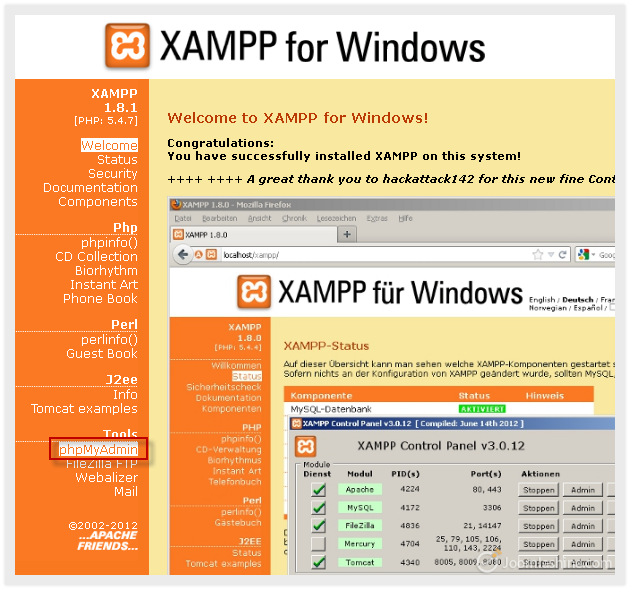
Click “phpMyAdmin”
- Next, click Database in the toolbar as illustrated in the following
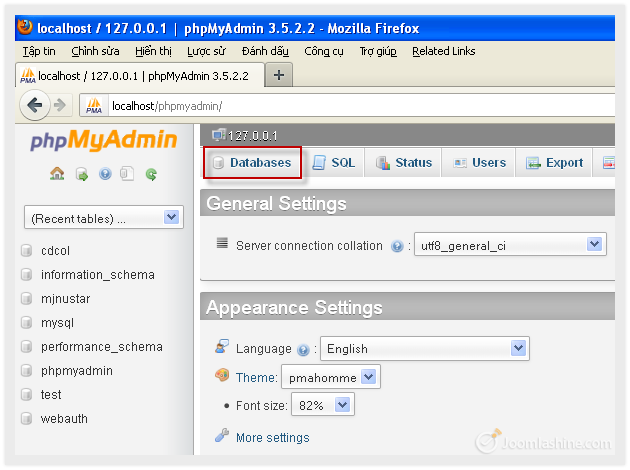
Click “Database”
- Next, enter the database name and then click “Create”
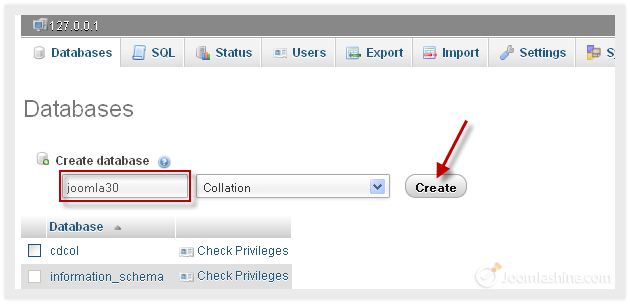
Create database
Now you are ready to install Joomla!.
Installing Joomla!
- Download the Joomla! 3.0.x full package at https://www.joomla.org/download.html
- Create a new folder entitled “Joomla30” in folder “htdocs” in XAMPP folder. Normally it will be located at “C:\xampp\htdocs”
- Unpack the downloaded package file into the folder “Joomla30”
- Go to the URL “http://localhost/Joomla30”
- Follow all steps in Joomla! installation:
- Step 1. Main Configuration
- Select Language: Choose your own language in the drop-down menu, for example, “English (United States)”
- Site Name: Enter the name of your site
- Description: Enter the description of your site
- Site Offline: Choose status for your website when you access to your site: Click “Yes” for “offline” and “No” for “online”
- Admin Email: Enter your valid email address you want to use for your site
- Admin Username: Enter “admin” as default
- Admin Password: Enter your own password
- Confirm Admin Password: Re-type your password
- Click “Next” to continue Step 2
- Step 2. Database Configuration
- Database Type: Select MySQLi
- Host Name: Enter “localhost”
- Username: Enter “root”
- Password: let it blank
- Database Name: enter the name of the database you created “Joomla30”
- Table Prefix: let it generate automatically
- Old Database Process: Click “Backup” to backup tables from former Joomla! installation, or “Remove” to delete these tables
- Click “Next” to continue Step 3
- Step 3. Overview
- Finalization: You can choose installing sample data or not, by clicking on corresponding selection.
- Overview: This step is to review all information you configured in step 1. After checking, you click “Install”.
- When installation finishes, you just need to click the button “Remove installation folder” button to complete the installation process. After that, you can either click on “Site” to see your newly created or “Administrator” to access the administration area.
Now you have your first Joomla! site installed successfully! It’s not too hard, right? If you have any trouble with the installation process, you can try in the following sources for the answer:
- Official Joomla! forum
The Joomla! forum is one of the busiest (and most friendly) support forums in the world, and it is a great place to get help and meet other Joomla! users. There are a lot of questions and answers which are discussed here. Because our topic is Joomla! 3.0 installation, so you can find help in the category “Installation Joomla! 3.0”.
- Other Joomla! learning resources
There are many other websites which you can use a s your Joomla! learning resources:
>>> The next step
Installing Joomla! 3.0.x on your local host is the first thing you need to do successfully before getting started with your Joomla! site. Now, when your website is ready, let’s fill it with content. You can get more details of how to fill it with content by downloading the 108-page ebook "Joomla 3.0 Made Easy".
If you have feedback or suggestions, feel free to leave your comments below.
About the author
By accepting you will be accessing a service provided by a third-party external to https://magazine.joomla.org/
Comments