How to add a video library to your site in 6 easy steps
A step-by-step tutorial on how you can easily create a professional-looking video library with the help of Amazon Web Services and HD FLV Player for Joomla! to provide a true YouTube-like experience for your users without impacting server performance and bandwidth use.
Main benefits of this solution
- Enjoy a video library that offers a YouTube-like experience, where users can select a video from a playlist and play it in the same player, on the same page.
- Quick deployment time, minimal learning curve.
- Host and stream your resource-consuming video files on Amazon for about $0.30/GB;
- Video formats that you can use: .mov, .mp4, .flv or almost any other h.264-encoded video that Adobe Flash player supports.
- Create unlimited playlists using the HD FLV Video Player solution friendly interface.
- Easily add YouTube videos (you can hide the YouTube logo), upload videos to your website, publish ads, add sharing/embed options, Google adsense, and more.
Ingredients:
- Amazon S3 (your simple storage solution) account
- Amazon CloudFront (your streaming solution) account
- Amazon Elastic Cloud (EC2) account
- Firefox S3 - ftp-like tool that directly connects your Amazon storage area with your desktop or the folder where you keep the videos on your computer
- HD FLV Player (there is a free demo version that you can try, but I recommend the paid one - their support is pretty good)
- Your Videos
How to implement - 6 easy steps
1. Sign up for Amazon S3
Sign up for Amazon S3 (storage for the Internet) – create an account here: http://aws.amazon.com/s3/. Once your account has been created and confirmed, you will be provided an account number and you will have to define your access credentials. Please note that you will be given three access credential options. You need to choose the access keys option that has to be activated. You will need that information later to setup your Firefox S3 component.
2. Sign in
Once you are all set, you can sign in to your S3 console which looks like this:
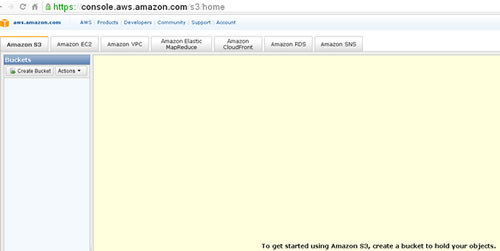
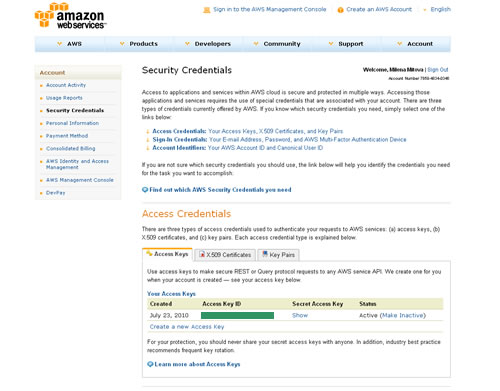
Now, create your first “bucket” by clicking on the Amazon S3 tab and selecting “Create bucket”. This is the place where you will store your videos. Use a bucket name format like: abccompany.videos. Now that you have created your bucket, click on the Amazon CloudFront and EC2 tabs on the console. Please note that you have to sign up for these two services in addition to your S3 account. Signing up for them will require additional confirmation of your email/account and security access keys. It is a quick and easy process - just follow Amazon's email instructions. Note that your security access keys can be accessed when you click on "“account” in your management console page:
After your CloudFront and EC2 accounts have been activated, go back to the Amazon Web Services console and click on the CloudFront tab. Then, create your “distribution”, where you will provide the name of your S3 bucket, abccompany.videos, so that CloudFront can assign a streaming domain url for this bucket.
Don’t forget to select “streaming” distribution, instead of “download” distribution if you want your videos to stream.

3.Install FireFox addon: FF S3
Now you can install your FireFox free addon, the FF S3 which can be found here - http://www.s3fox.net/. It will enable you to easily transfer your videos directly from your computer to your bucket. You can use the file manager provided by Amazon.com too. FF S3 is faster if you need to transfer large amounts of files at once. It also lets you auto-synchronize your local video folder(s) with your Amazon S3 bucket. Once you install FF S3, make sure you enter your account number and access keys to connect the handy FireFox add-on with your Amazon web services account. You are now ready to add your videos. Just locate the folder where you keep your videos on your computer and push them to Amazon S3.
You can create unlimited folders to organize your videos. One thing that’s very important though: right-click each and every video to “make it public” or it won’t play in any player.
4. Install HD FLV Video Player
Once your videos have been transferred to your S3 bucket, you can go to your Joomla! site and install the HD FLV Video Player, which can be found here: http://www.hdflvplayer.net/hd-flv-player-features.php. Note that there are many other players on the market, so you don't necessarily need to go with this one. As with any other Joomla! add-on though, always install on a testing site first and make sure it syncs well with your dev environment prior to publishing on your production site. This component's installation is pretty straightforward, via the Joomla! backend. Use the settings option of the component to define the player skin, size, playlists display, etc.
5. Create a new playlist
Next, it's time to put your video library to work. First, go to the Playlist Name tab to create a new playlist, using the HD FLV Player friendly component interface. Then click on the Videos tab to create a new video. The player will provide you with several options to source your video file. You can add an YouTube video — just add an YouTube url, give your video a title, and assign it to a playlist. As you will see, you won't even need to add a thumbnail image, since YouTube provides that for you. The best part is that you can hide the YouTube logo if you like.
6. Create an Amazon Web Services streaming video
Now, let's create a video that will stream from Amazon Web Services. Here is how to do that: access your FF S3 add-on from Firefox > Tools; select a video and right-click it to copy its url. Paste the url in a text document. Then, go to your Amazon Web Services Console, select the CloudFront tab and copy the domain name url of your bucket (the distribution address). Paste this information in the text document too. Now go to your Joomla! website backend and open your HD FLV player component. Click to add a new video. Under the Video section, select “rtmp” as your streamer option. In the Streamer path field, enter the CloudFront domain name url you copy-pasted, followed by the following suffix: cfx/st/.
Example: rtmp://s244353535.cloudfront.net/cfx/st/.
In the File path field, choose “url” and paste the video url that you copied in the text document earlier. Make sure that after you paste, you delete the front part of the url, only leaving the video's folder and name. Example: public/training.mov.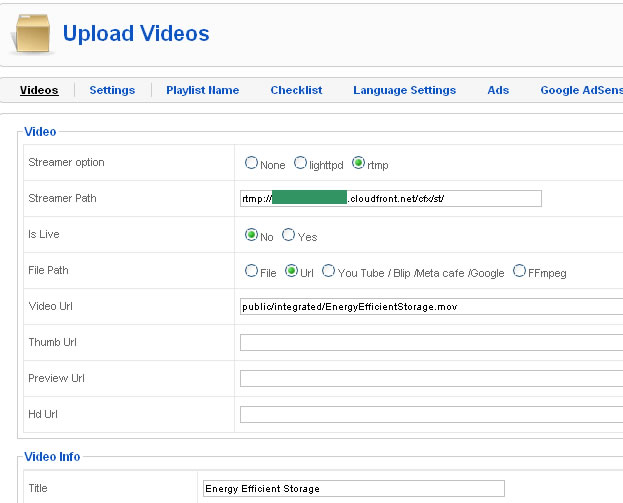
Next, add a thumb image for your video, type a title, select a playlist for it and save. Repeat the process to add all of your videos.
Make sure all your videos have been made "public" in your FF S3 or they won't play in any player.
Last, but not least: Enjoy!

Now you have a neat-looking video library with dynamic playlists and a profesional-looking player that streams your videos from Amazon Web Services, keeping your website light-weight and fast! Any questions/comments - let me know. I will be more than happy to help. Thanks!
Links in this article
- To register for Amazon Web Services: http://aws.amazon.com/s3/
- To download the free FF S3 ftp add-on: http://www.s3fox.net/
- To download the HDF Player for Joomla!: http://www.hdflvplayer.net/hd-flv-player-features.php
About the author
By accepting you will be accessing a service provided by a third-party external to https://magazine.joomla.org/
Comments