

In this 3rd episode about Custom Fields: (1) we will first cover in detail all the possible parameters (2) then we will give an overview of some new exciting features which will ship with Joomla 3.9 (3) and finally, we will end up with an example of site making an interesting use of Custom Fields
When creating a Custom Field, in addition to the parameters already seen in the previous episode, there are even more options which we will cover hereafter in detail.
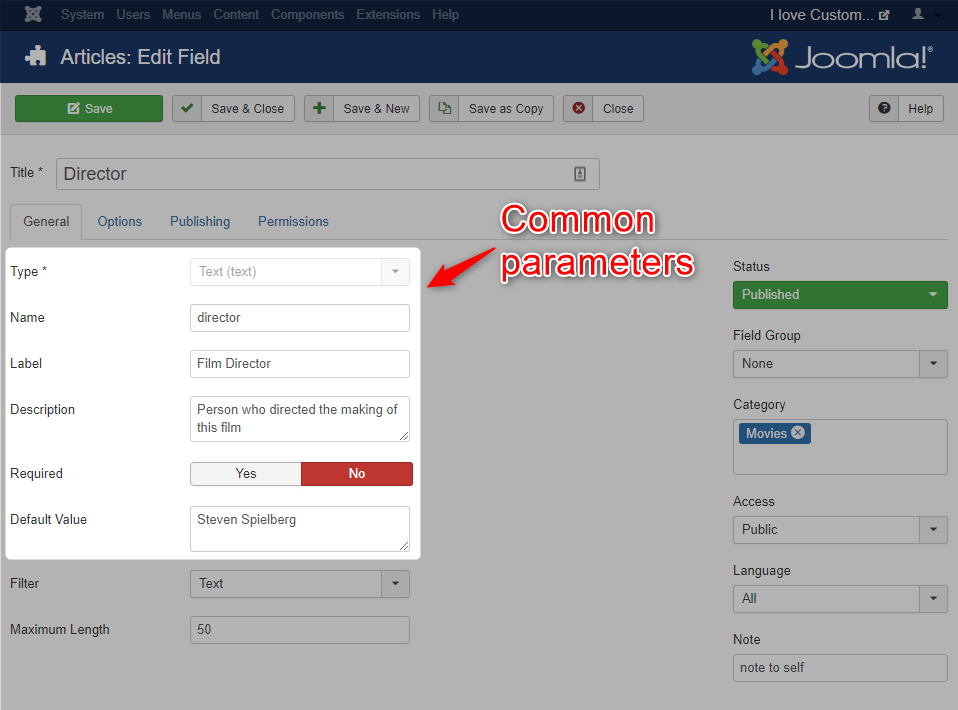
Common Parameters for Custom Fields
On the 1st tab ("General") of a Custom Field, you will notice that some parameters vary depending on the type of field :
Custom Fields all have the following common parameters :
- Name: "The name will be used to identify the field. Leave this blank and Joomla will fill in a default value from the title."
With other words, it is the technical name of the field for a possible use in the PHP code (in an override or an alternate layout for example). - Label: The label displayed on the screen, typically on the left of the field.
- Description: The help text or information displayed on the label tooltip.
- Required: (Y / N) is this a mandatory field or not
- Default value: when a user edits the field, is it simply empty or does it show a default value
The other parameters of the "General" tab displayed after those common parameters depend on the type of Field chosen :
Calendar
- Display time : (Y / N) Do you just want a "date" or "date and time" field.
Checkbox
- Values for the checkbox: enter values that can be checked.
Color
- (no additional parameters).
Editor
- Show buttons : should the editor-xtd buttons be shown or not (those buttons which come natively with Joomla or with some third-party extensions).
- Buttons to hide : even if you show the editor-xtd buttons, you can still choose to hide some of them
- Width : width of the editor in the interface (in pixels). Default is 100%
- Height : height of the editor in the interface (in pixels). Default is 250px.
- Filter: see explanation below.
User groups
- Multiple : if set to "No" the field will allow the selection of a single group of users, if set to "Yes" it will be possible to select multiple groups of users.
List
- Multiple : if set to "No" the field will allow the selection of a single item from the list, if set to "Yes" it will be possible to select multiple items.
- Values in the list : enter the values of the values which will be displayed in the list.
Image list
- Directory : The path to the folder containing the images to be listed.
- Multiple : if set to "No" the field will allow the selection of a single image, if set to "Yes" it will be possible to select multiple images.
- Image class a class to the image or images in the front-end.
Example of HTML in the front-end with a shadow class: <img src="/images/headers/windows.jpg" class="shadow">.
Media
- Directory : The path to the folder containing the media to list.
- Preview : If set to "Yes" the field displays a button to preview the selected photo.
- Image class: adds a class to the image in the front-end.
Example of HTML in the front-end with a shadow class: <img src="/images/headers/windows.jpg" class="shadow">.
Integer
- Multiple : if set to "No" the field will allow the selection of a single number, if set to "Yes" it will be possible to select several numbers.
- First : Number to start the list of numbers.
- Last : Number to end the list of numbers.
- Incrementation : the "step" between two numbers.
- Example:
- if you set First = 15, Last = 27, Increment = 5
then the drop-down list will show: 15, 20, 25
- if you set First = 15, Last = 27, Increment = 5
Radio
- Values : List of values from which one of them can be selected.
SQL
Using this field requires knowledge of the SQL language basics that can extract data from the database of your Joomla site.
- Query : the SQL query to retrieve a field named 'value' and a field named 'text'. The 'text' field will be used to make up the visible part of the list. The 'value' field will be retrieved when the user selects an item from the list. Warning: it is recommended to use the '#_' to replace the prefix of the table.
- Multiple : if set to "No" the field will allow the selection of a single item from the list, if set to "Yes" it will be possible to select multiple items.
- Examples:
- To display a drop-down list of articles in my category ID 12, the query to use will be:
SELECT id AS value, title AS text FROM #__content WHERE catid = 12 - To display the list of contacts of my Joomla site, the query to use will be:
SELECT id AS value, name AS text FROM #__contact_details
- To display a drop-down list of articles in my category ID 12, the query to use will be:
Text
- Filter : the notion of input filter is explained later in this article.
- Maximum length : the maximum number of characters to enter in this text field (HTML attribute 'maxlength').
URL
- Protocols : Select the allowed protocols so that the links entered correspond to the desired use of this field.
- the choices are: HTTP, HTTPS, FTP, FTPS, FILE, MAILTO
- relative URLs : if set to "No" the field will only allow the complete URLs, if set to "Yes" it will be possible to input relative urls (so to another page of the current site).
User
- The field "Default value" is replaced by "Default user".
Text area
- Rows: The height of visible text area in lines.
- Columns : The width of visible text area in characters (this parameter would probably not be used used in modern respnsive templates. One would generally prefer to use a CSS style to define the width of this zone).
- Maximum length : the maximum number of characters to enter in this text field (HTML attribute 'maxlength').
- Filter : the notion of input filter is explained later in this article.
To see the rendering in Administration and Frontend of all these fields, please see the article "Custom Fields Episode 1".
Custom Field Display Settings
On the second tab called "Options", you'll find rendering settings:
- Placeholder: Placeholder text which will appear inside the field as a hint to the user for the required input.
- Render class: CSS classes used to display the field on Frontend,
- Edit class: CSS classes used to display the field when you edit it in Backend and Frontend.
The 3 following display options "Show label", "Show on" and "Automatic Display" were explained in episode 1.
The last parameter was introduced with Joomla 3.8.7:
- Display when read only
This new parameter allows to define if users who are not authorized people to edit a field (read-only) will still see the field in the form.
Please find the detailed explanations at https://github.com/joomla/joomla-cms/pull/20068
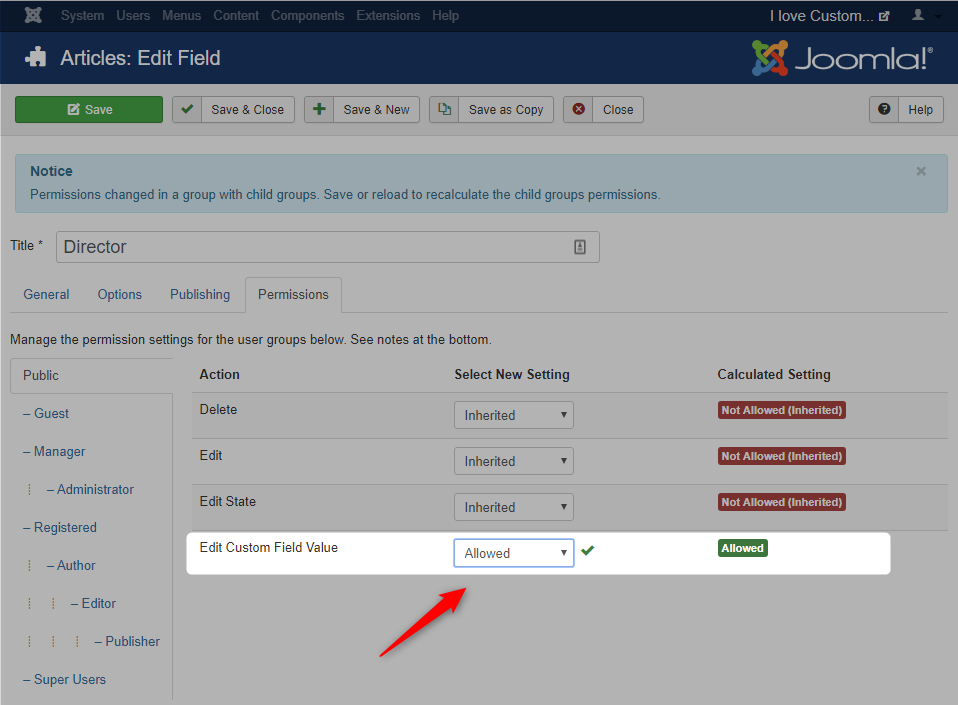
In some cases, it may indeed be necessary (in editing mode) not to allow the modification of the contents of a field for certain groups of people. Example: You could enable the "Edit Custom Field Value" on the Permissions tab only for the "Editor" group. "Authors" (who have less rights than the "Editors") would then not be allowed to modify this Custom Field.
But with this parameter it becomes possible to let those "Authors" see that field and its value, even if they can not edit it anyway.
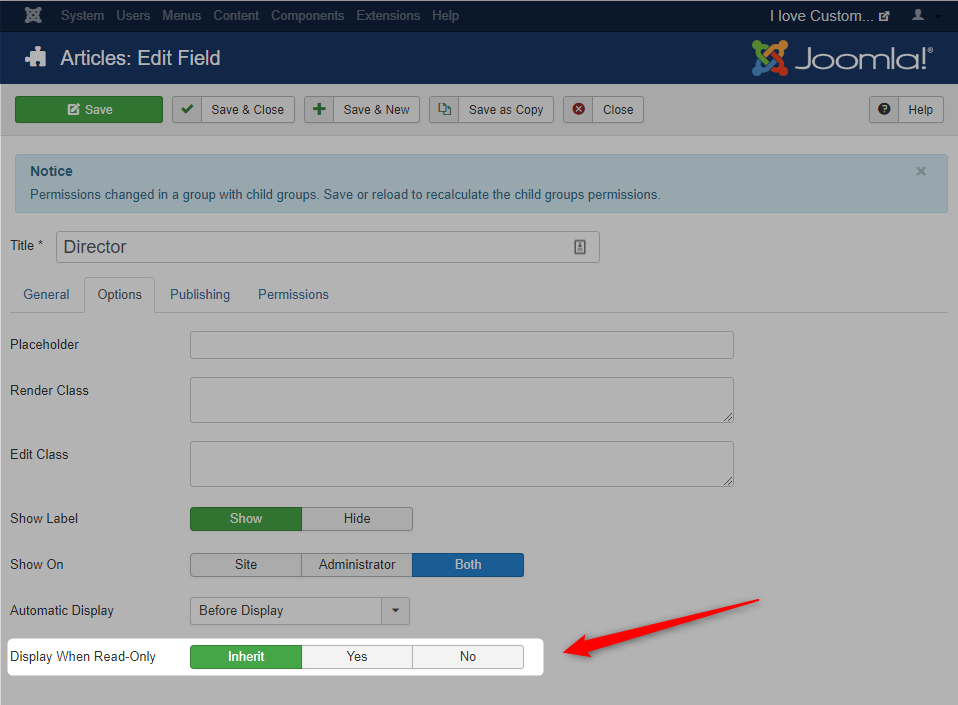
The choice "Inherited" will be treated in another episode because it concerns the use of "Groups of fields".
Display example with Bootstrap styles
The rendering and editing classes are customizable according to the CSS of your templates. However, as Joomla 3 integrates Bootstrap 2 (in the backend and also in the front-end if you use the template Protostar. If you use another template based on another version of Boostrap or on another framework, the philosophy is the same of course), it is possible to refer to the online documentation to take advantage of built-in styles.
Bootstrap includes "rendering styles" for "Label" and "Badge":
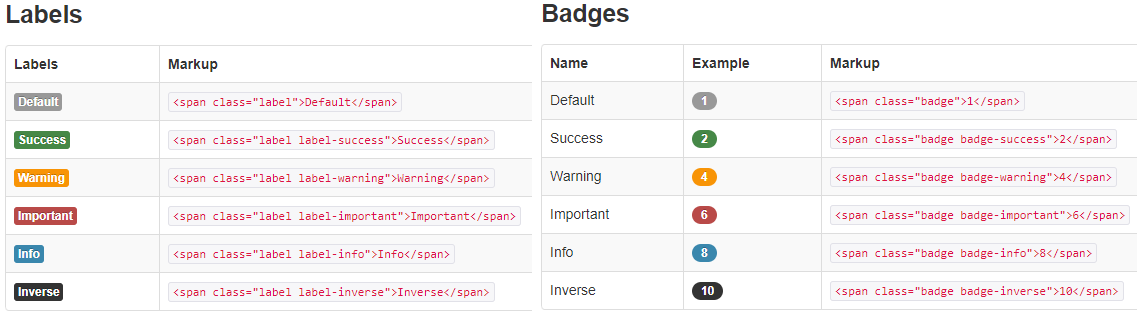
More details at: http://getbootstrap.com/2.3.2/components.html#labels-badges
Example of a field width with Bootstrap styles
For entry fields, Bootstrap provides styles for defining the width of an input field: "input -......."
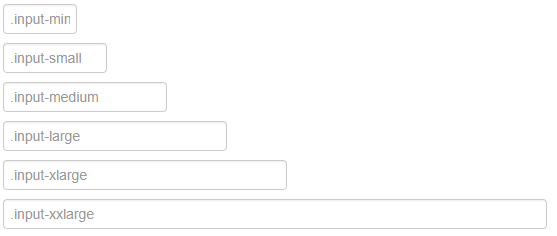
More details at: http://getbootstrap.com/2.3.2/base -css.html # forms
So you can use the styles presented above in the rendering classes (Frontend) and editing classes (Backend and Frontend):

With the above styles, the rendering when you edit that checkbox field in administration will give a "xlarge" display with a "badge-info" (blue) style:

The rendering will be similar if you modify the article in Frontend:
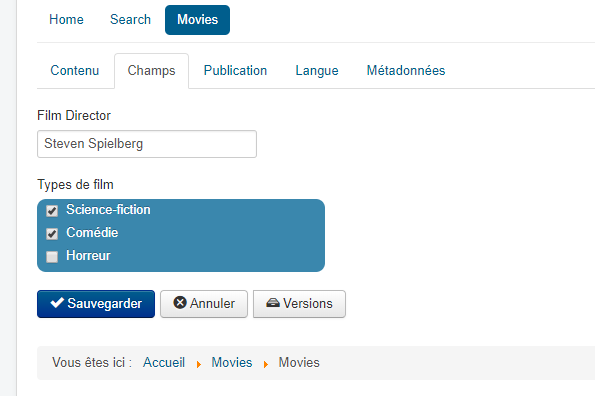
Here is the rendering of the article in front-end if you use "label label-warning" as Render Class. These styles do indeed add an orange box around the selected values of checkboxes:

In this example, "Show Label" is set to "Hide".
Warning: if you have set Automatic Display to "Do not automatically display" because you create your own template overrides or alternate layouts, then the Render Class will not be taken into account! (the logic is probably that if you make an override/alternate layout, you already completely control the code and therefore the classes that you want to put).
Further information on setting up a Custom Field
Version Management of Articles
If you use versioning in Joomla content, be aware that Custom Fields will not be versioned (it would be a nice feature though).
Source: https://docs.joomla.org/J3.x:Adding_custom_fields/en#Versioning
Filtering input
Some fields (Text, Editor, Text Area) provide a "Filter" setting.
This setting allows you to have control on the input on those fields.
The possible values are:
- No : no filtering of the data entered.
- Raw : (raw) I guess the same result as "No".
- Safe HTML : allows the input of "safe HTML" code (no scripts, ...).
- Text : filtering according to the parameters of the general configuration ("Text Filters" tab).
- Alpha numeric : only alphanumeric characters are accepted.
- Integer : only integers without decimals are accepted.
- Float : only figures (with or without decimals) are accepted.
- Telephone : allows the entry of a telephone number in international format only (country code and local telephone number, separated by a period, eg 33.1234567).
What next features can we expect from Custom Fields ?
Joomla 3.9.0 will bring some new interesting features on the use and implementation of Custom Fields.
Here is a selection of a few I have spotted and I take this opportunity to thank all the people involved in these Pull Requests :)
Alternative Layout for a Custom Field
Details: https://github.com/joomla/joomla-cms/pull/18571
Would you like to be able to change the HTML rendering of a Custom Field using alternate layouts?
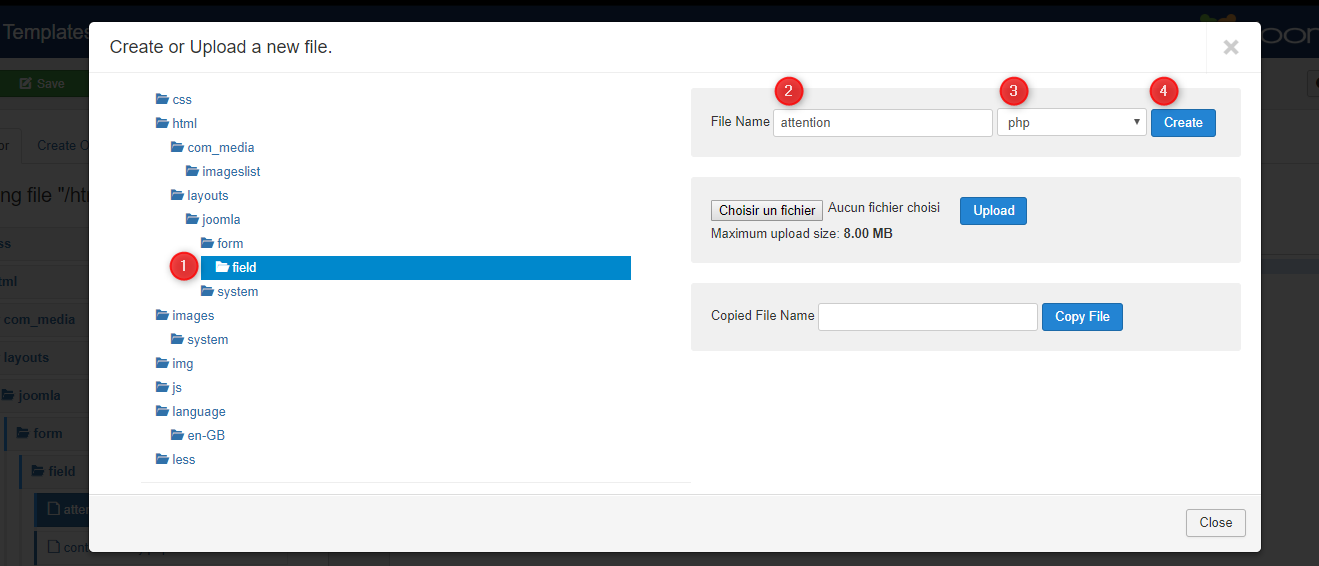
In your template, create a new substitution file by clicking on "New file":

In the popup window, select on the left the source file for your substitution:
html> layouts> joomla> form> field
Then, on the right of the popup window, give a name for the substitution file (example here: "attention"), specify that it is a PHP file.
Finally click on the blue button "Create":
This process is already possible in your sites in Joomla 3 and allows you to create an alternative layout for the rendering of an article, a module ...
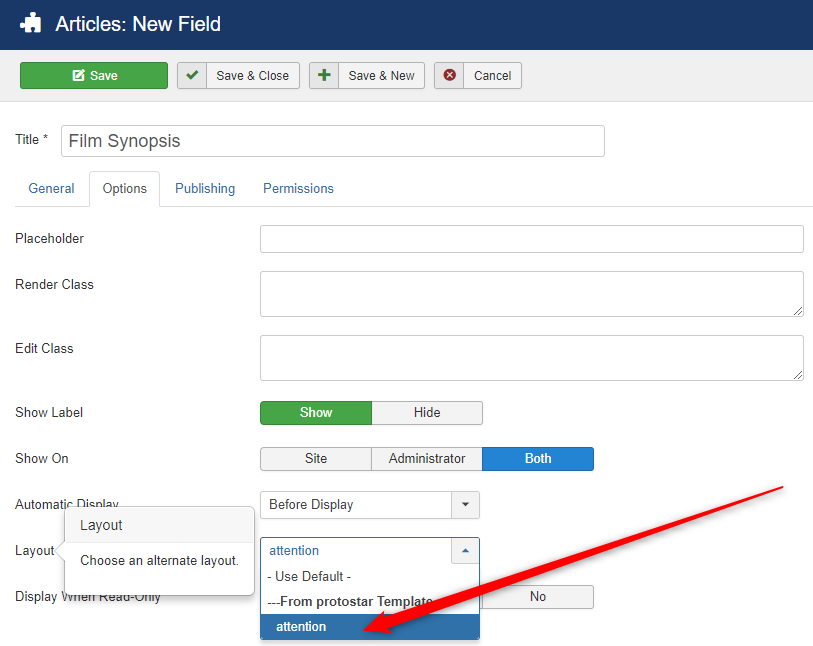
But what is new Joomla 3.9.0 is that it will be possible to assign that Alternate Layout in the configuration of any field!
Indeed when you edit one of your Custom Fields in a site running Joomla 3.9.0+, a new parameter will be available in the "Options" tab. This "Layout" field will allow you to assign your Alternate Layout:
Multiple entries for the same Custom Field (Repeatable Fields)
Details: https://github.com/joomla/joomla-cms/pull/20243
In many cases, you want to create a certain number of Custom Fields of a given type, but you don't know the maximum potential number.
Example: the ingredients of a recipe. For some recipes, 3 will be enough, but for others you will need 15... or even more but you don't know in advance how many.
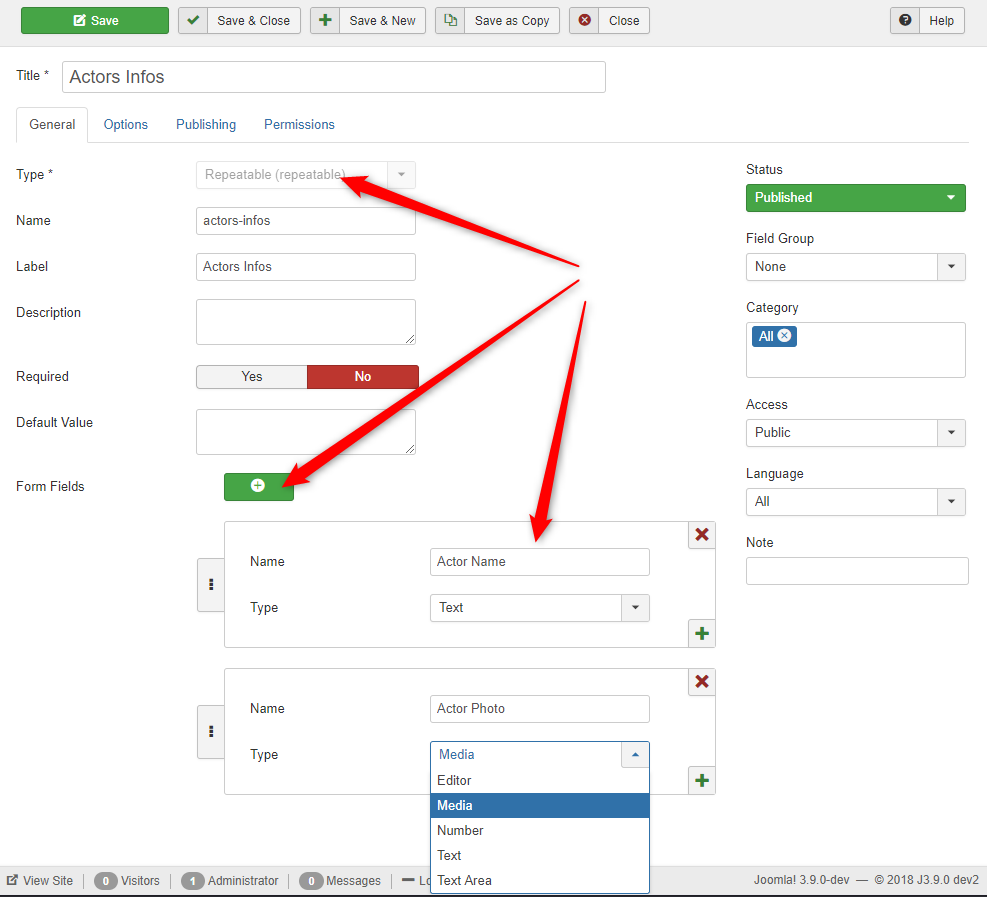
That is why a new field type will appear with Joomla 3.9.0 : the "Repeatable" field.
This type of field will allow you to build a subform composed of one or even several fields (for example : actor's name and actor's picture for movies. Or ingredient and quantity of that ingredient for recipes) by choosing from 5 types of fields supported in these subforms (Editor, Media , Number, Text, Text Area):
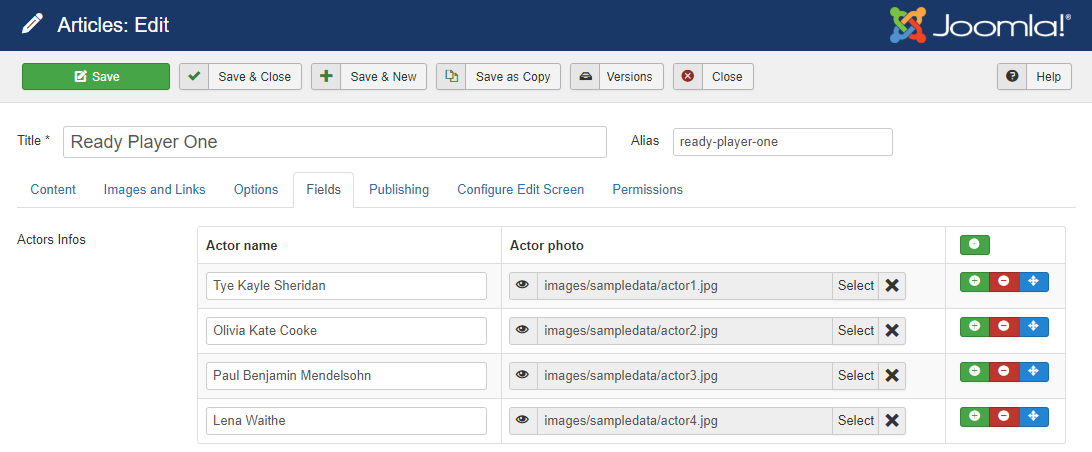
Once you have configured your repeatable field, when you edit an article you will get 3 buttons allowing to enter as many values as you wish :
- Green Button (+) adds a new entry/row.
- Red button (-) deletes an entry/row.
- Blue button (with arrows) allows to reorder the elements by "drag and drop".
Adding label Class for input
Details on https://github.com/joomla/joomla-cms/pull/18431
Custom Fields in real life - another example
In each episode, we try to illustrate the power of Custom Fields with with a real site example.
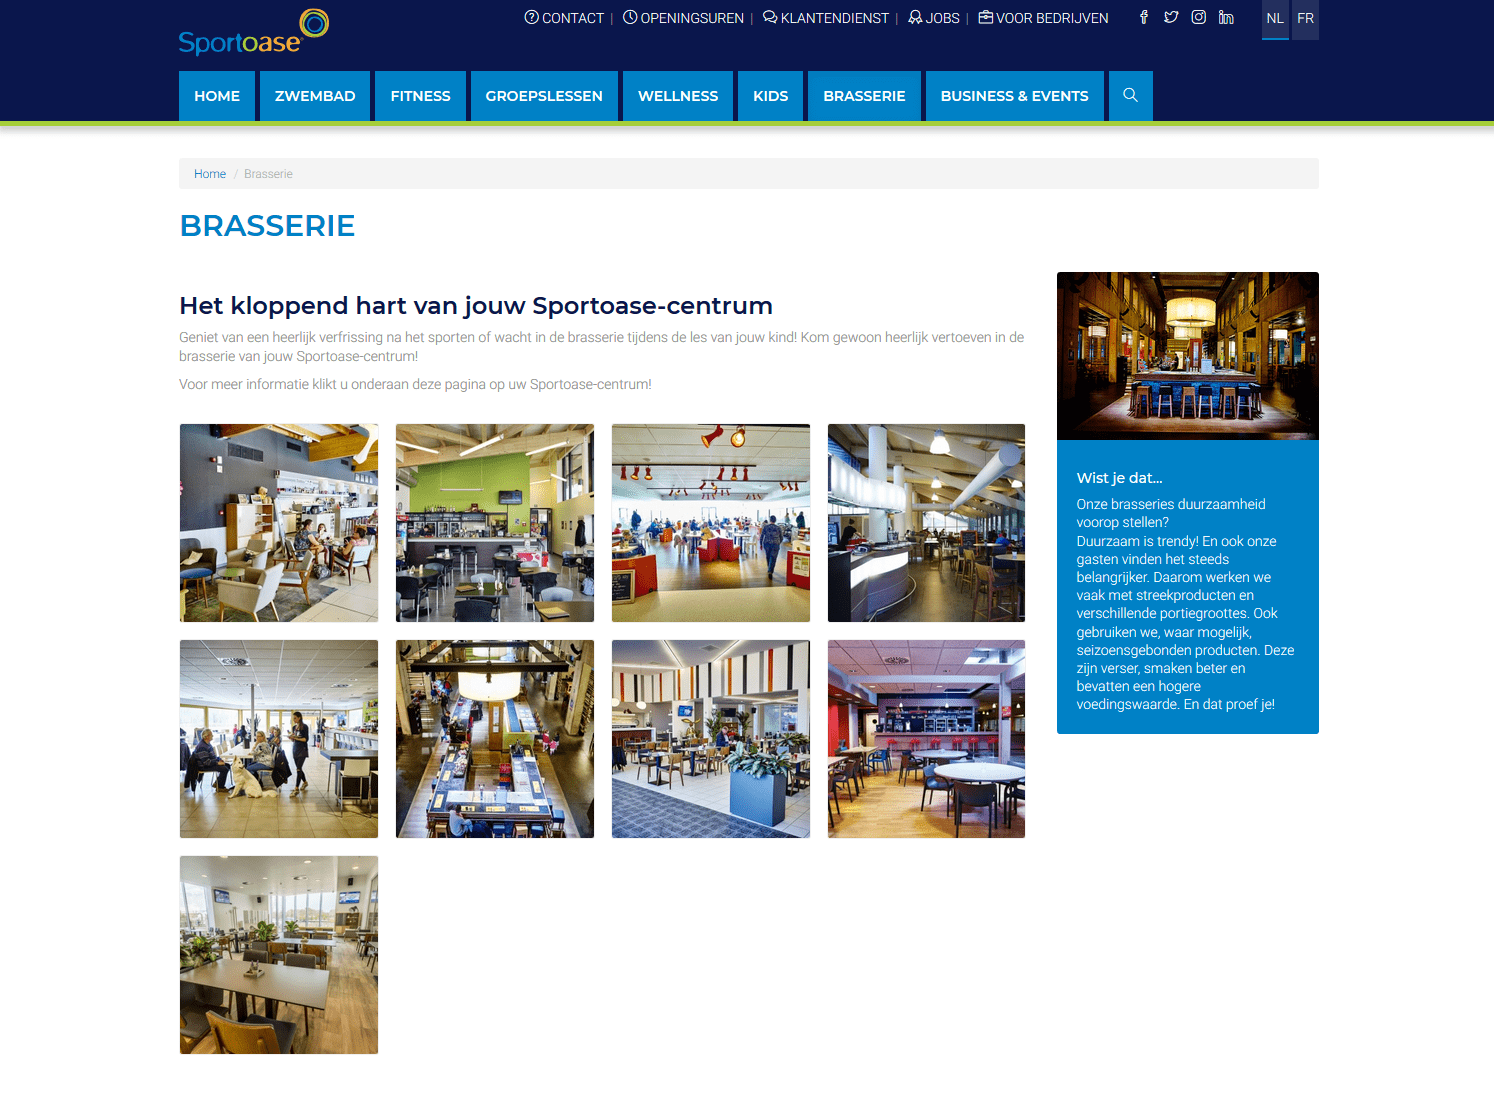
This time, Ronny Van Der Borght tells us more about https://www.sportoase.be, made exclusively with the Joomla Core and its Custom Fields.
There are a lot of ways to add functionality to your Joomla based website, you can install extensions, plugins or modules. But when possible I always try to use Custom Fields first: why take additional safety or performance when you can do it using Joomla's core technology?
If you are working with end-users / editors / clients it is also difficult to learn how to use an additional installed extensions, how to use and remember shortcuts for plugins etc ...
Since they are used to working with com_content it is often easier for end-users / editors / customers when you add a certain functionality with Custom Fields.
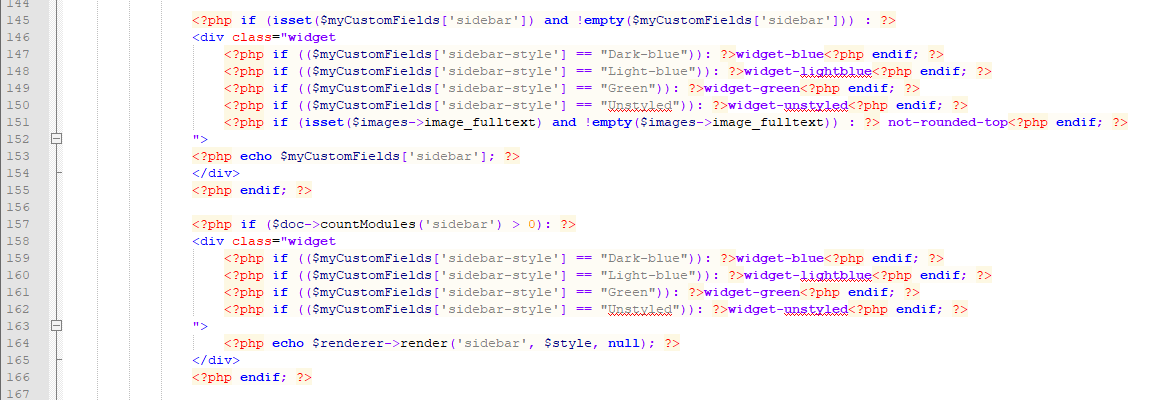
A few examples. To add a sidebar to a page you could perfectly have a module, but you can also use a custom field for this, the end-user / editor / client does not need to go into a long module to add a module to a certain page, he can only add a sidebar with it's content when the sidebar is defined as a custom field (textfield).
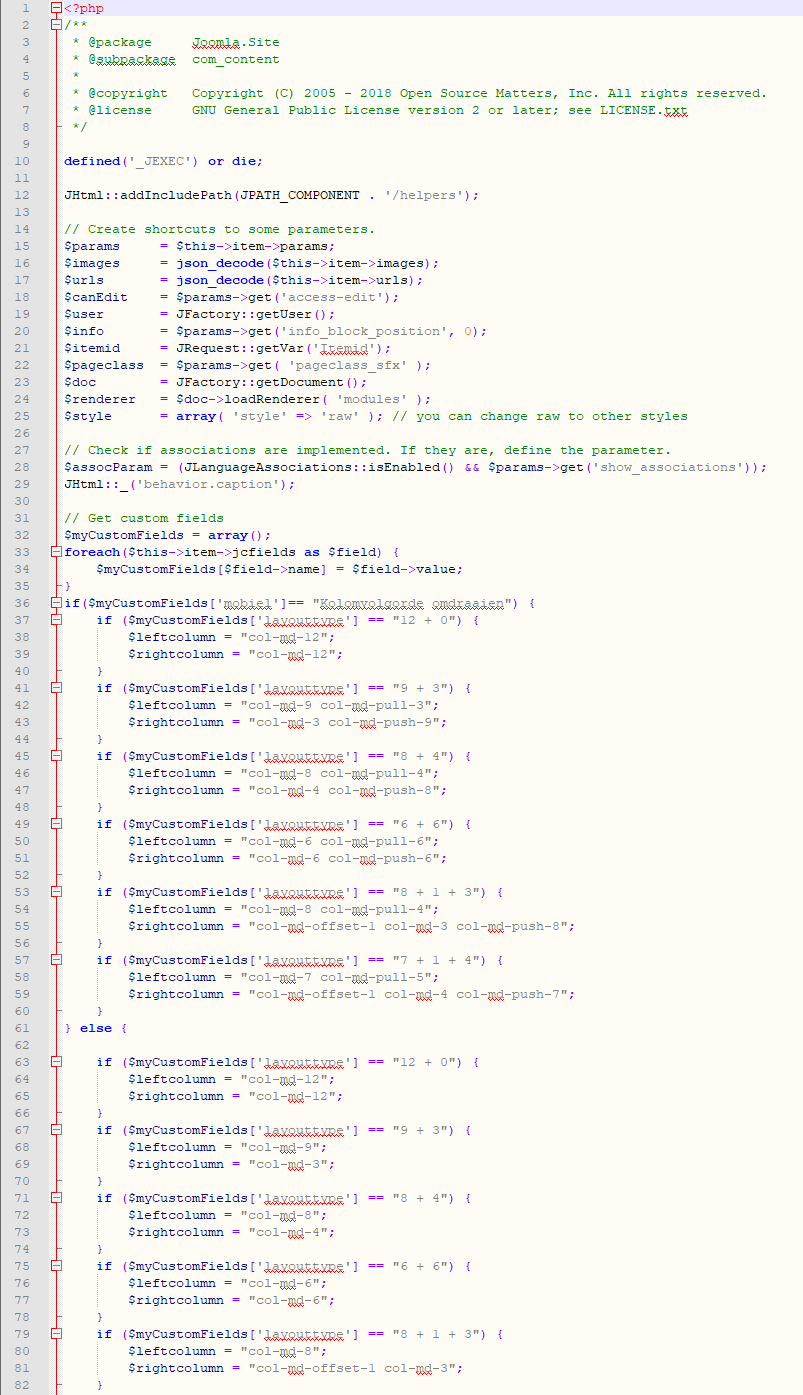
You can also use Custom Fields for layouting. In the next screenshot you will find the field 'Layout Type', it allows you to choose between different page layouts: 12 + 0, 9 + 3, 8 + 4 or 6 + 6. Depending on the selected options the page will be split in 0 or 2 columns, 8 + 4 means that the left column has the width of the right column, 6 + 6 makes both columns the same width. When 12 + 0 is chosen the sidebar will be below the content.
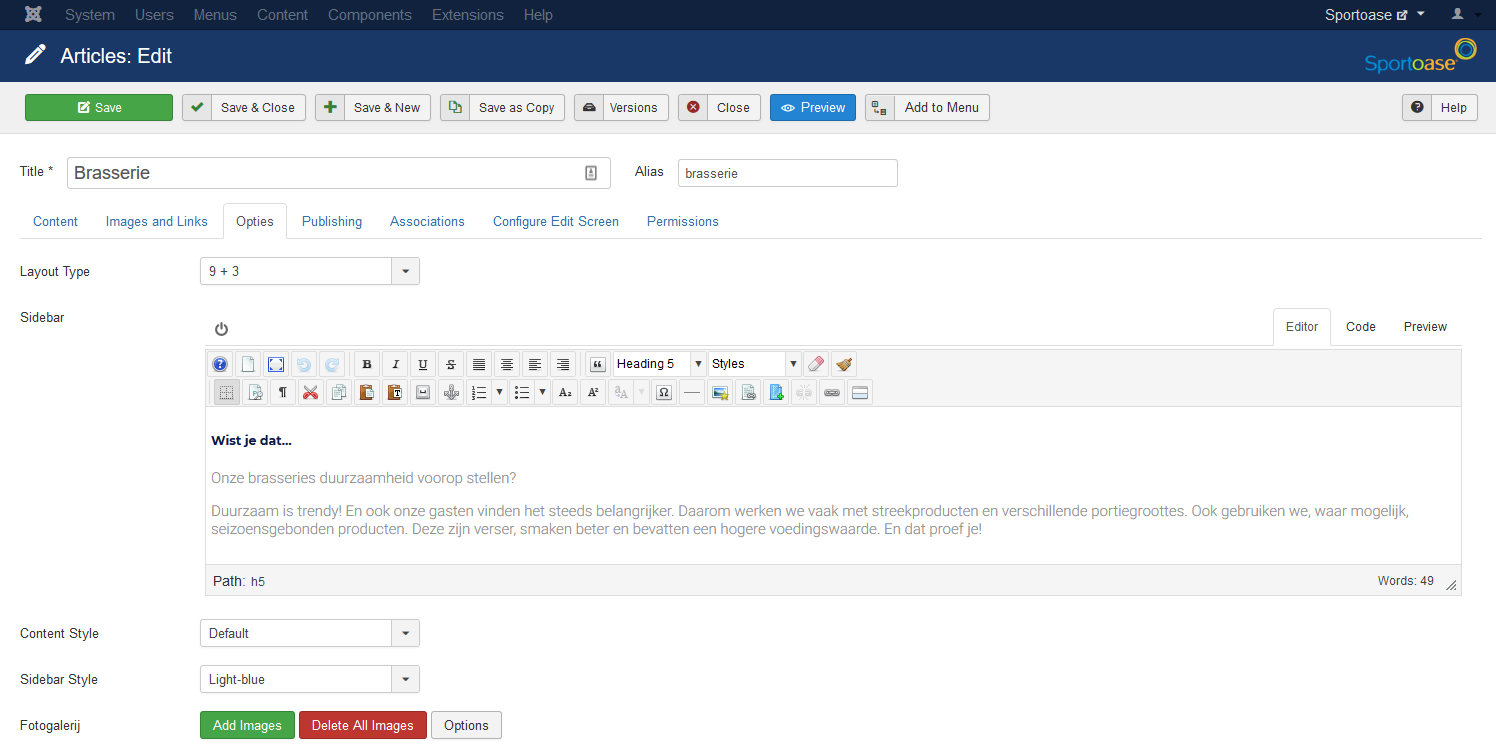
Layout Type = 9+3, Sidebar Style = Light-blue:
Layout Type = 8+4, Sidebar Style = Dark-blue:
In this example Bootstrap is used for layout, and the Custom Field 'Layout Type' just defines the used grid .
Another powerful feature of Custom Fields is the SQL Query Field. 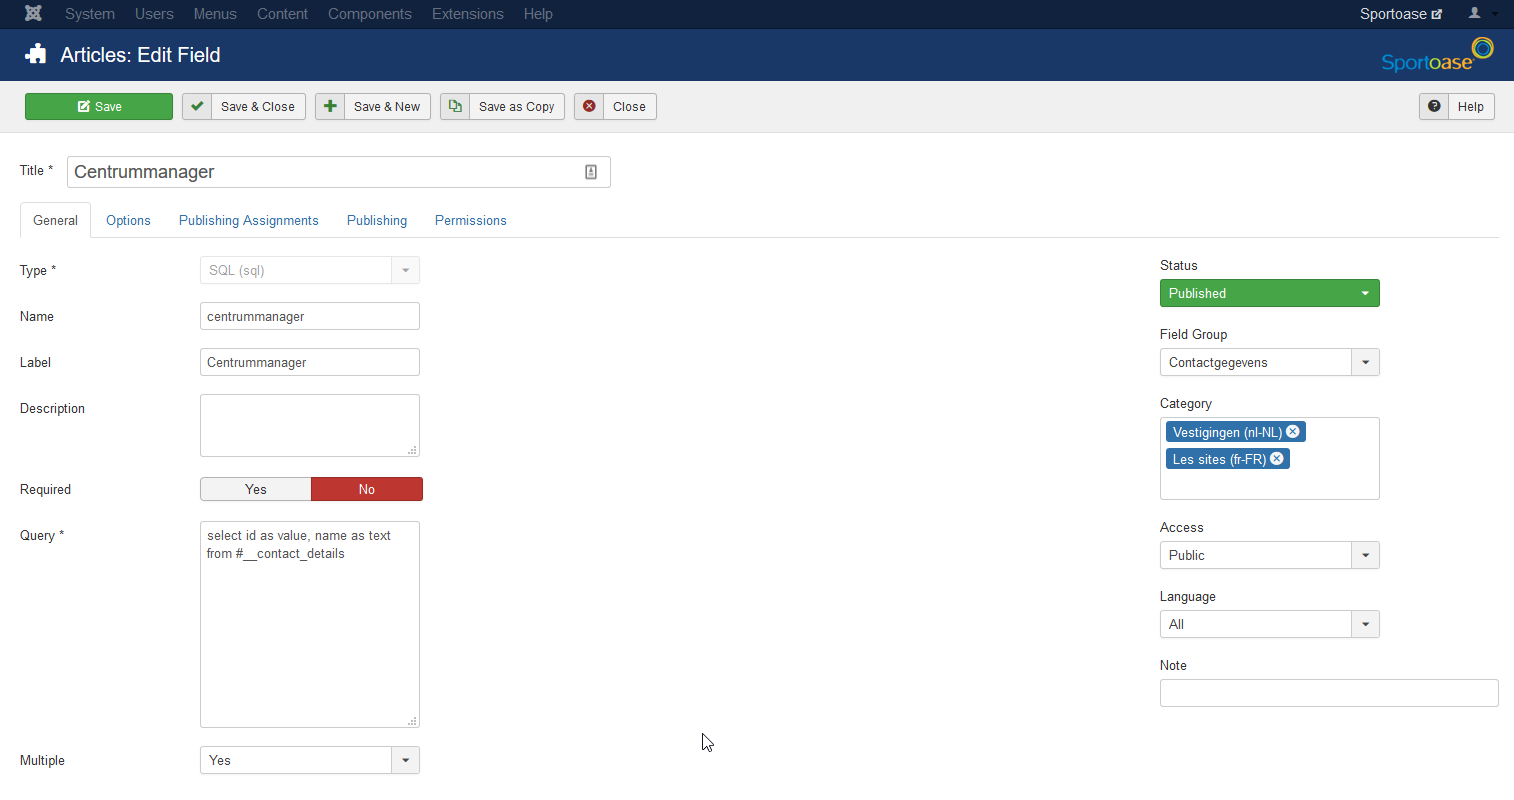
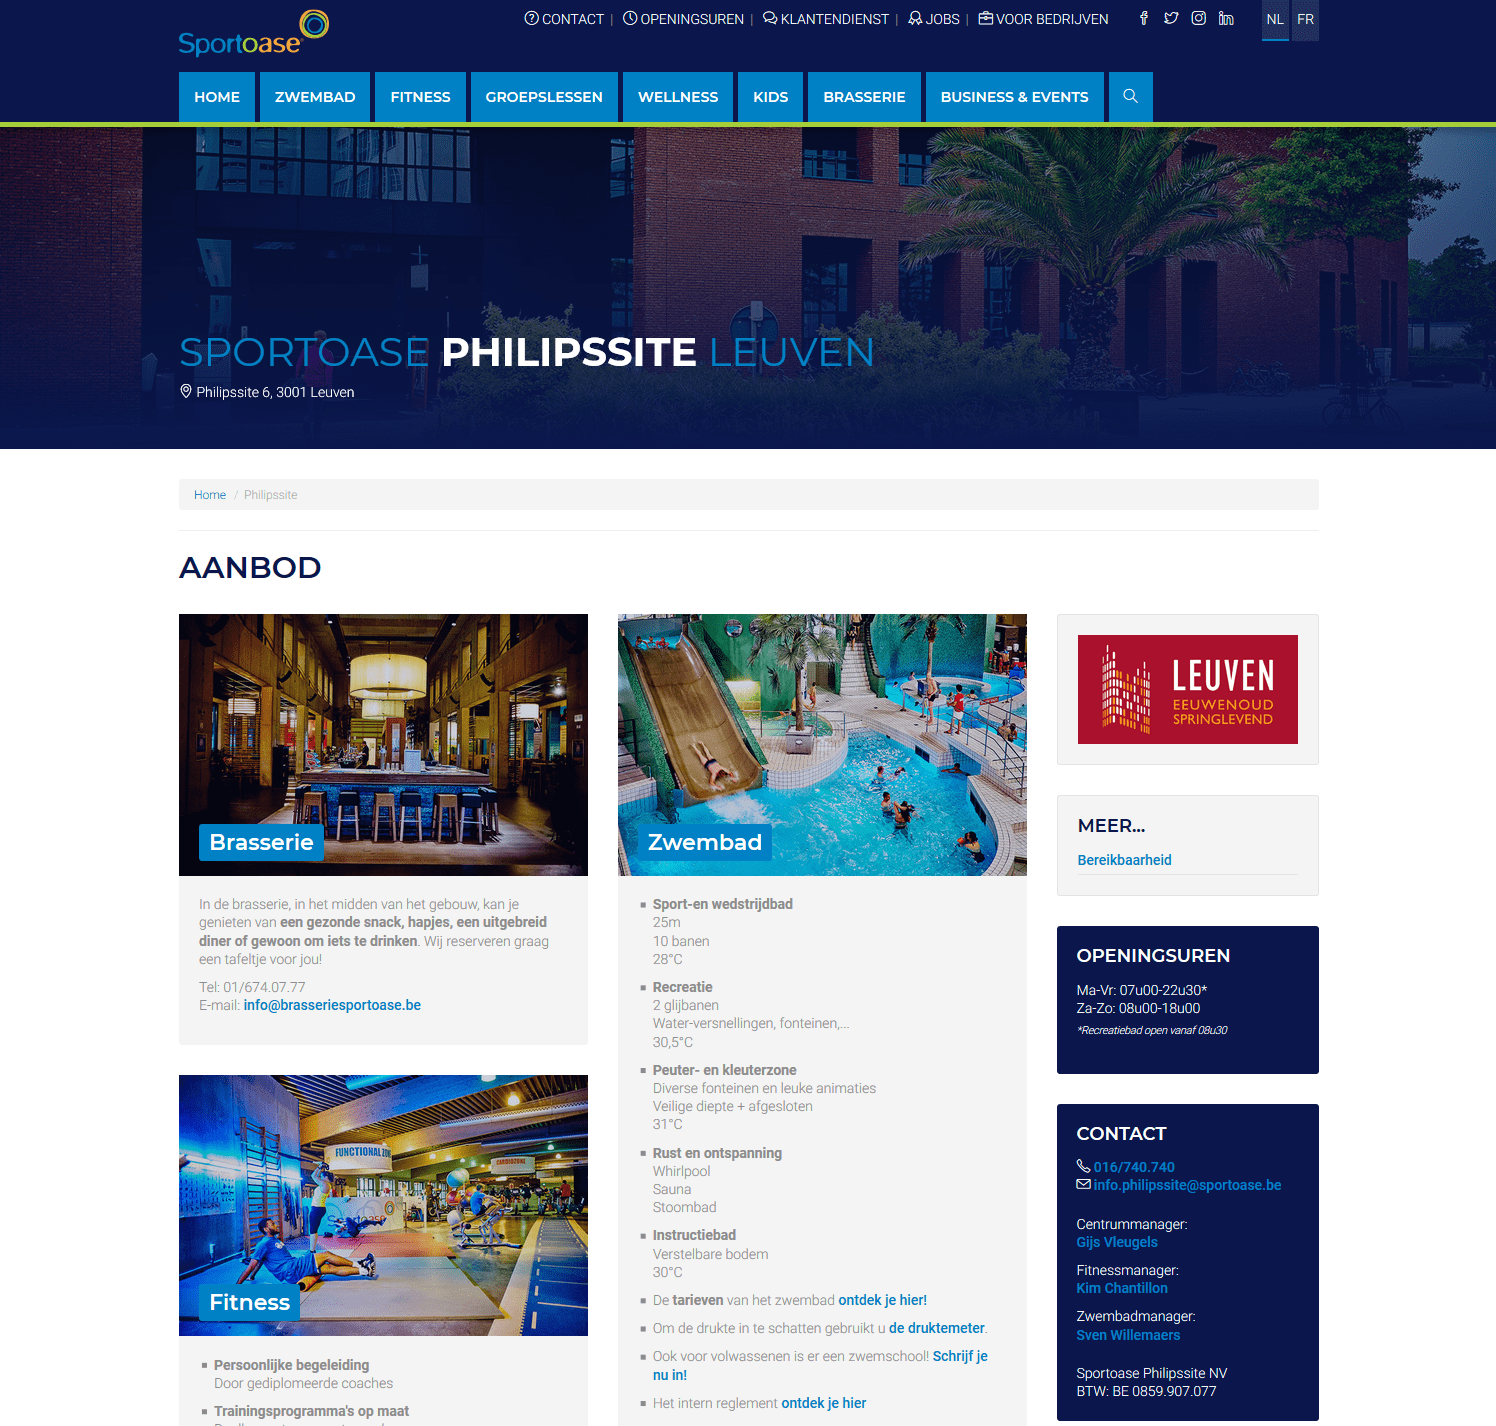
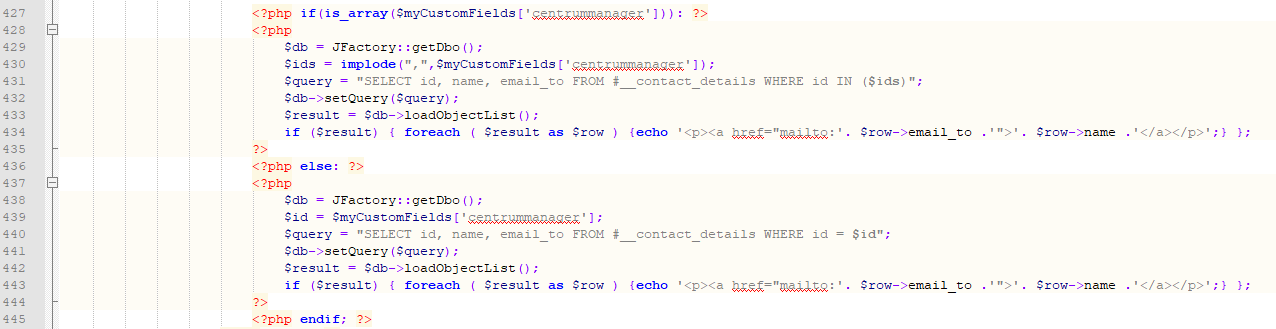
On this site this field is used in order to select a contact from com_contacts. The contact is then displayed on a Contact block of the corresponding venue.
select id as value, name as text from #__contact_details
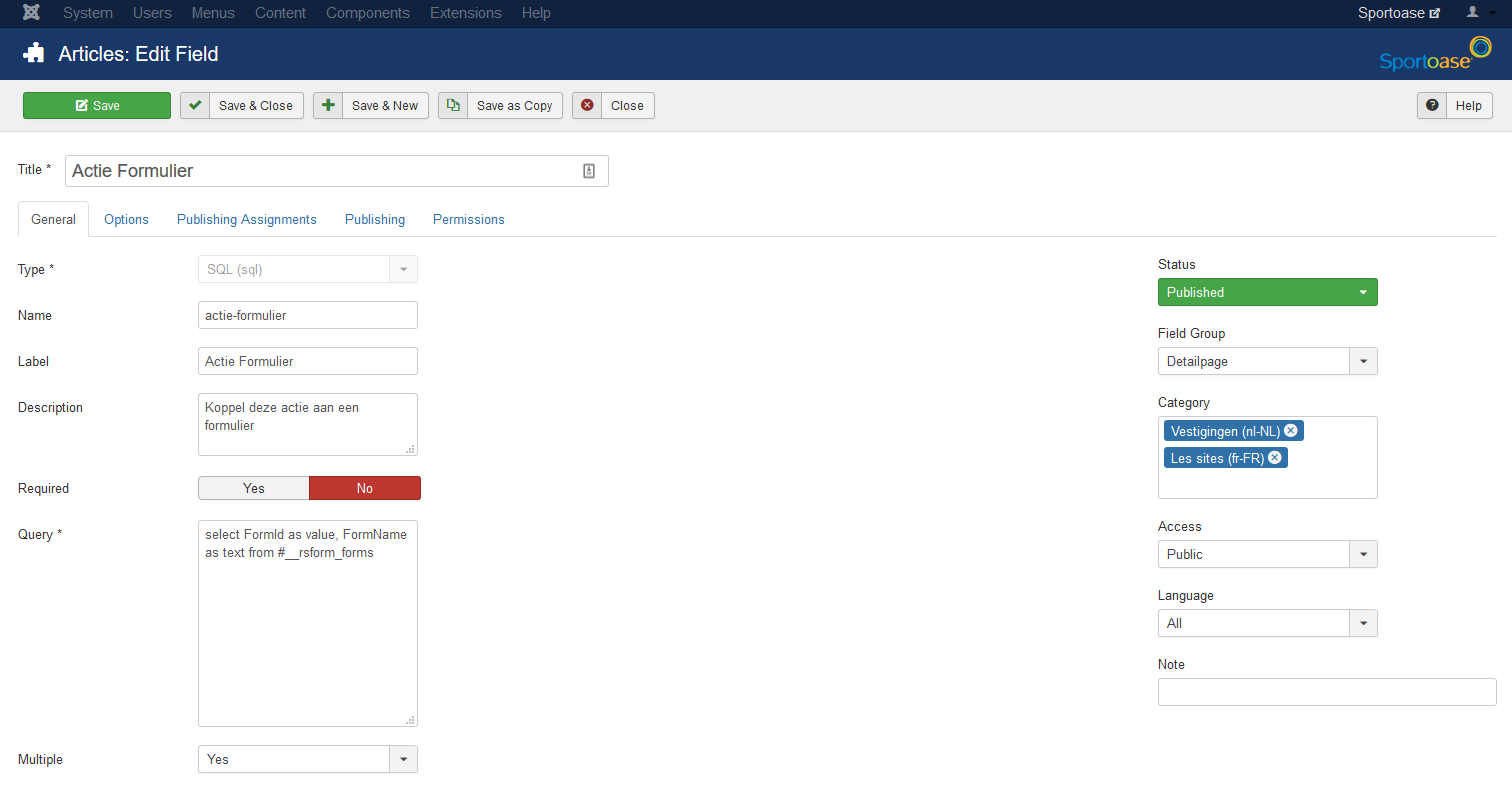
To add a signup form to a page (using RSForm Pro or any other form component) you can add a SQL Query Field as a Custom Field.
select FormId as value, FormName as text from #__rsform_forms
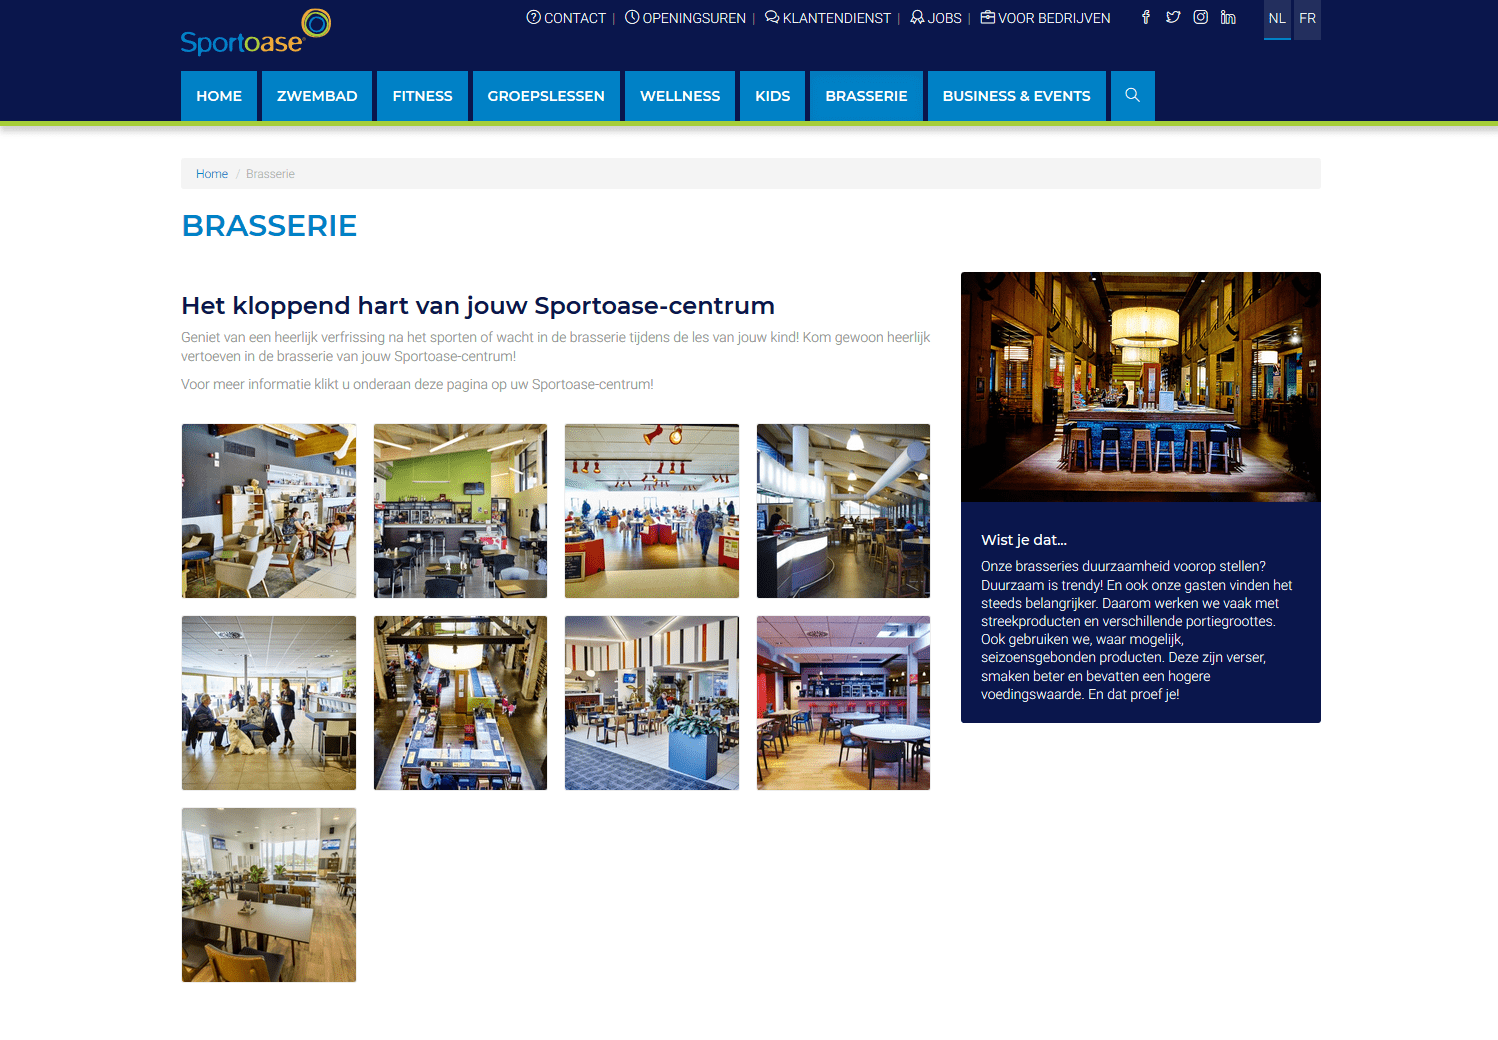
A last example of Custom Fields can be seen on the homepage:
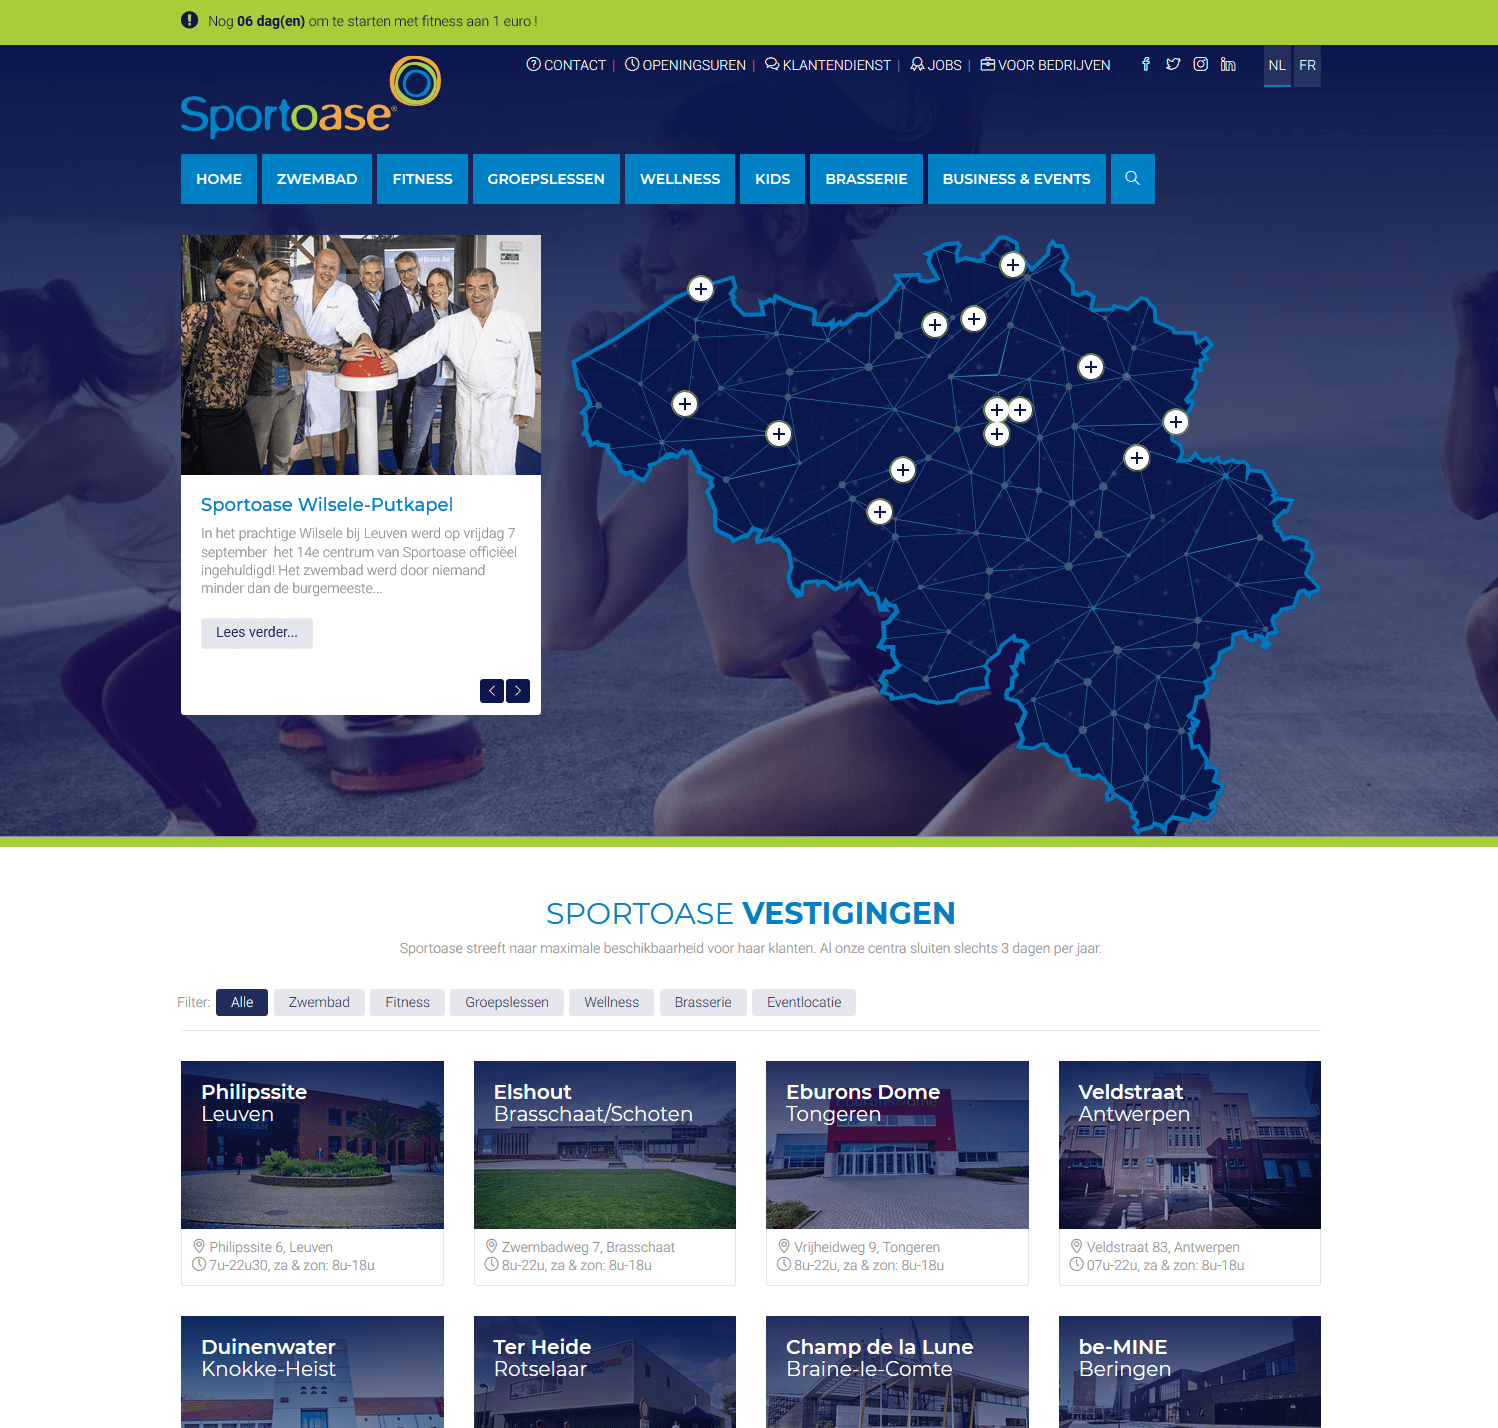
The map of Belgium but also the filters above the Cards and the thumbnails all use Custom Fields.
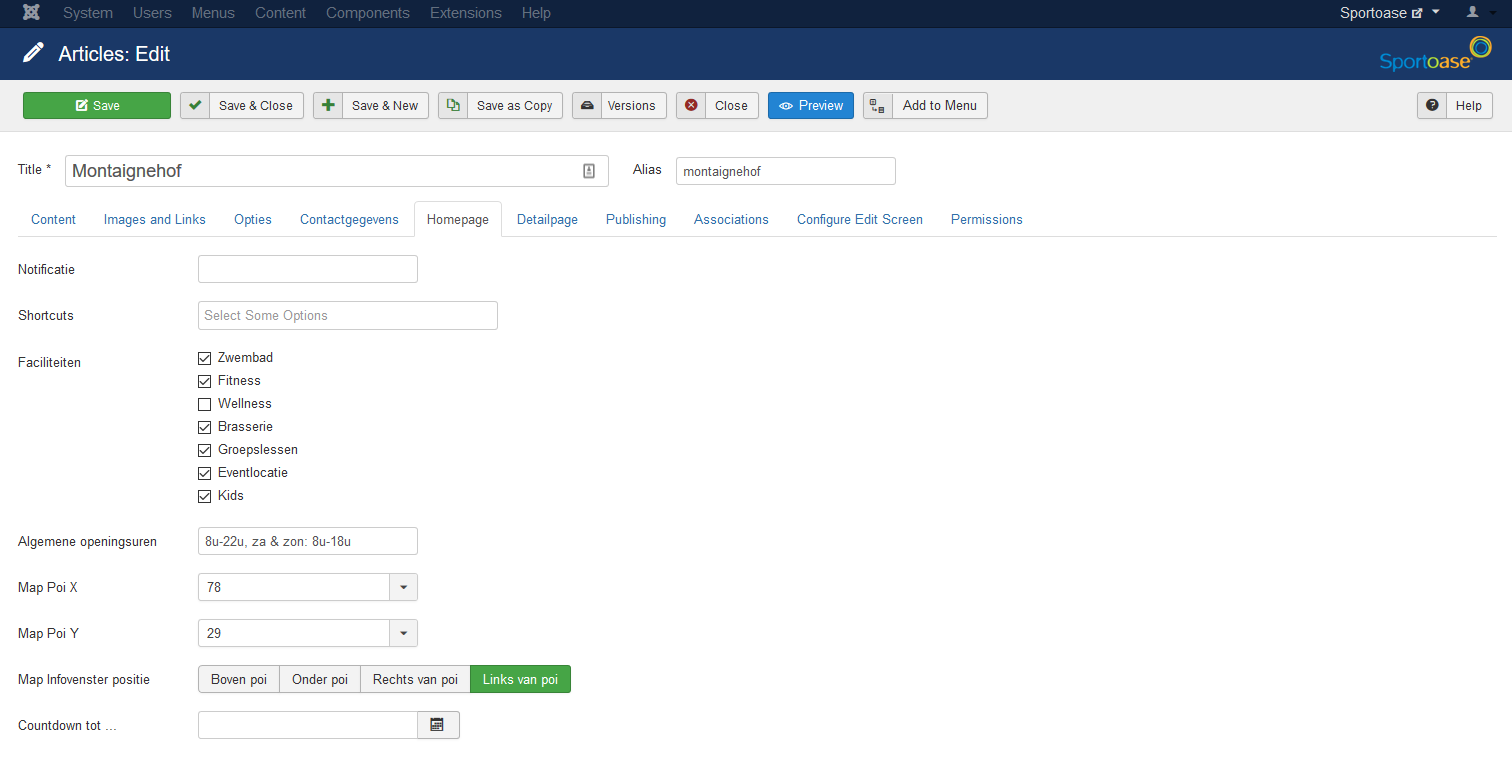
In the Custom Field 'faciliteiten' (venue) you can check on which filters the article should react.
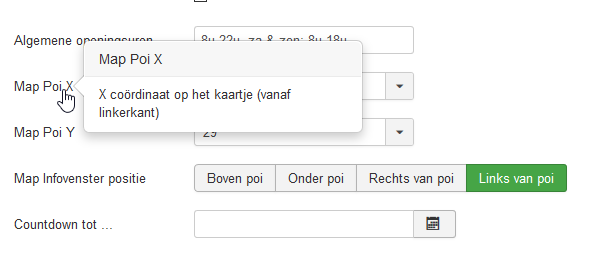
In this demo the svg-based map uses Custom Fields to add markers to the map, there is a Custom Field for the map's X and Y coordinates.
The Custom Field 'Countdown tot...' (Countdown until) activates a jQuery countdownclock, the client uses this to countdown until the opening of a new franchise.
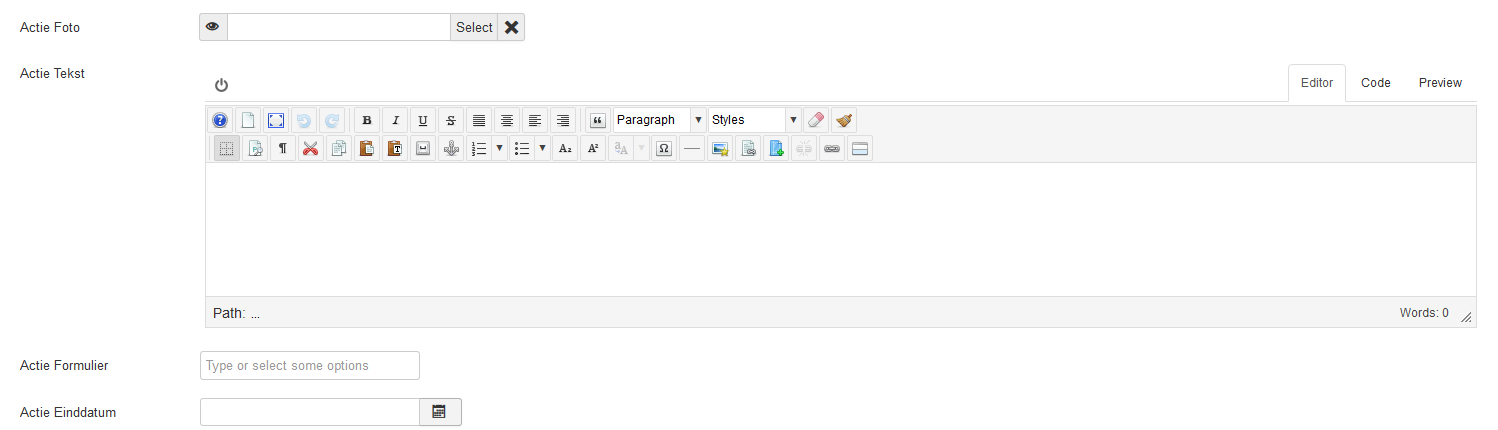
In other cases you can use a Date Custom Fields to add a temporary promotion to a page, it will go offline automatically when the end date is reached.
Curious to see the code behind the scene?
Here is a peep on the overrides:
override-layout:
override-com_contacts
override-sidebar-style
What's next ?
Here we are at the end of this 3rd episode about Custom Fields, where we covered
- all the parameters of Custom Fields.
- a preview of some interesting innovations which will ship with Joomla 3.9.
- and also particularly interesting case-study.
The next Episode should be about... Field Groups.

Comments