
In our Explore-the-Core-series, experienced Joomlers explain the basic features of Joomla. In this article Christiane Maier-Stadtherr dives deeper into menus, menu-items and the things you can do with menus.
What is a menu?
On the Web (not in a restaurant) it is a navigation where the user can choose where to go next.
Navigation is one of the most important elements for the user experience and accessibility of a site. The clearer, simpler and better structured your navigation, the better the user's experience when surfing through your site.
Making a Menu in Joomla takes three steps:
- Planning: Which Navigations will you need on your site (and for which user groups)?
- Implementing: Build the navigation structure in Joomla Backend: Menus and Menu Items.
- Presenting: Bring the Menu Modules into your template.
Planning
Make the structure clear and simple. A user should be able to reach every page via two clicks maximum. Navigations with a deep structure belong to the past – on mobile devices they are bad. Before you implement a website you should always make a concept, independent of the CMS. You can plan your navigation structure using pencil and paper or every tool you want for this purpose.
Implementing the Structure
After the planning phase you can start the implementation. In the first step you will work in the “Menus” area of the Joomla backend. Whether you are working in Joomla 3 or Joomla 4 – it is the same principle, even if you will find some differences in details and other layout of screens.
If you have a new installation: install the Blog Sample Data as well. That will make it easier to follow the steps below.
The Menu
A menu is a collection of menu items. Building a menu is easy: A name and a unique name, access rights for user groups (a description if you want) – that’s all.
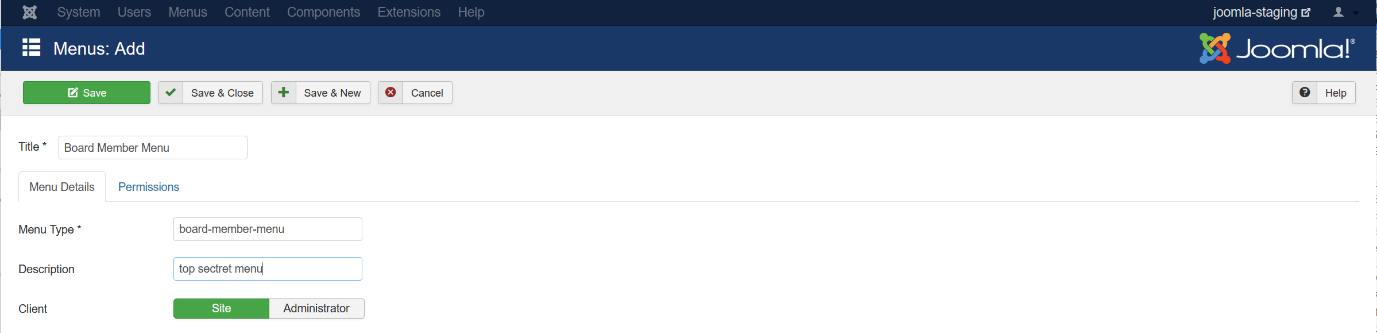
Screen 1: Define a Menu
You will have at least one menu on your site, but (unlike in other content management systems) you can have multiple menus as well. In the third step, when you place the menus in modules on the site, you can decide which menu appears on which page and on which position on the page, and you can define which user group can change (or even see) this menu.
The Menu Items
After you have defined your menu, it’s time to create the menu items: the links to your pages. One menu item must open the homepage, it is the default menu Item. Each Menu Item has a title and addresses a specific page on your site, this can be an article, a blog, a contact, a login form – the Menu Item Type.
There are many different types of pages. A few examples? A link can lead to:
- A single article
- A category blog (multiple articles from a category) in many different varieties
- A contact form or a list of contacts
- An external site
- A list of tags
After defining the type, only a few more clicks are needed: The Menu Item must be connected to a menu and, as this is a tree structure, the parent item must be specified. By default it is set to the root item of the menu.
On the screen you see one of the most used menu items: to a single article page. Here the system needs a specification of the article and gives you the opportunity to create the article right here. The link will be added to the first level of the main menu (root) and is visible to everyone (public).
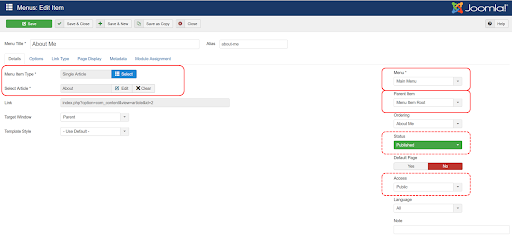
Screen 2: Define a menu item
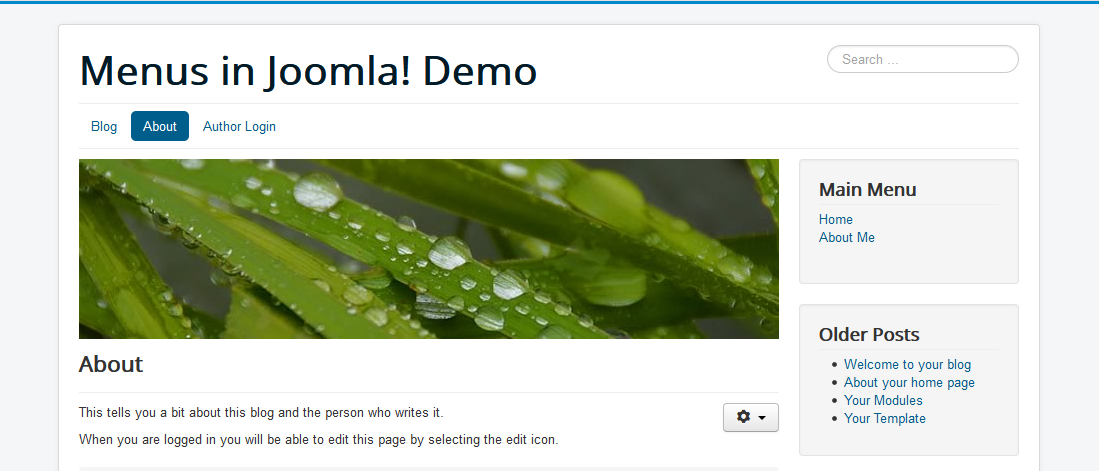
A typical example for this kind of menu items is the “About me” here:
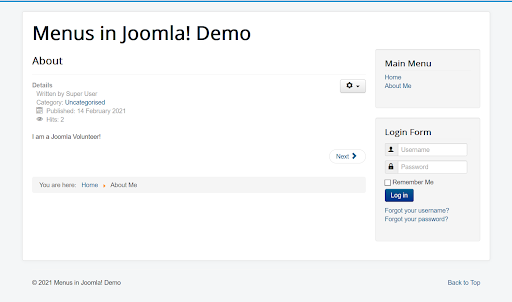
Screen 3: The menu Item appears in the frontend
Every menu item can be defined individually. Every setting in the menu item will override the settings of the respective page.
There are many possibilities:
- Give the page another appearance with an own template style
- Show details for articles or hide them, show or hide titles and links
- Allow only registered users or a special user group to see the link
- Add an image to the link or use an image as a link.
And many more.
See the tabs in the Menu Item Screen. Every Tab contains parameters which control the appearance of your menu item itself and the appearance of the page that is opened by the link. These parameters are predefined by Joomla and your global settings, you don’t need to do anything if the default settings match your needs, but you can. Settings are grouped in tabs:
- Details defines the target of your menu item
- Options define the appearance of the target page
- Link Type define the appearance of the link in the menu
- Metadata let you improve your link for Search engines (SEO)
- Module Assignment informs you which modules of your application will be visible when the user clicks this menu item
A small example of what option parameters can do: Articles have a global setting “show a print button” and “show article details”. You can see this on screen 3.
For this special article we want to change the options (in the option tab): no Print Button. Show only the publishing date in tab “details” and let the Details stay below the article text.
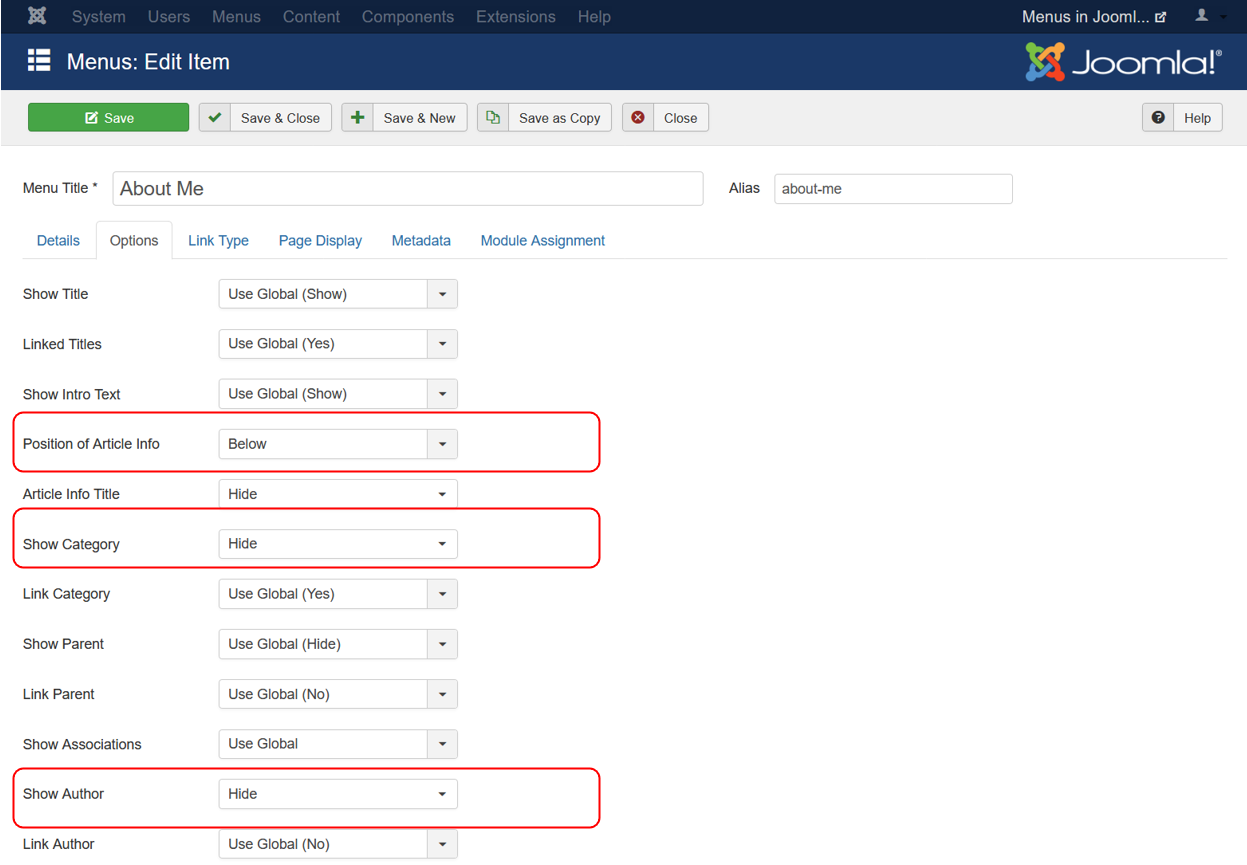
Screen 4: Set parameters in Options to control the appearance of the linked page.
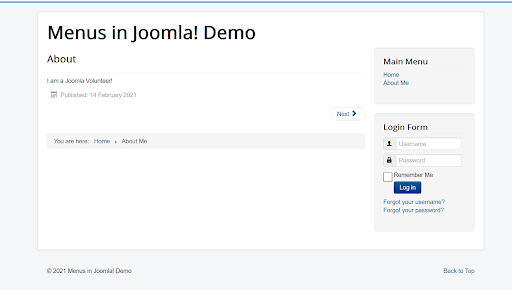
Screen 5: New Options changed the appearance of the page.
Maybe you want to change the menu item itself and show an image instead of a text? Have a look at the parameters in Link Type. Here you can also hide a menu item so that it is not displayed in the menu. A good feature for search engine optimization.
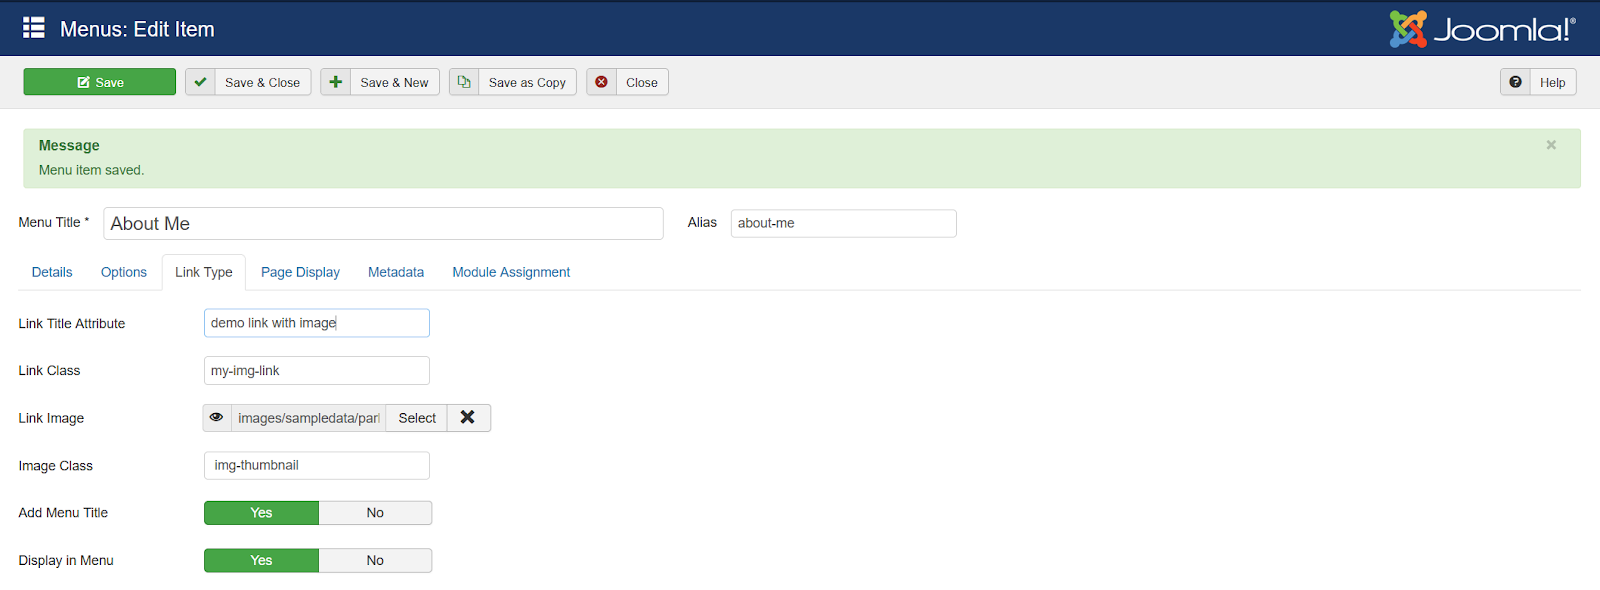
Screen 6: Many possibilities for designing your menu items.
The Presentation - Modules
Now let’s present your menus on the site.
The main menu is always in a prominent place where the eye catches the most important points at once. A horizontal menu bar in the header area is a de-facto-standard. Show it sticky,on top and expanded or collapsed by default. You can have menus in sidebars as well, and very often we find additional menus in the footer – from simple legal menu items to huge multi column sitemaps.
The first step is defining a new module of type menu (in Extensions – Modules) and placing it into a position of the template. Give your module a name and select the menu which is presented here.
If you are new to Joomla and haven’t installed the Blog Sample data yet, now is a good time to do this. With the Sample data comes a second menu on top of your site in position navigation and with some more menu items. This menu is horizontal.
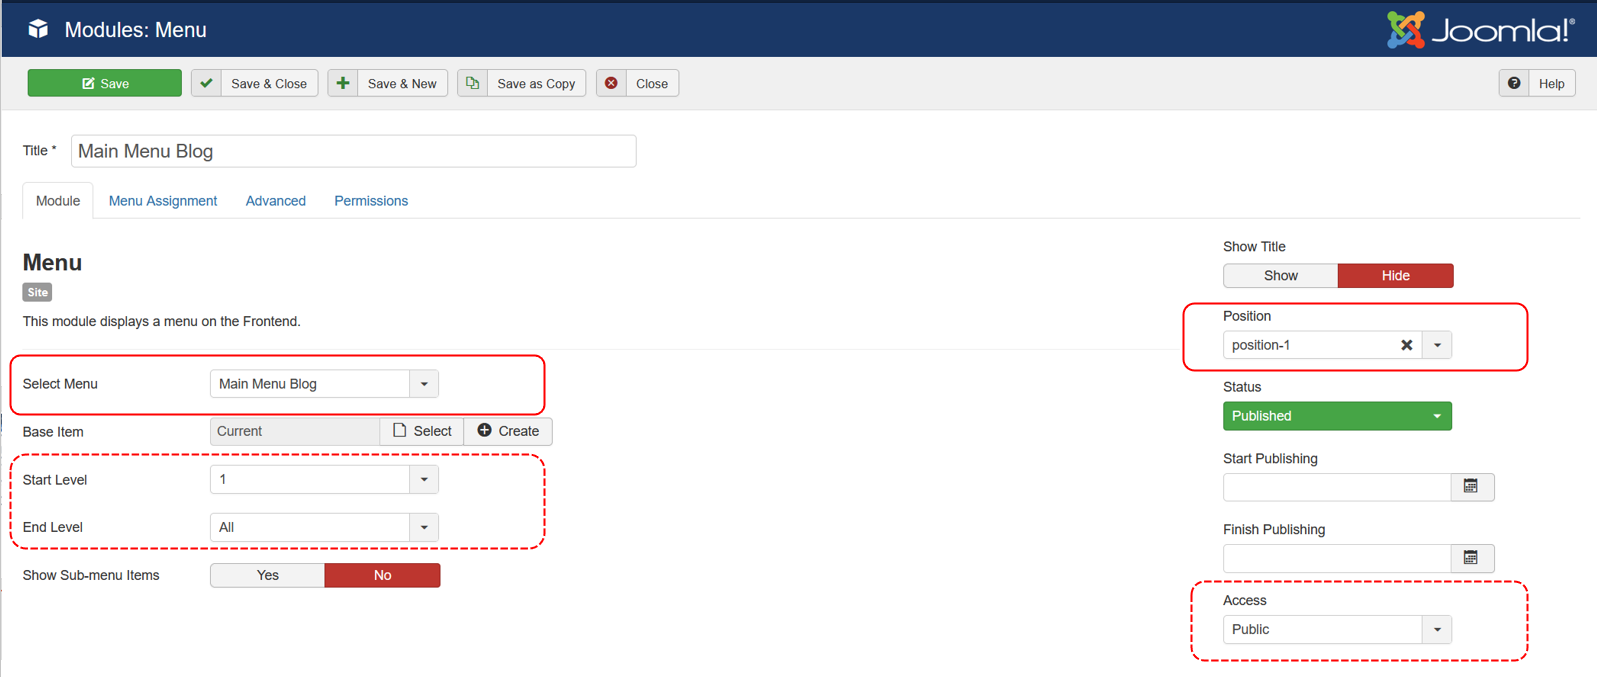
Screen 7: Place your menu with a menu module
As in menu items there are many decisions to make:
- Where (in which position) shall the module be presented?
- For everyone (public) or for a defined user group?
- One or more levels?
- On all pages or only on selected (see the tab “menu assignment”)?
Should it be a vertical or a horizontal menu? With your own overrides and styles as inherited from your template?
If you want to set your own values, go to the tab “advanced” – explore it!
You can make your menu vertical or horizontal. The Menu Class Suffix does the magic here. “ nav-pills” makes the menu horizontal as you see here:

Screen 8: A horizontal menu is made with “ nav-pills” in J3
In the Tab Menu Assignment you can define when the menu is displayed or hidden. For example, if you have a site for sports events, the menu for football ranking is not useful on the darts page and vice versa.
Now we have the main menu with the default menu item “Home” at position sidebar-right and a horizontal menu in the header of the site.
Now we have prepared a playground. You know how to bring menus on your site. The more you play with this, the more you will understand the magic and the countless opportunities with menus in Joomla. Go ahead and explore!

Comments