2 minutes reading time (420 words)

Explore the core: resize your images upon upload

2023-JCM-July-Image-Resize-Plugin

Wouldn't it be nice to have your images resized upon uploading? Without having to use a third party plugin? Let's explore the core, because Joomla! 4 has this built in. All you need to do is configure it!

A major drawback with Joomla 3 has always been the mediamanager. Thankfully Joomla 4 has a big update in that department. The mediamanager allows for image manipulation such as crop, rotate and resize, multiple uploads and much more.  As you have worked with Joomla 4, you must have come across these options allowing for a better workflow.

One of the major reasons however, to install JCE(pro), and use its mediamanager has often been the option to set a resize while uploading. A feature I have used a lot to save tons of space on my clients' websites. For not too tech savvy users this was a lifesaver!

Screenshot 2023 07 03 at 14.13.30

As can be seen above, the default resize option is in place, making it very easy for the user, who does not have to first resize the image prior to uploading it. 

I thought this part was still missing in Joomla 4, but I found out it was not! In order for this to work with the Joomla 4 default media manager, you simply need to set your default dimensions in a plugin. 

A plugin that is likely already activated, but the fields that control the width and height are not filled yet!

Setting the default resize option

Simply go to “System” - “Plugins” and find the “Media Action - Resize” plugin. 

Screenshot 2023 07 03 at 14.16.07


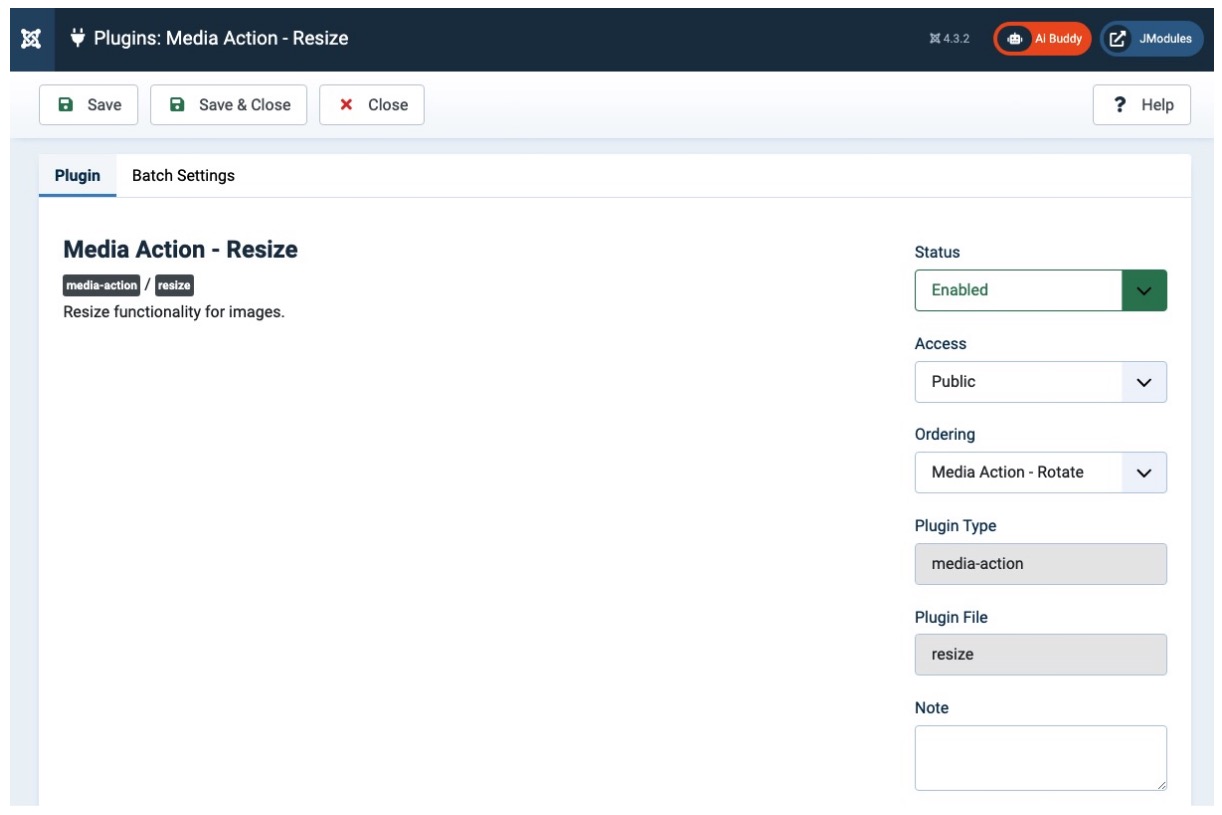
As you can see, it states what it does: Resize functionality for images.

Go to the second tab, and voila, you can set your default image size here! If you for instance set both fields to 1000px, your image will be scaled to that width / height during upload, of course keeping the right aspect ratio.

Screenshot 2023 07 03 at 14.15.03

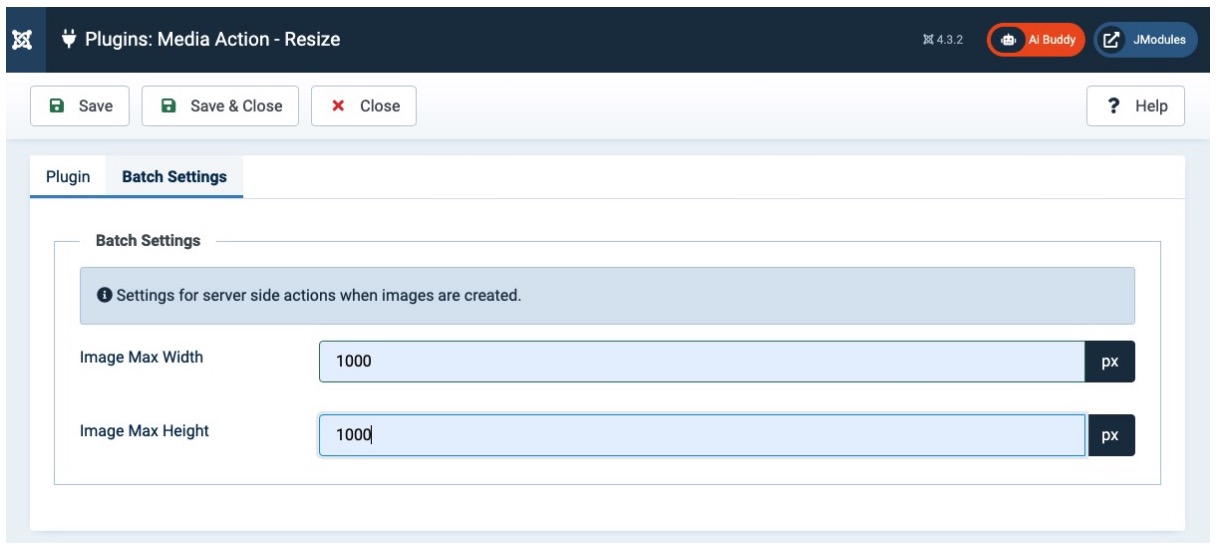
Click on save and you are good to go. The upload function of your default Joomla 4 website will now resize during upload!

Before and after

Below you can see the result when the plugin is set.Screenshot 2023 07 03 at 14.17.05

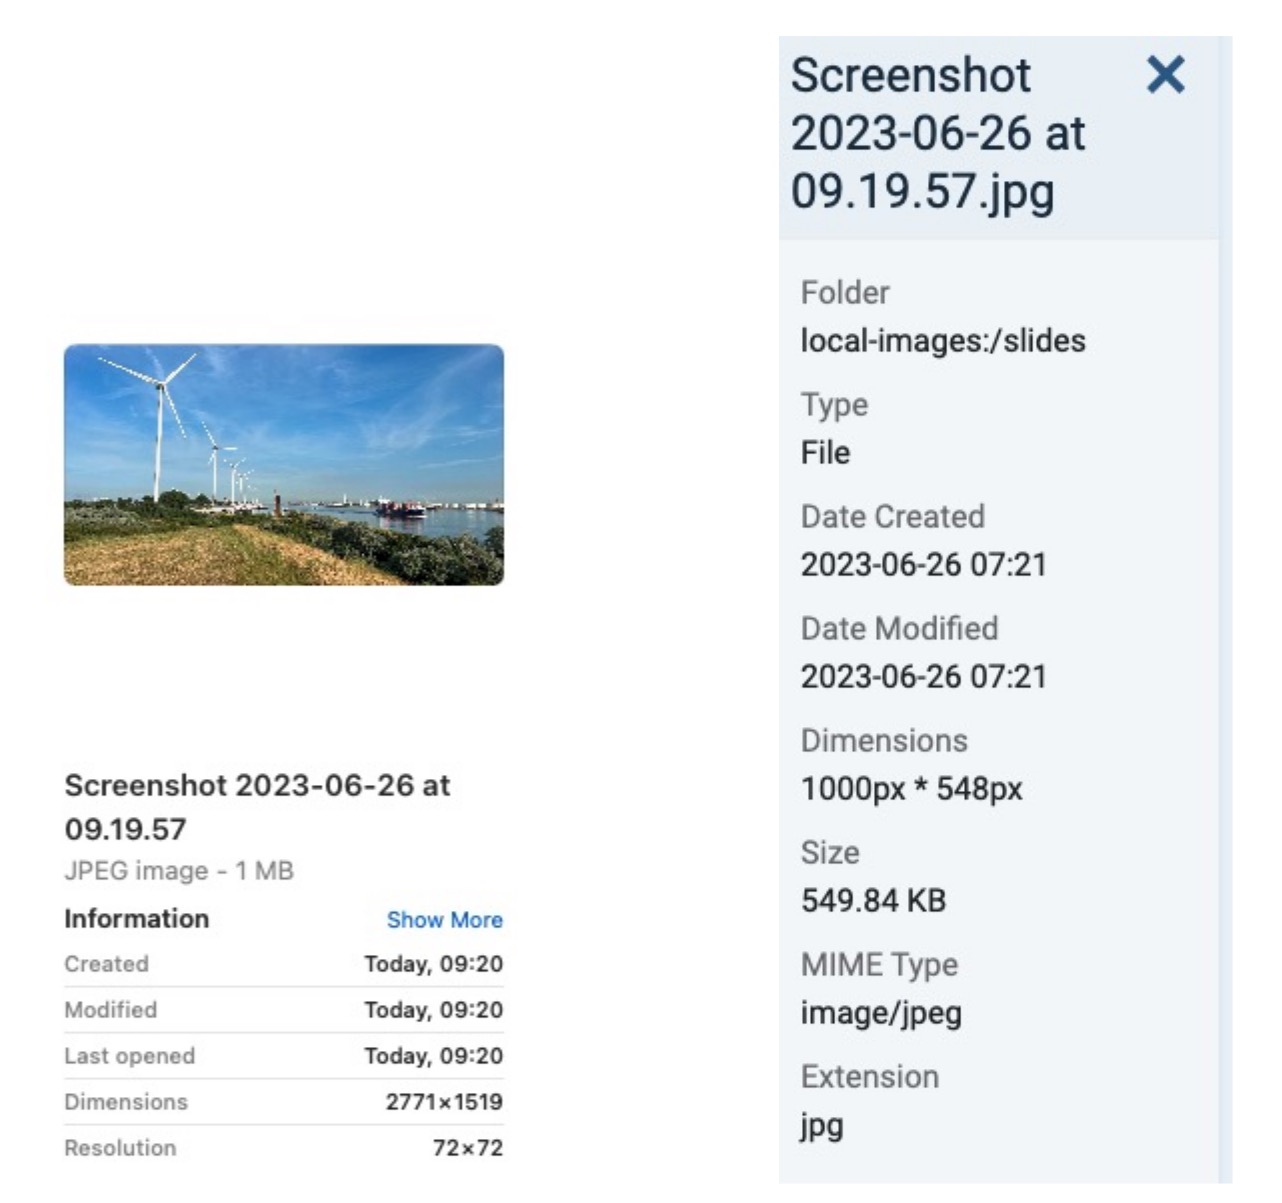
The left image shows the image information that is on my harddrive, the right one shows the image information after upload. As you can see, the dimensions are different, according to my settings in the plugin, and even better, the size is also different.

Simply setting up the plugin will enable you to automatically change the image size during upload. Another great feature and reason to stick to the core!

1
Explore The Core: Articles Related
How I became a Joomler - Patrick Smits
 

Comments 3

Already Registered? Login Here
Daniel Tan on Monday, 24 July 2023 07:30
PHP Error: imagecreatefromstring

I have tried configuring the image dimensions, following the instructions above and encountered this error when uploading images using the media manager:

Call to undefined function imagecreatefromstring()

What other server configuration do I need to enable?

0
I have tried configuring the image dimensions, following the instructions above and encountered this error when uploading images using the media manager: Call to undefined function imagecreatefromstring() What other server configuration do I need to enable?
Maarten Blokdijk on Monday, 24 July 2023 14:32
HP installation might be lacking the GD extension

It appears that your PHP installation might be lacking the GD extension or it might not be enabled. If you have access to your server's extensions, please consider enabling the GD PHP extension. Alternatively, you can get in touch with your web hosting provider and ask them to enable the GD extension for you.

It's important to note that in PHP 8+, the name of the extension has changed from php_gd2.dll to php_gd.dll, without the "2". If you have any user.ini or php.ini files, please modify them accordingly. When using PHP 8, it should be php_gd.dll, not php_gd2.dll.

To verify whether the GD library is enabled, you can create a new file containing the PHP function phpinfo(); and check the PHP information provided.

Ensure that your php.ini file has the necessary line enabled for PHP 8.

0
It appears that your PHP installation might be lacking the GD extension or it might not be enabled. If you have access to your server's extensions, please consider enabling the GD PHP extension. Alternatively, you can get in touch with your web hosting provider and ask them to enable the GD extension for you. It's important to note that in PHP 8+, the name of the extension has changed from php_gd2.dll to php_gd.dll, without the "2". If you have any user.ini or php.ini files, please modify them accordingly. When using PHP 8, it should be php_gd.dll, not php_gd2.dll. To verify whether the GD library is enabled, you can create a new file containing the PHP function phpinfo(); and check the PHP information provided. Ensure that your php.ini file has the necessary line enabled for PHP 8.
Daniel Tan on Tuesday, 25 July 2023 06:41
Thanks for the response

Hi Maarten,

Thank you for the response. I will get my VPS admin to verify if the extension has been enabled.

0
Hi Maarten, Thank you for the response. :) I will get my VPS admin to verify if the extension has been enabled.

By accepting you will be accessing a service provided by a third-party external to https://magazine.joomla.org/