

Joomla 4 is here, and with it comes a completely revamped administration panel. Dashboards, side bars, and quick icons, oh my! As developers and integrators, we can take full advantage of all of these features and modules - but our clients might feel overwhelmed with the default options available to Super Users:

That's a lot, and frankly, our clients usually don't need to see all of that!
By the end of this series, we will have a streamlined, optimized back-end for our clients that puts all of their most common tasks at their fingertips... and hides anything they don't need to see.
This post goes over the basics of adding a custom user group and view access level for your clients so you can precisely control what they see. This is pretty much the same as Joomla 3, so if you are familiar with this already, feel free to skip ahead to Part 2 of this series.
Users, User Groups, and Viewing Access Levels
Joomla is super powerful and allows you to finely control user permissions, but it can be hard to wrap your head around all the different terms and options at first, so here's a quick primer!
A user is an individual login. Each person should have their own user; the login should not be shared among multiple people for security purposes.
A user group is, well, a group of users. User groups determine what a user can do. A user can belong to multiple user groups. Joomla comes set up with predefined user groups for convenience:

As you can see, user groups are nested within each other, and they build upon each other. So for example, "Registered" has basic permissions, "Author" has all those permissions plus a few more, "Editor" has the same permissions as "Author" plus more, and so on.
"Super Users" can do everything on the site; their permissions cannot be limited. It's best to have as few Super Users as possible at any given time, and to make sure you deactivate old Super User accounts regularly.
Finally, access levels determine what users can see, based on their user group. Like user groups, Joomla comes with a few access levels pre-configured for convenience:

User groups can be assigned to more than one view access level. Before loading any page in the front or back end, Joomla checks whether the user is logged in, what user groups they belong to, and whether they have a view access level that enables them to view the page.
Phew! So what does that mean for our clients?
Well, you could start with one of the predefined user groups if you want (Manager would probably be closest), but I like to start from scratch so I can tweak it as I go.
Defining a custom user group and view access level
Step 1: Create a new user group.
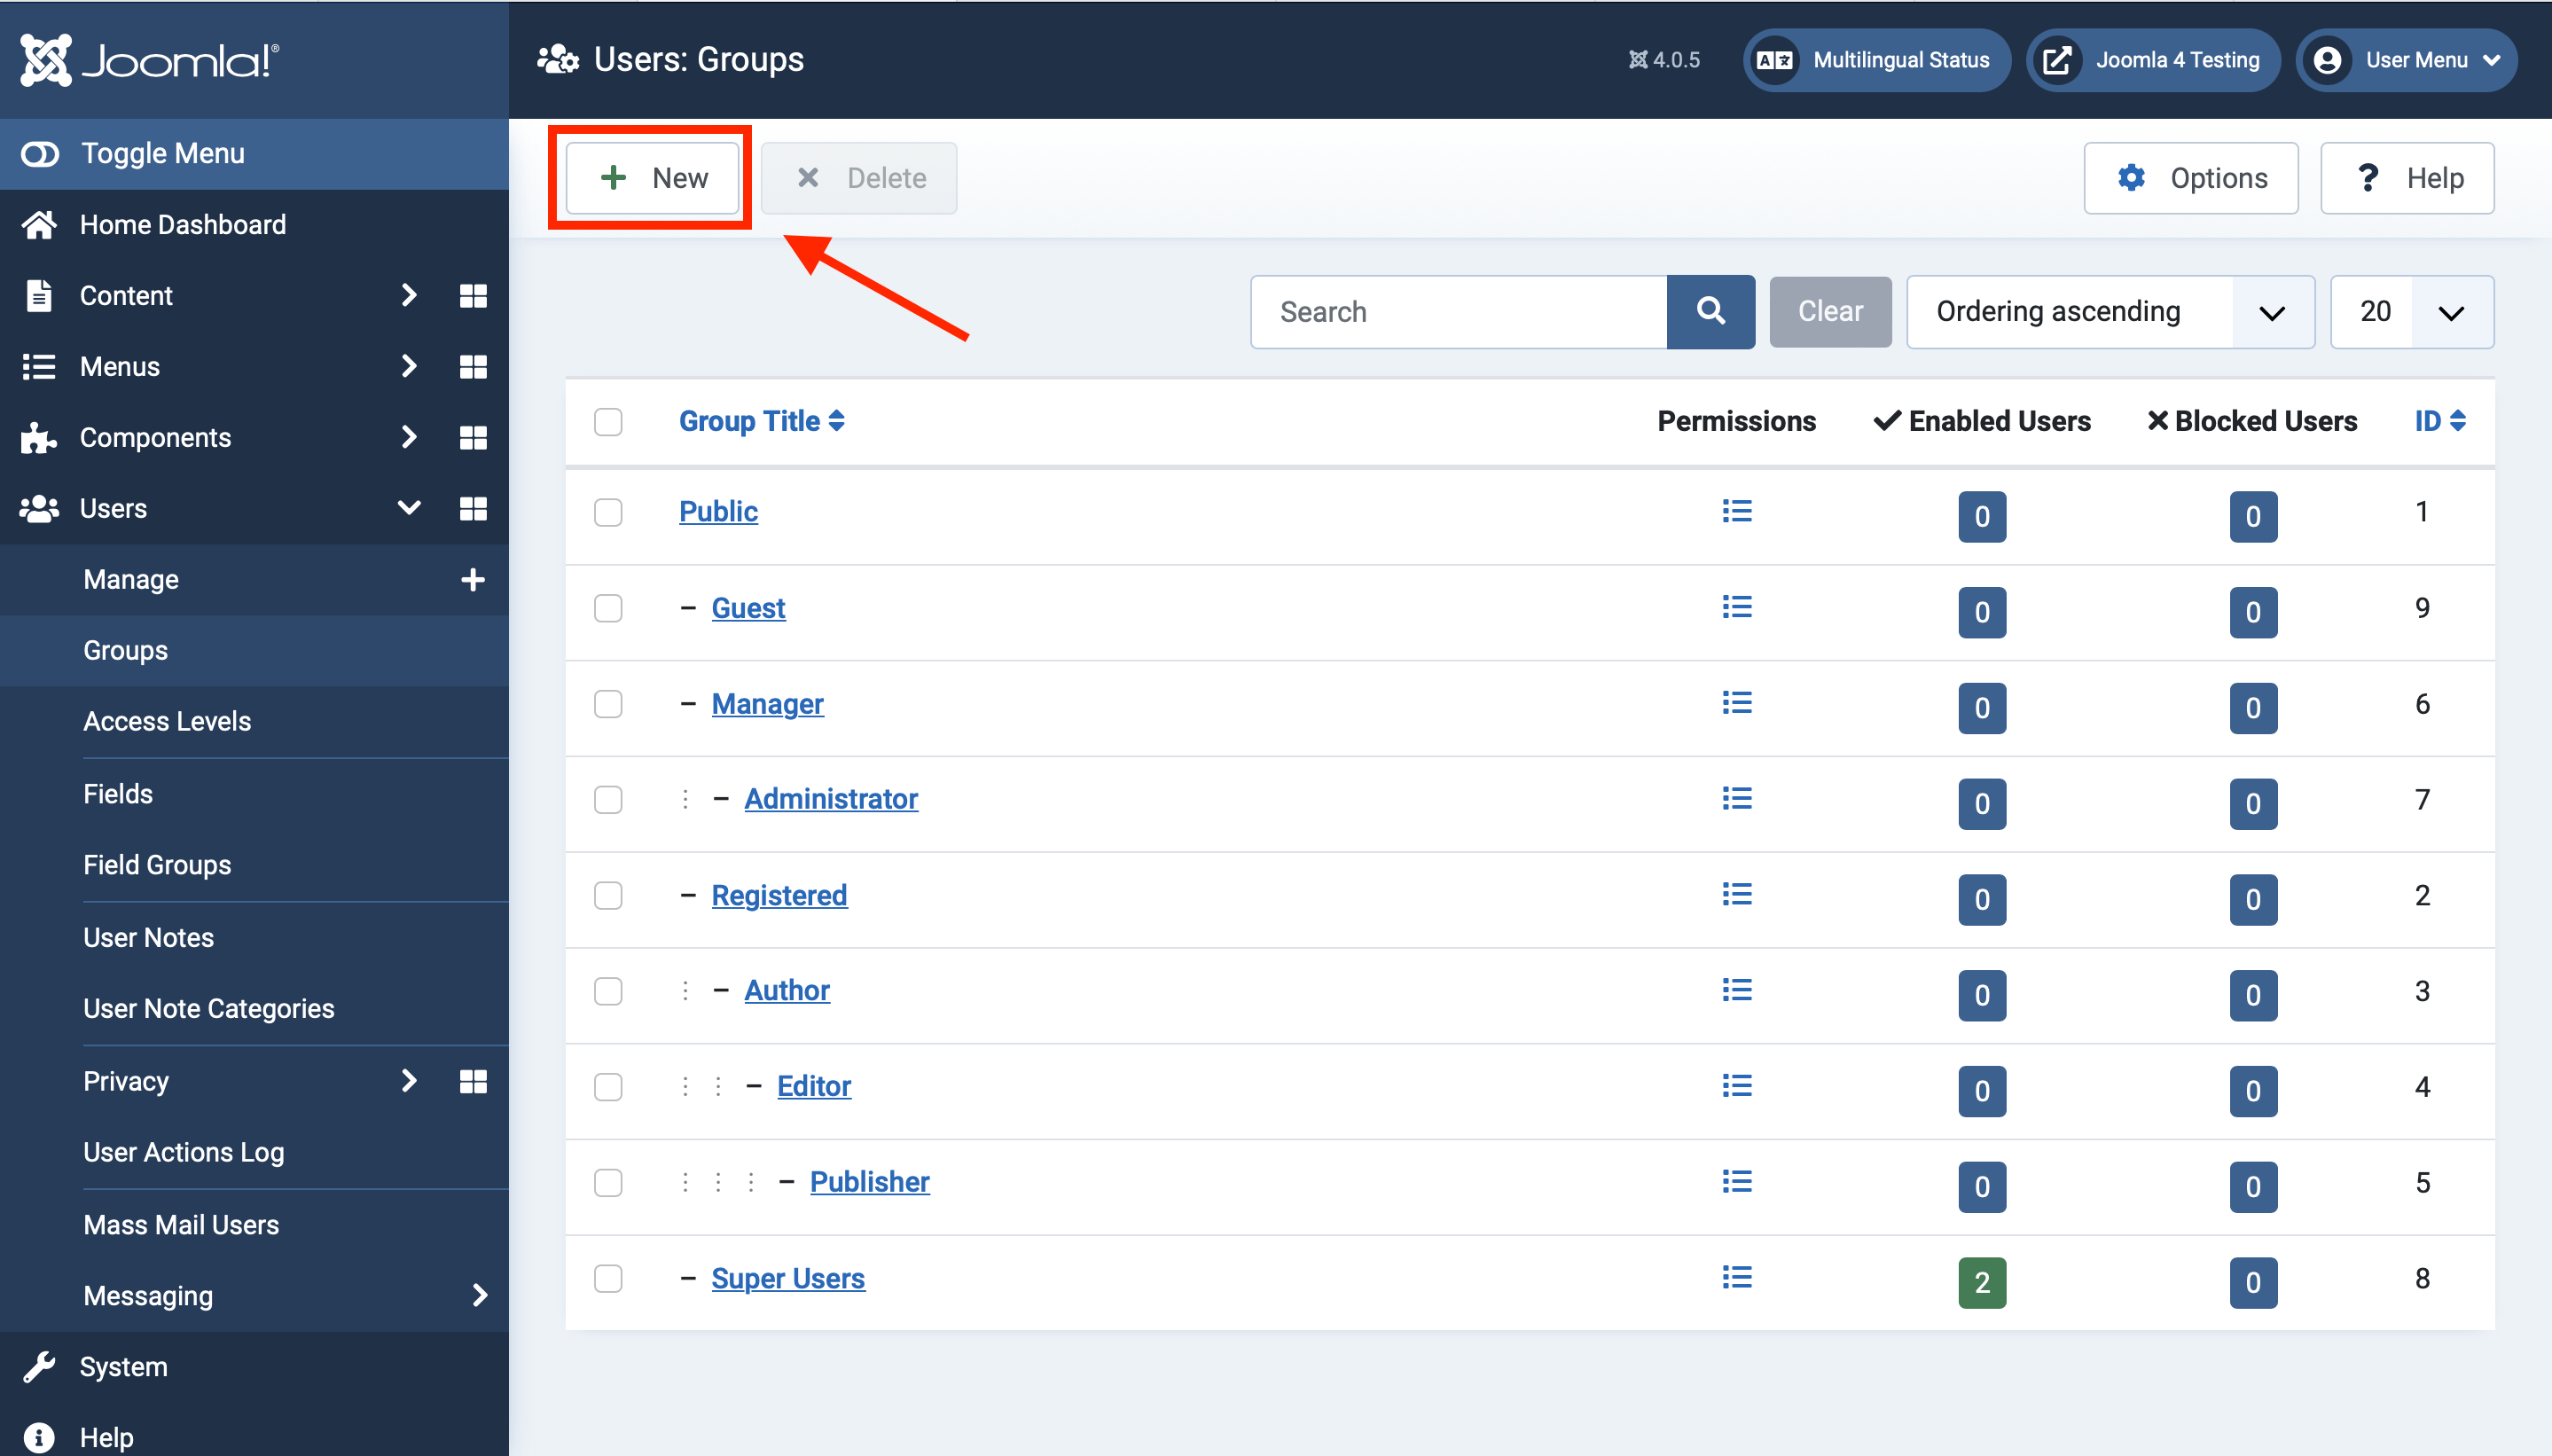
In the left-hand menu, go to Users > Groups, and then click on the "New" button.
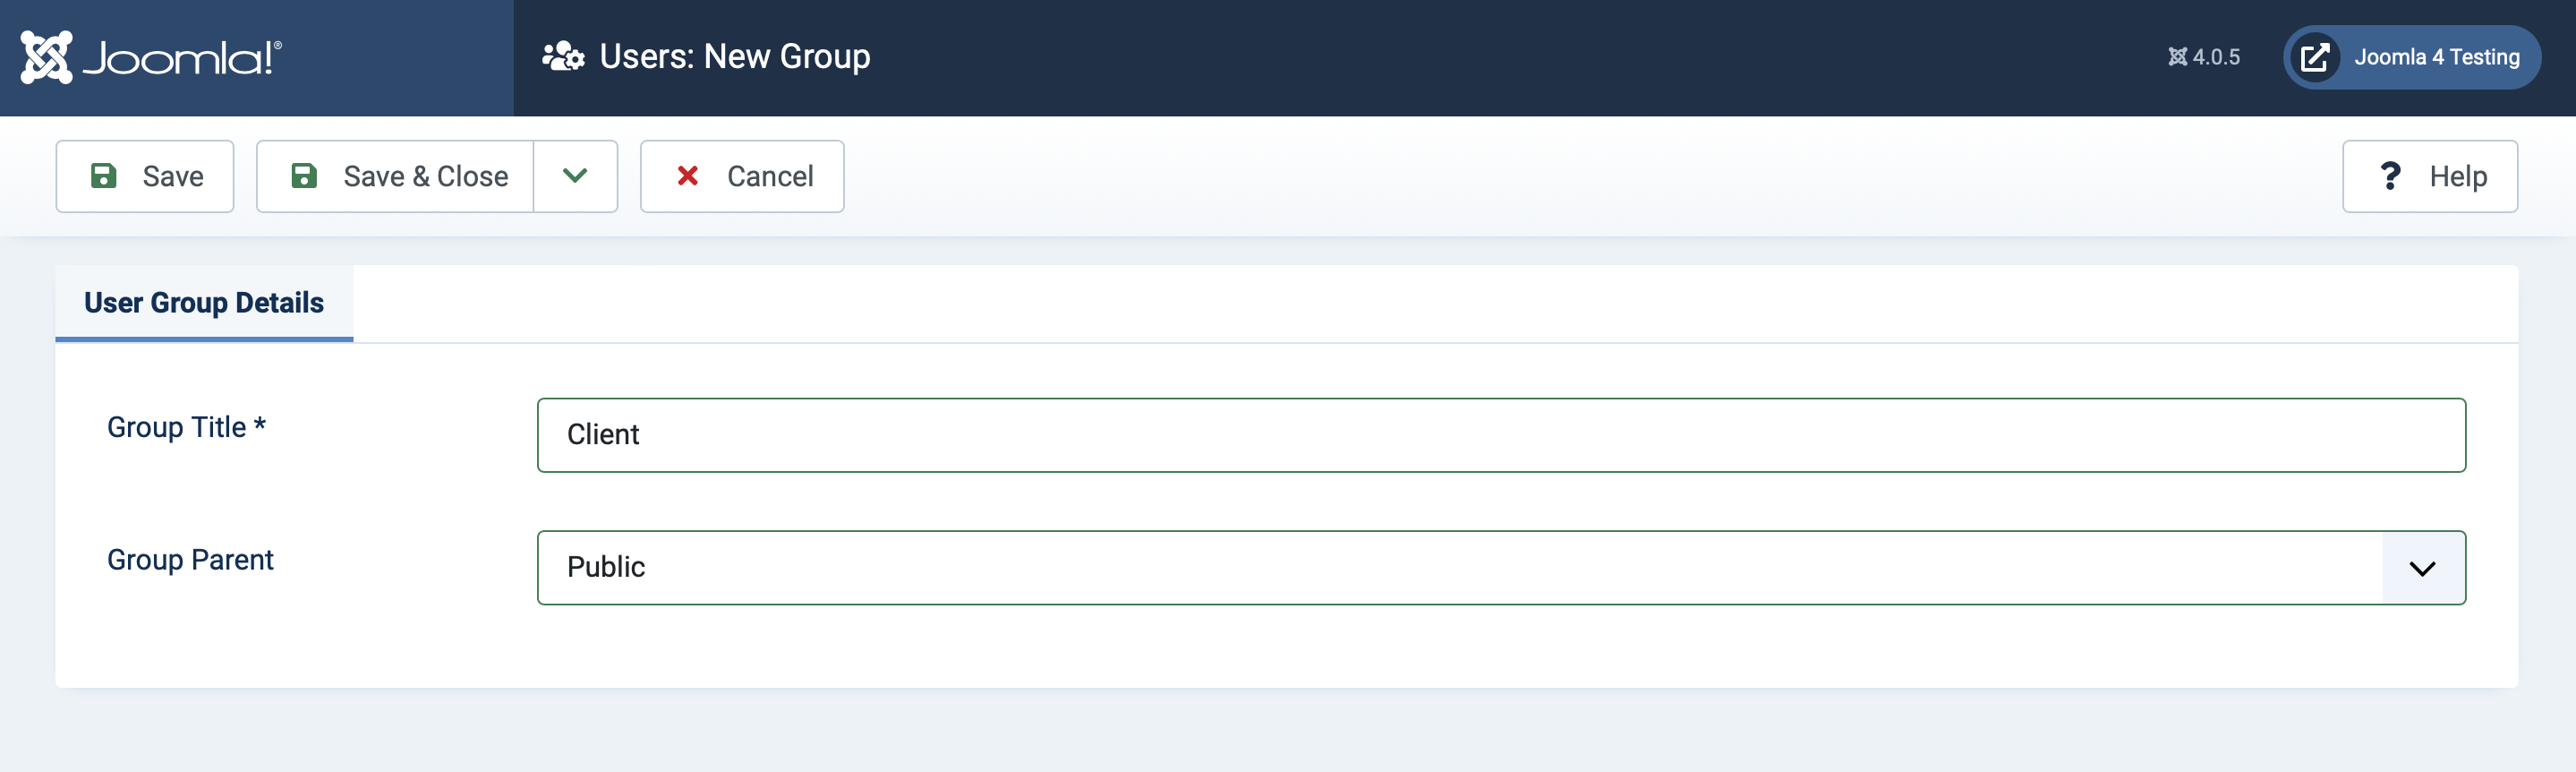
Fill out the name of the user group. I just use "Client". Make sure the parent group is "Public", so that we are starting from a blank slate with permissions. Then, click "Save and Close".
Step 2: Create a new access level, and add your new user group to it.
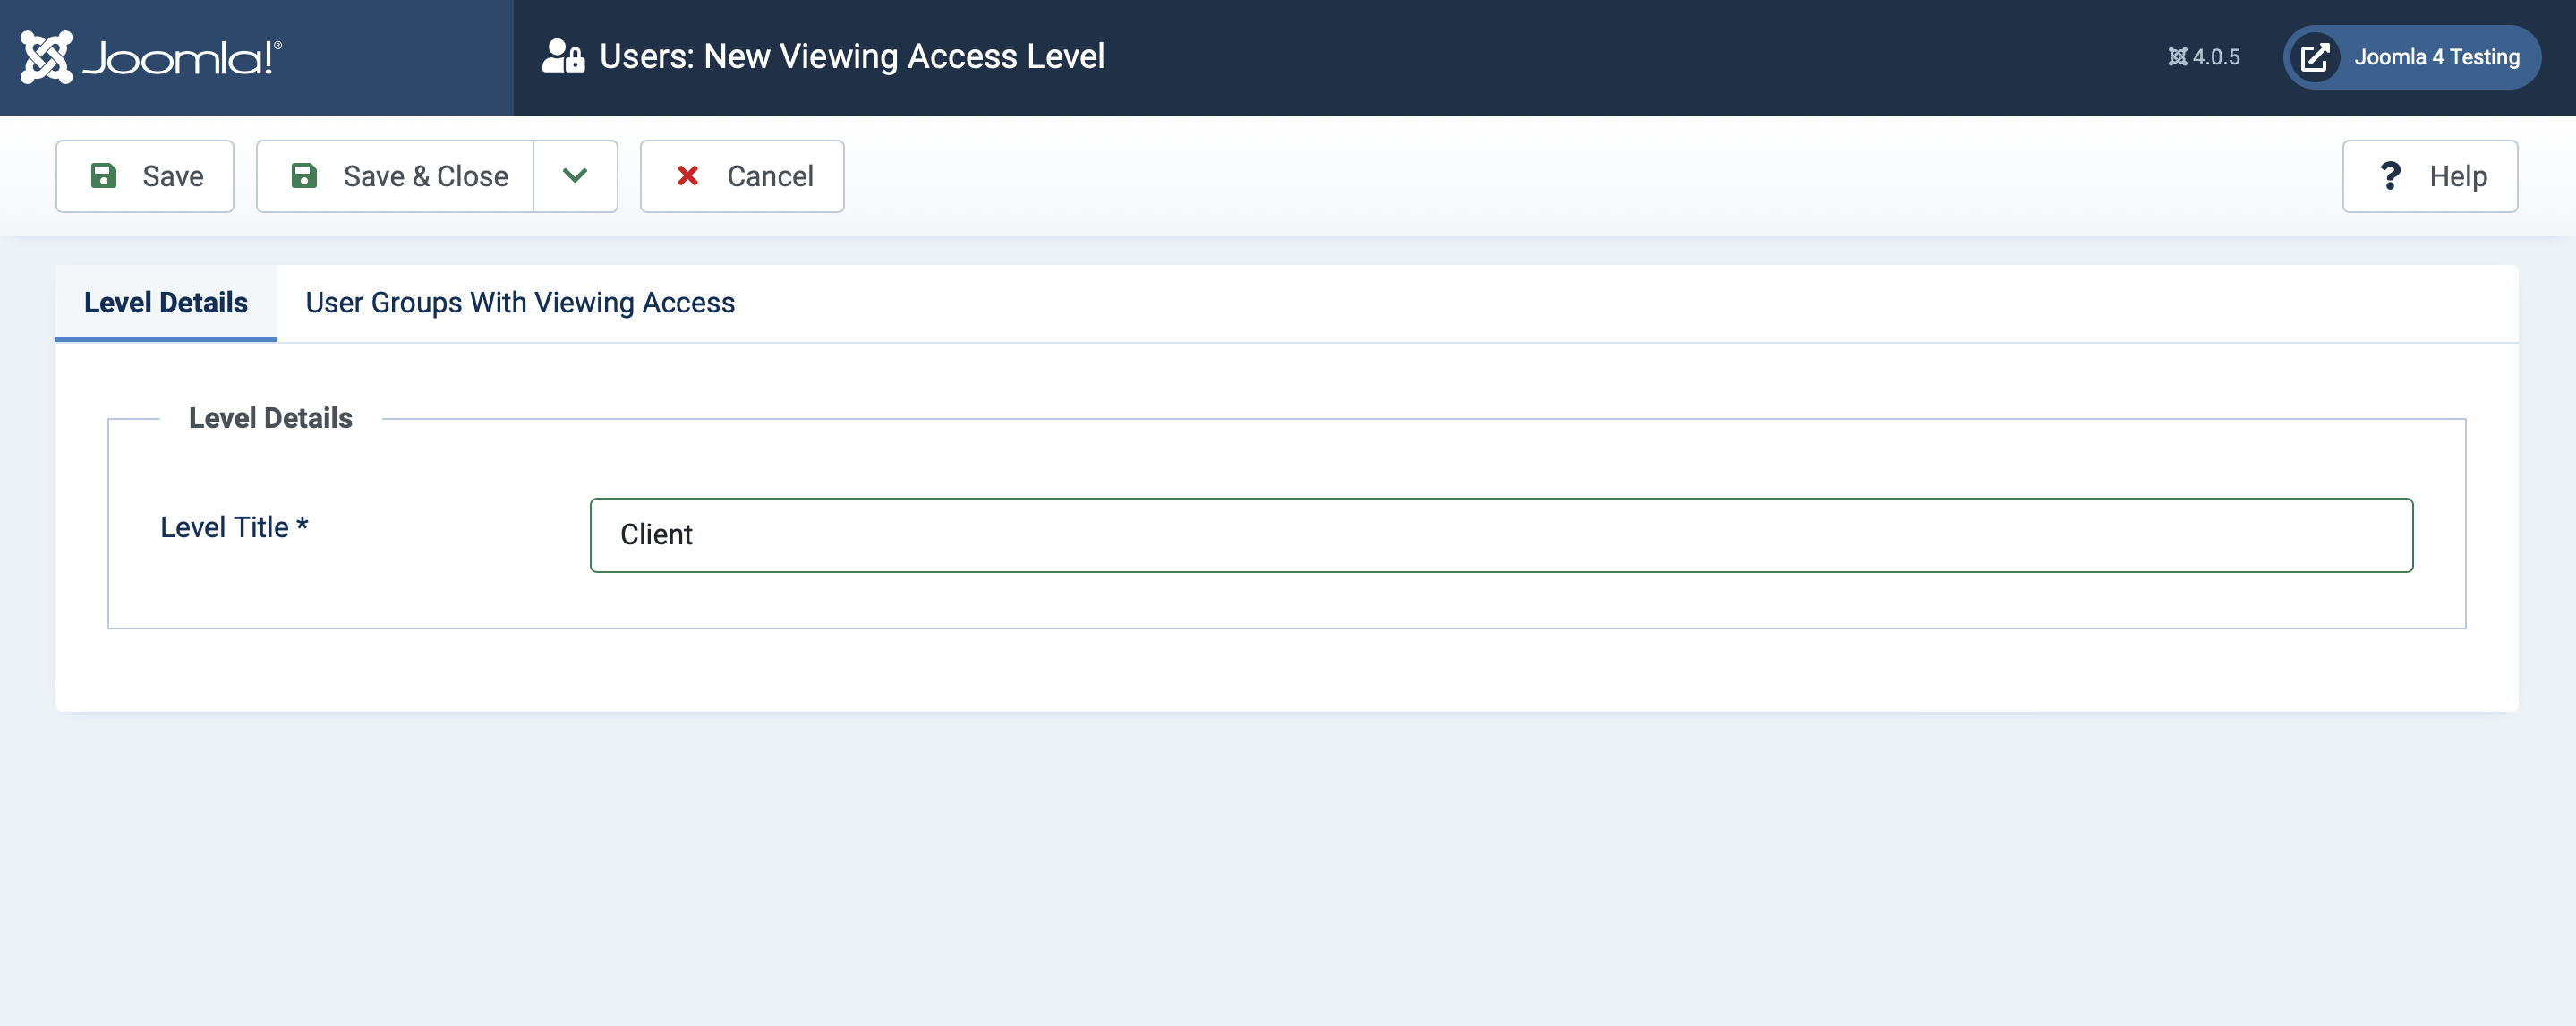
In the left-hand menu, go to Users > Access Levels, and then click on the "New" button.

Name the access level in the first tab. I like to keep things simple and use the same name as the user group, so let's go with "Client" for now.
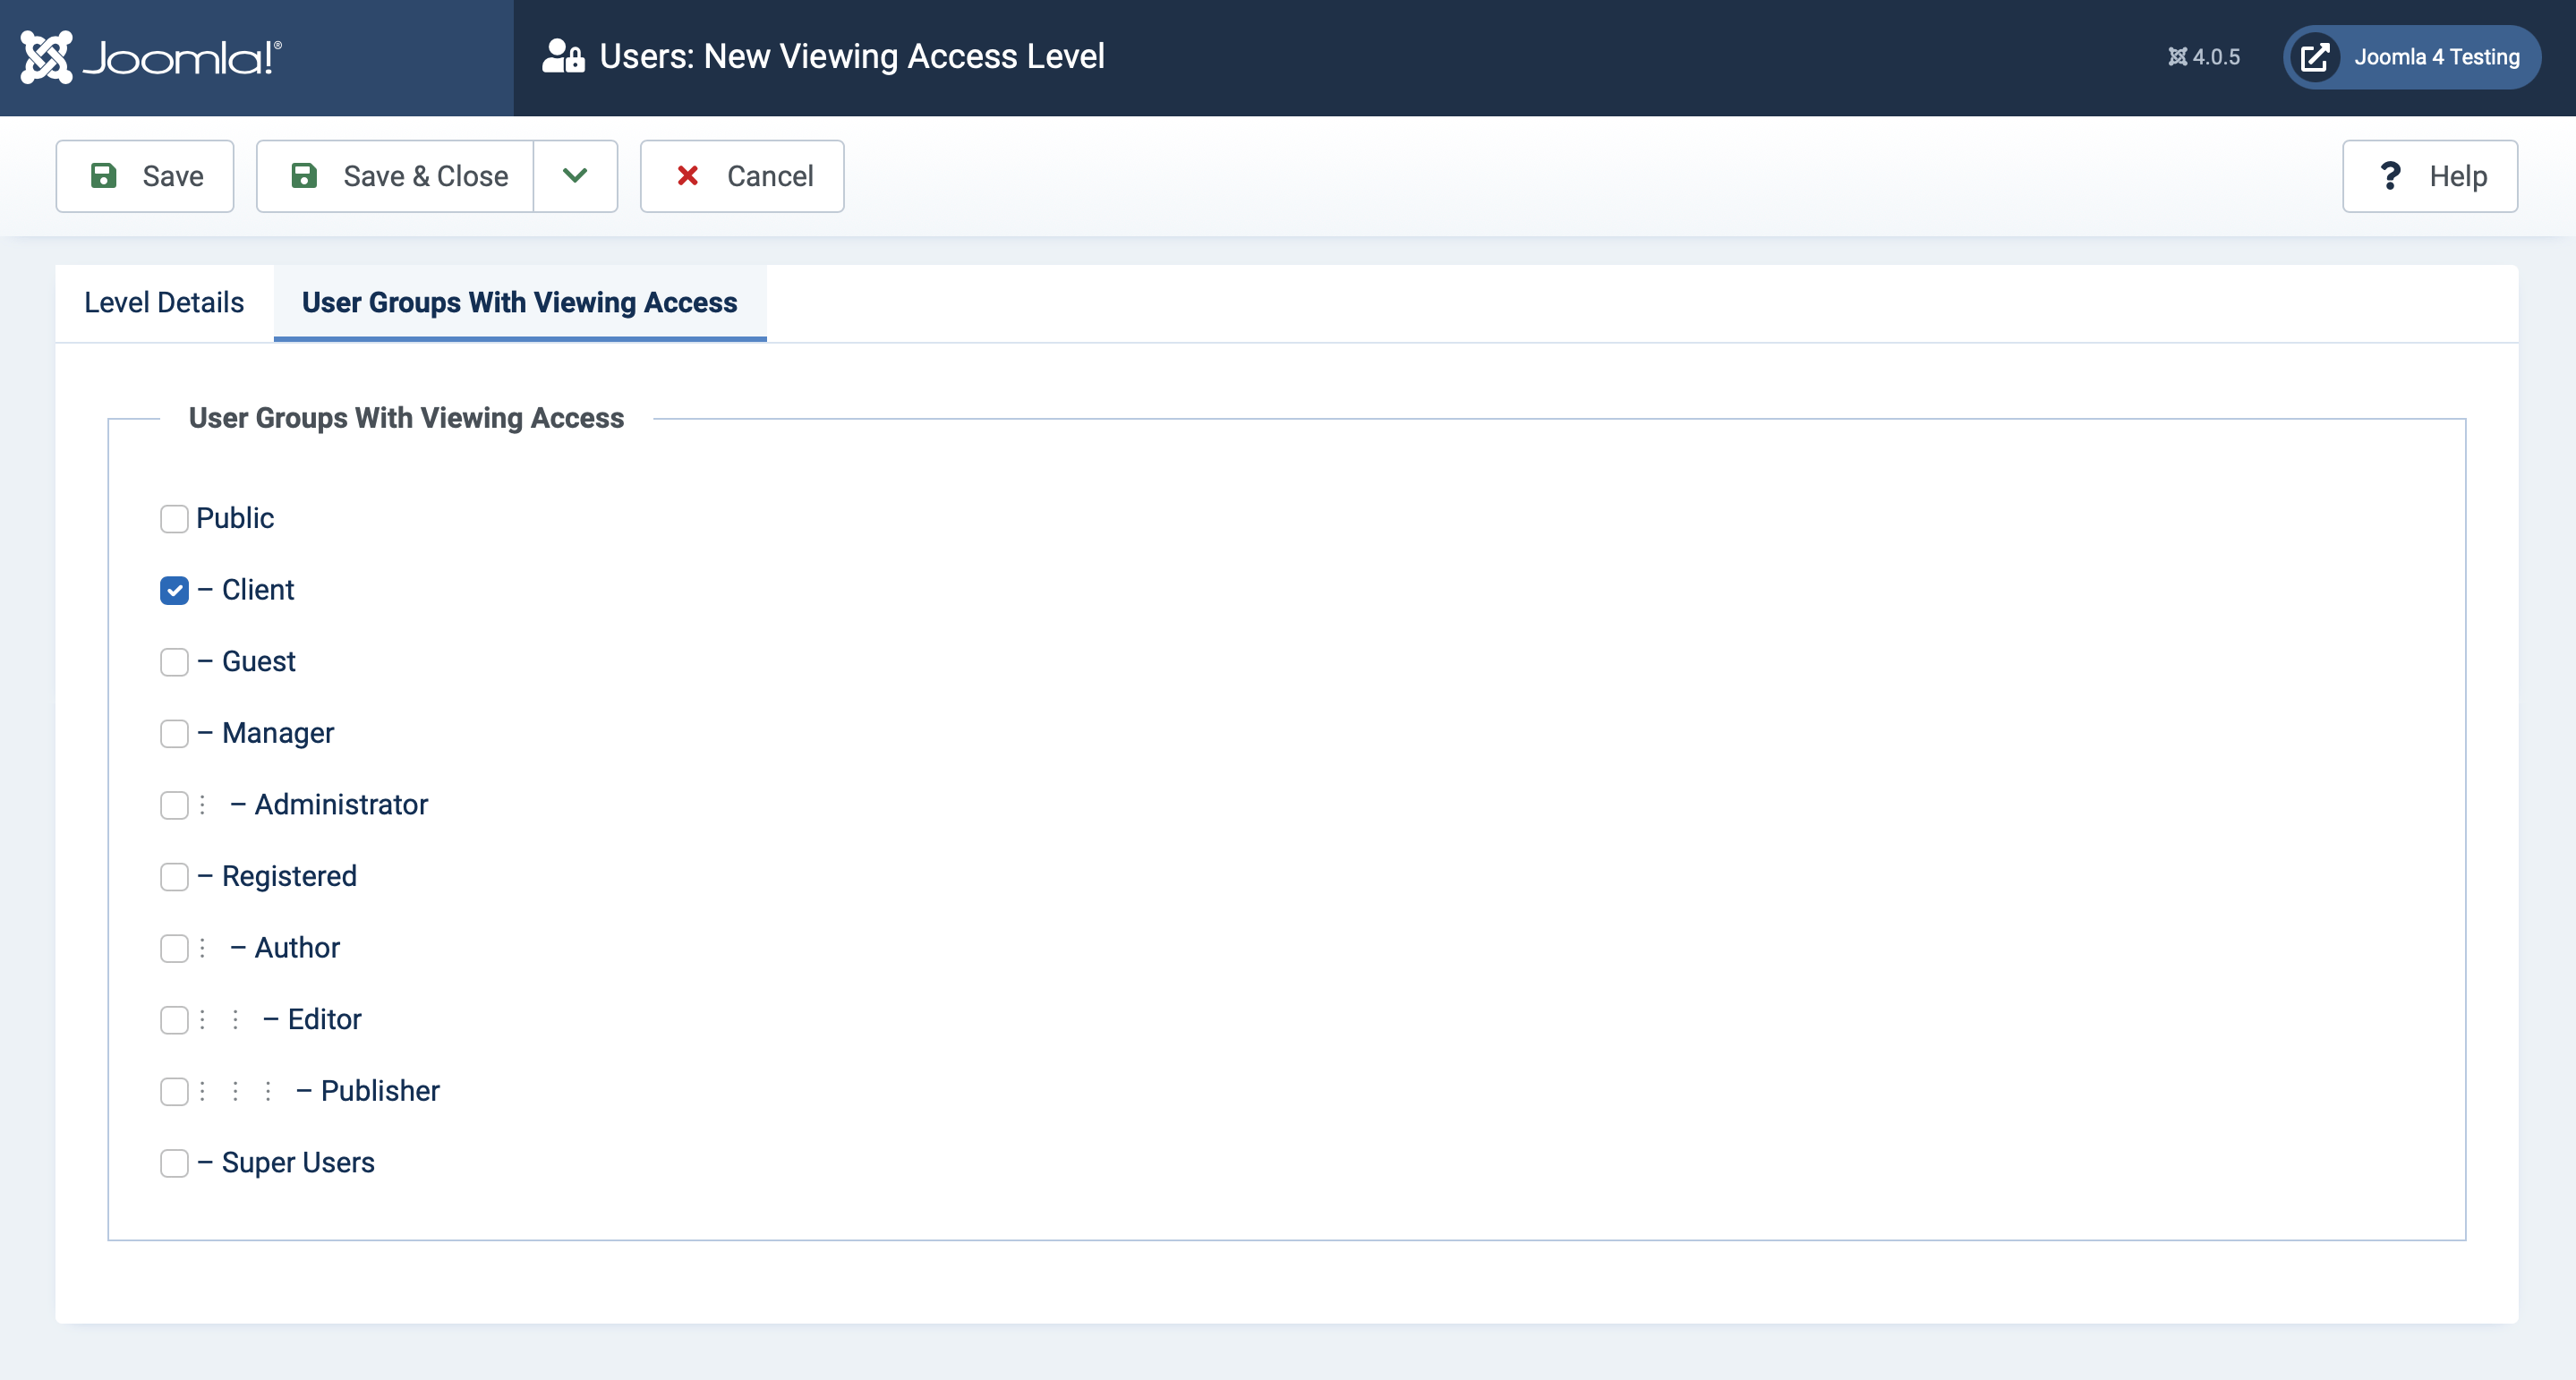
In the second tab, check the "Client" user group to add it to this level, and then Save & Close.
This means that only clients will be able to see anything set to "Client" view access level; no one else, not even Super Users, will see it. In most cases this is a good thing, because you can create specialized modules for your clients without cluttering up your own interface.
However, there are some cases when you might want to show things both to clients and to Super Users, so let's take care of that next.
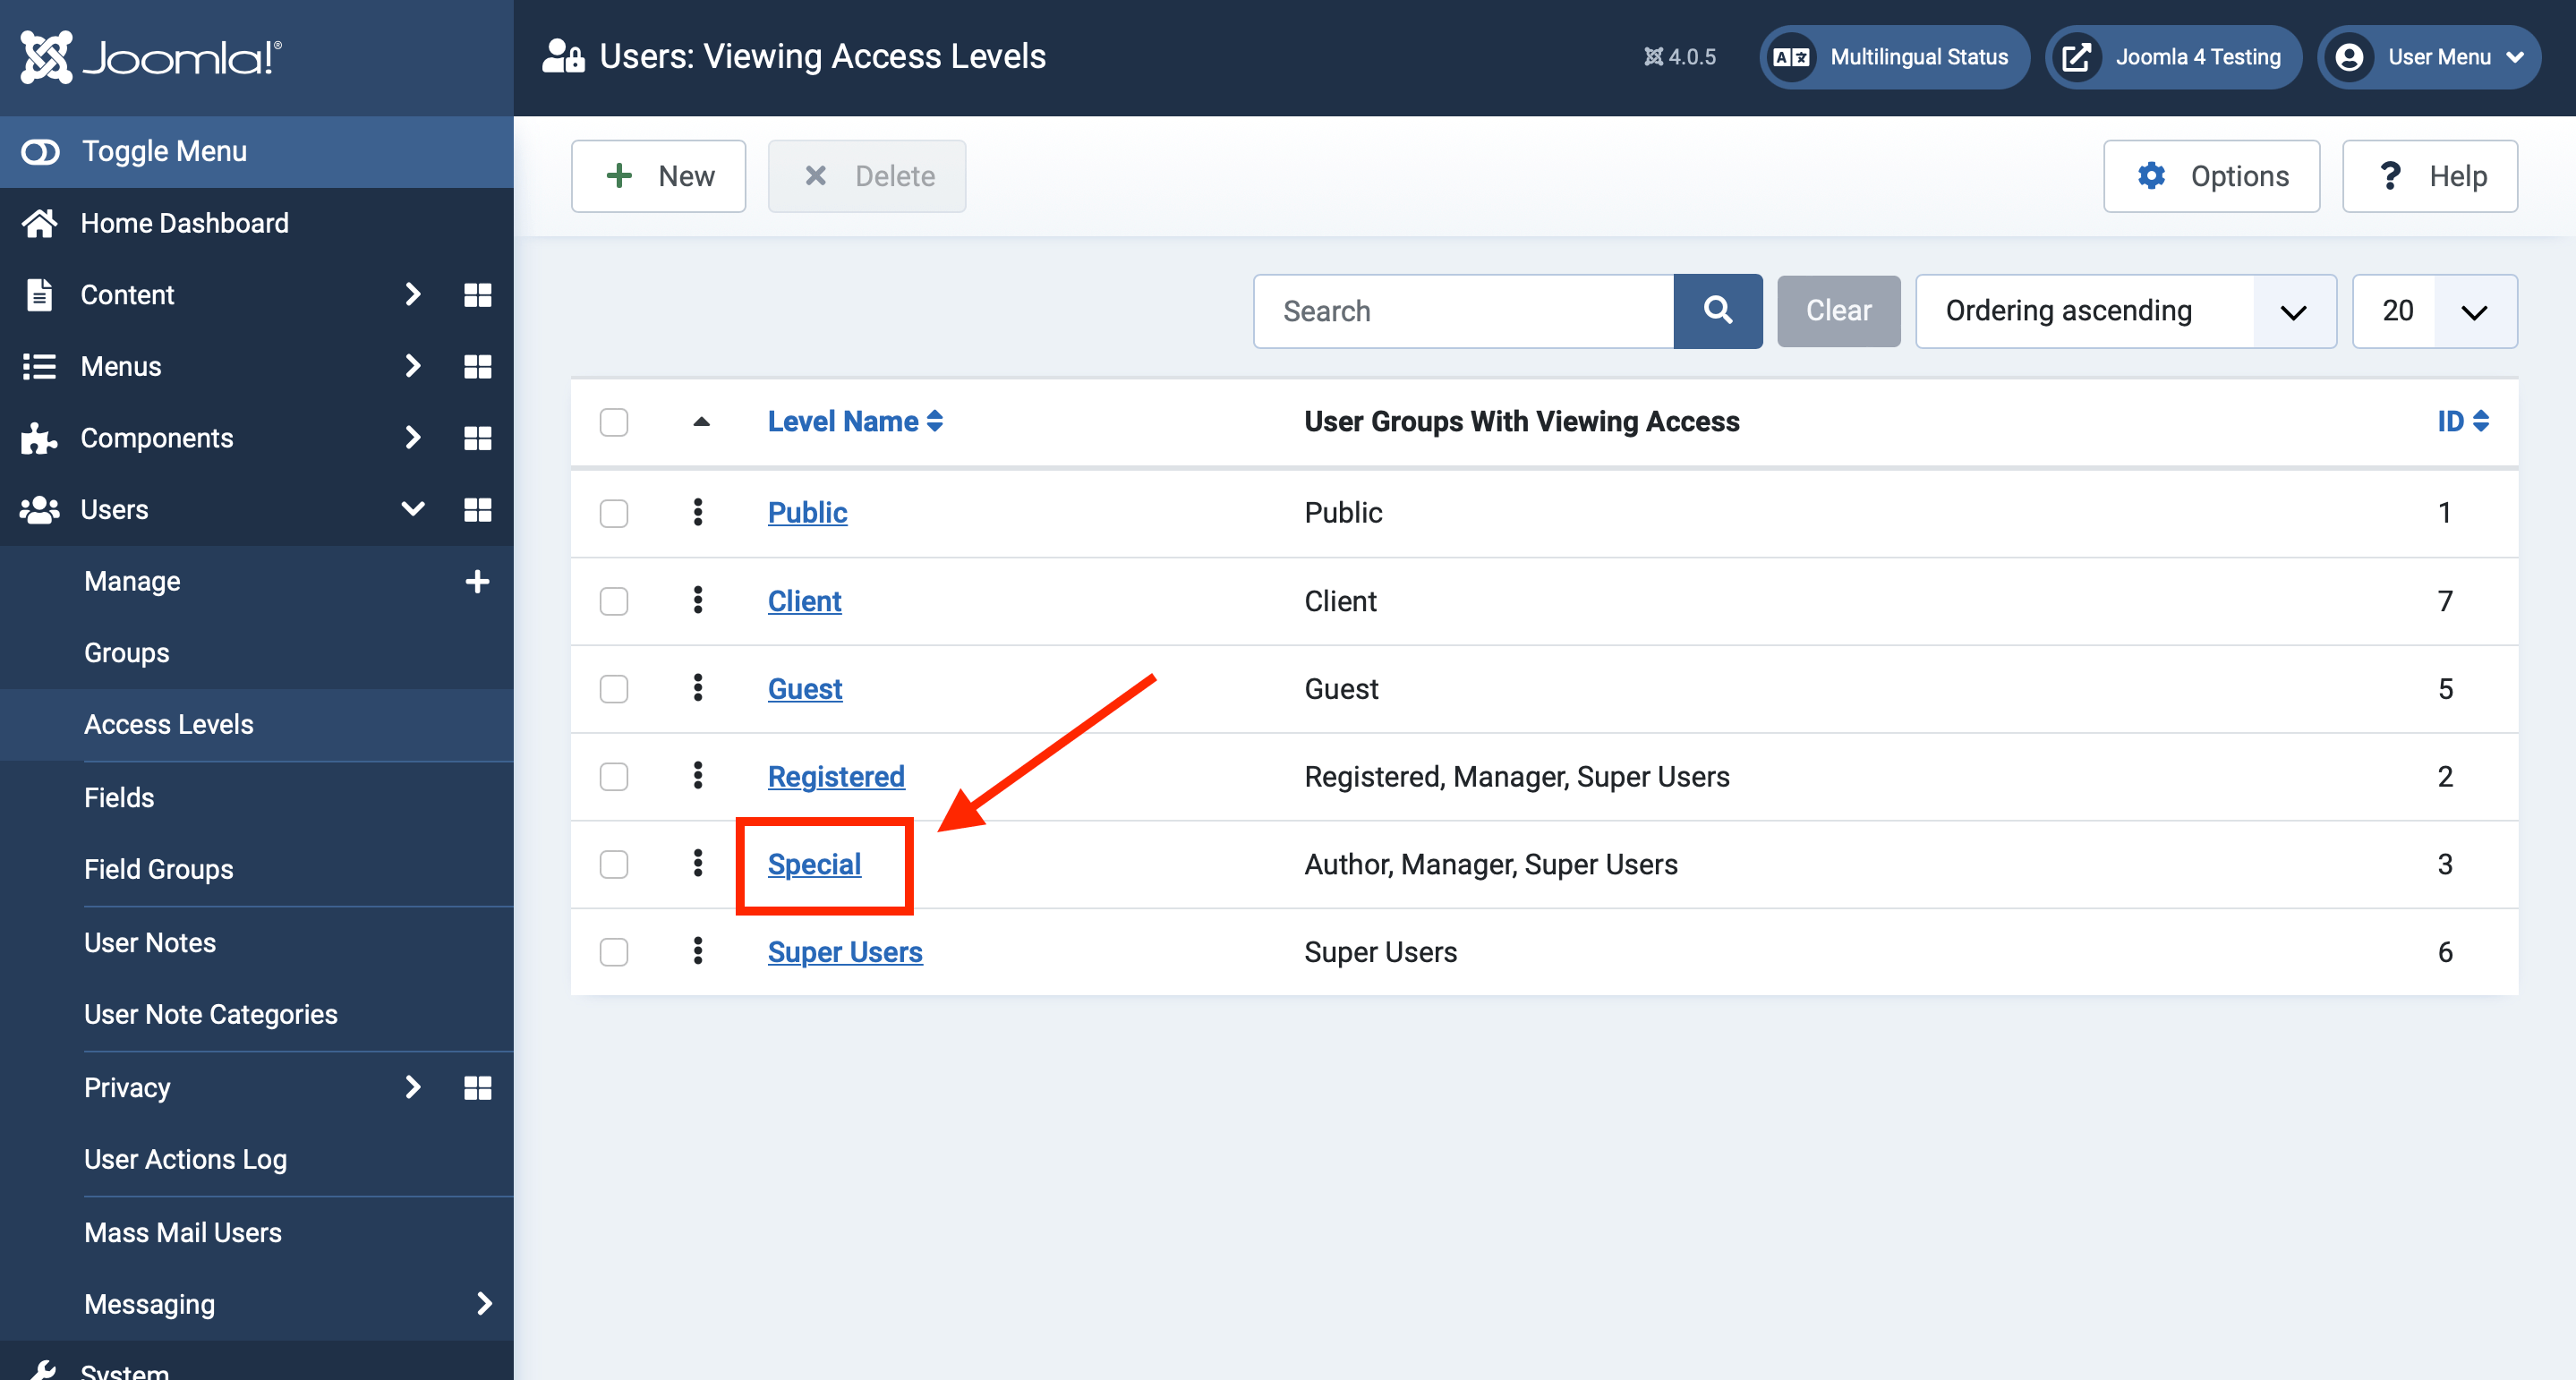
Step 3: Add the "Client" user group to the "Special" view access level.
Back in the list of access levels, click on "Special" to edit it.
Go to the second tab, and make sure you check "Client".
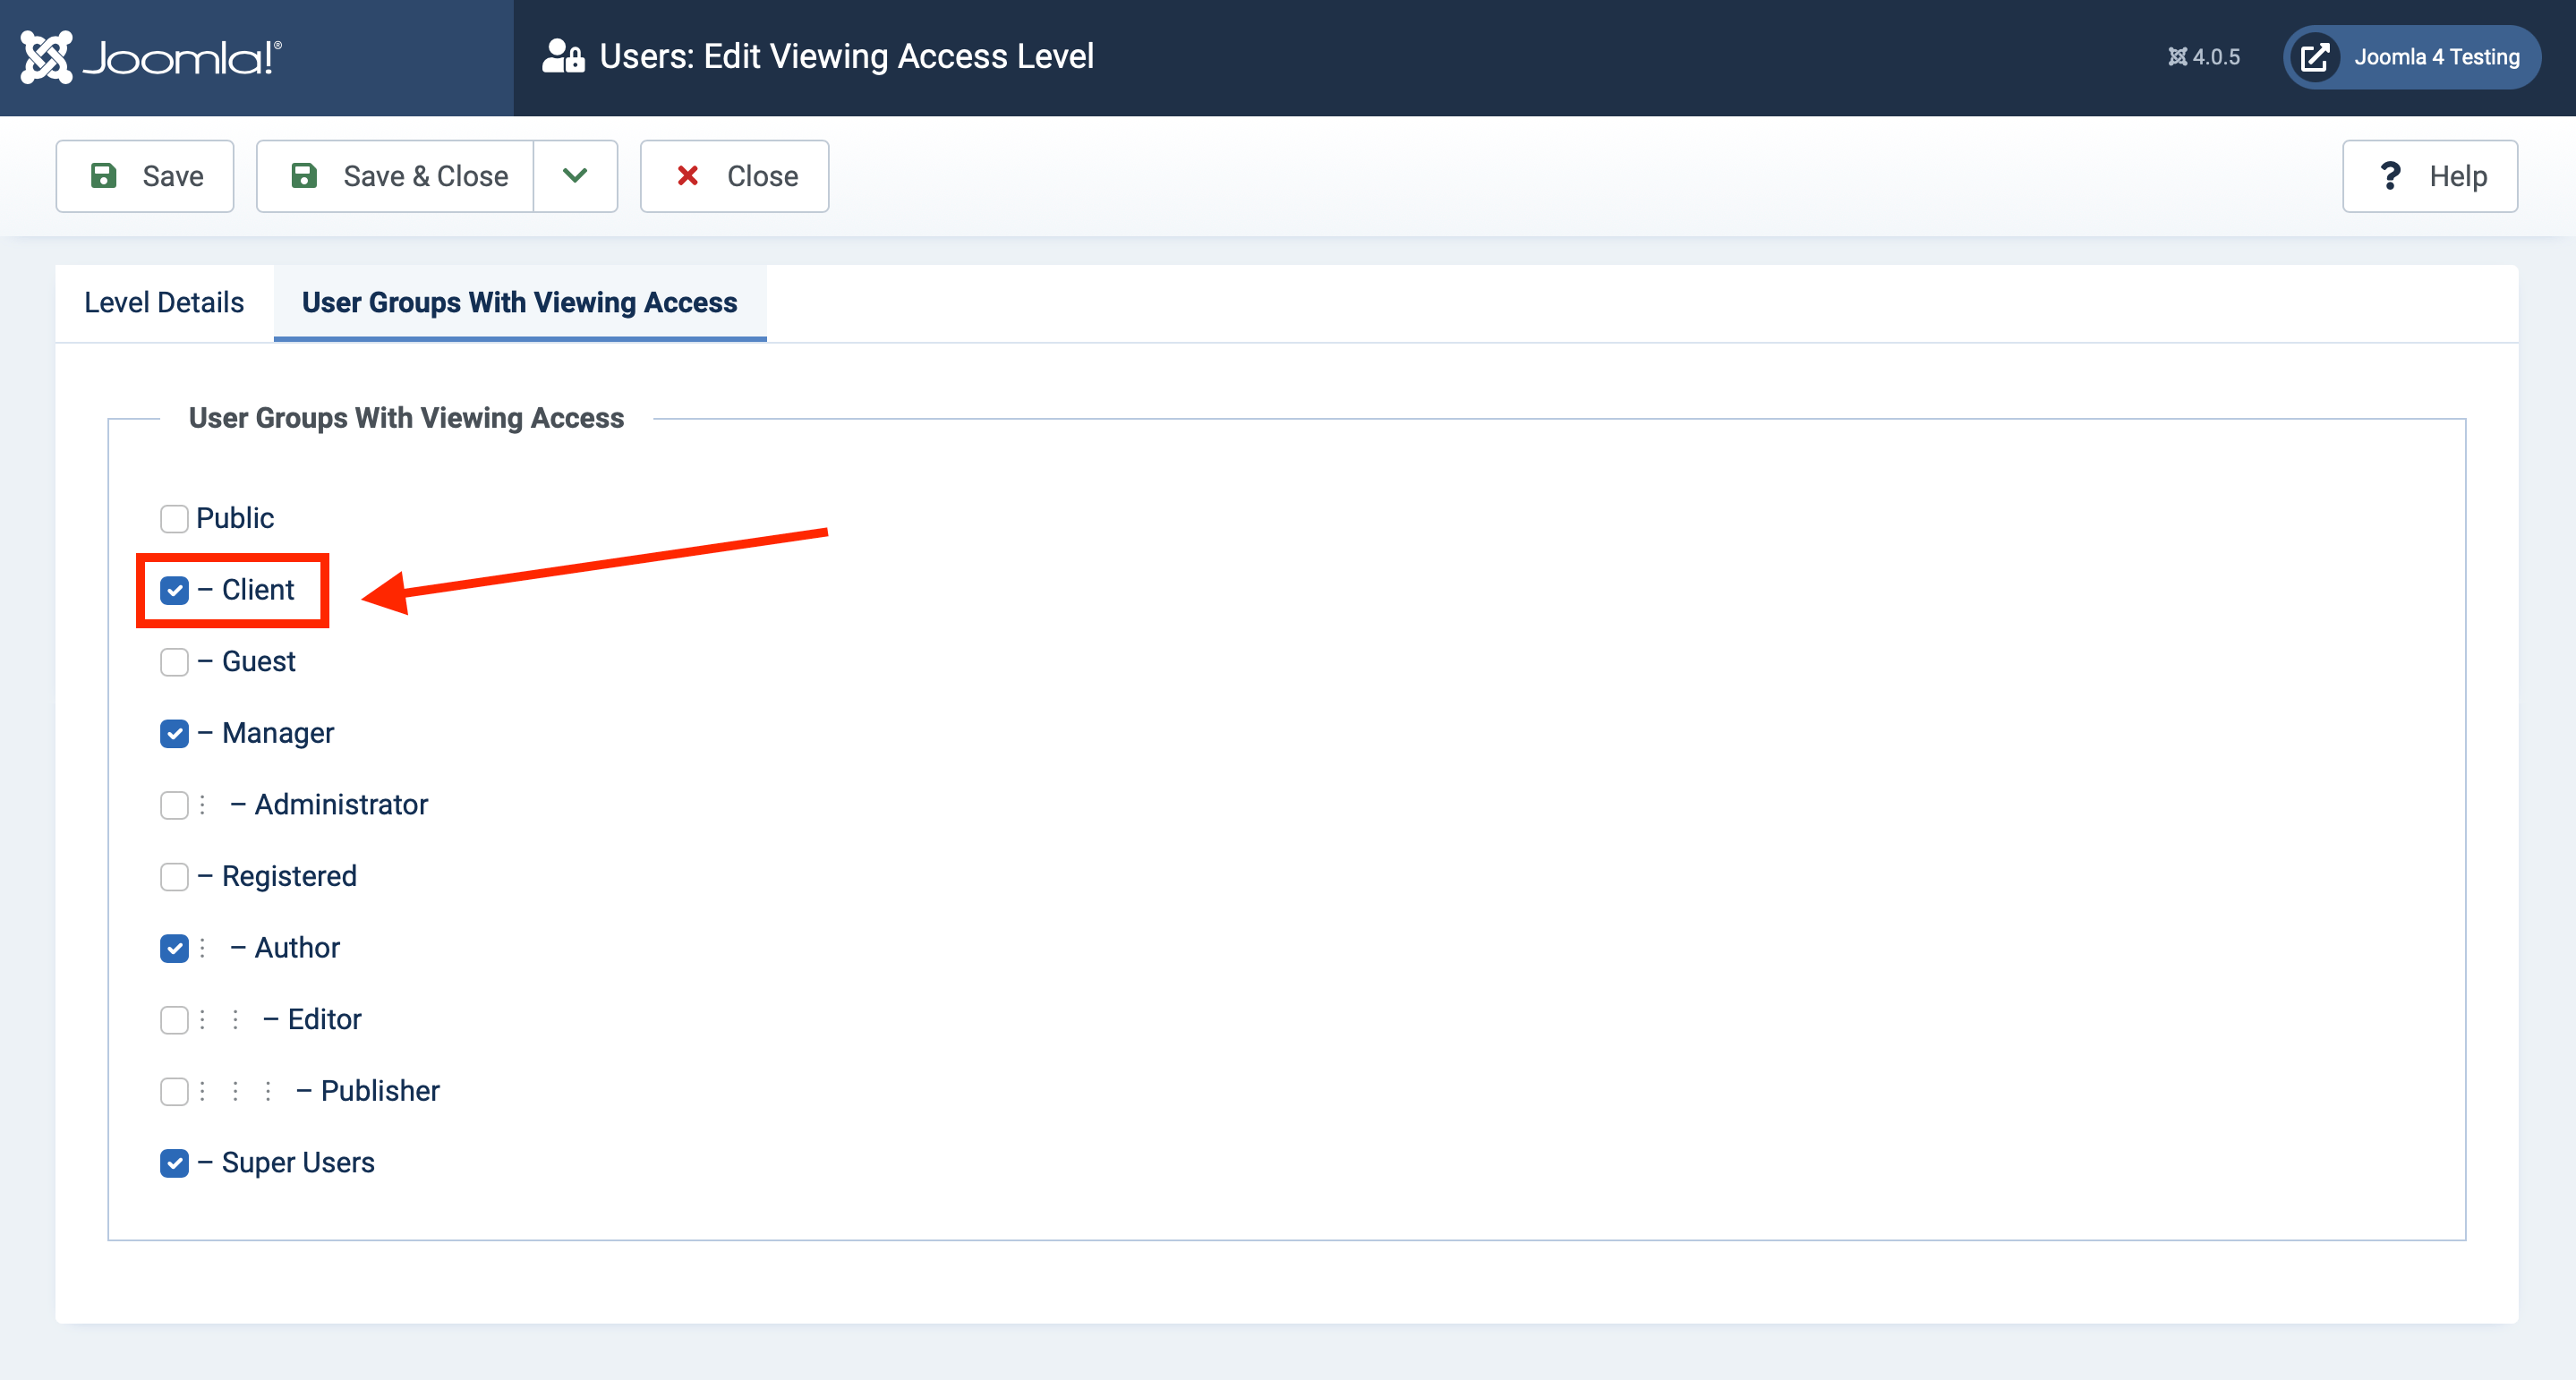
Save & Close.
Now, anything with "Special" view access will be seen by both clients and Super Users (along with managers and authors, by default).
Giving appropriate permissions to the new user group
We have a user group and a view access level, but we haven't used them yet. If we created a user now and assigned it to "client", they wouldn't even be able to log in! So, let's take care of that next.
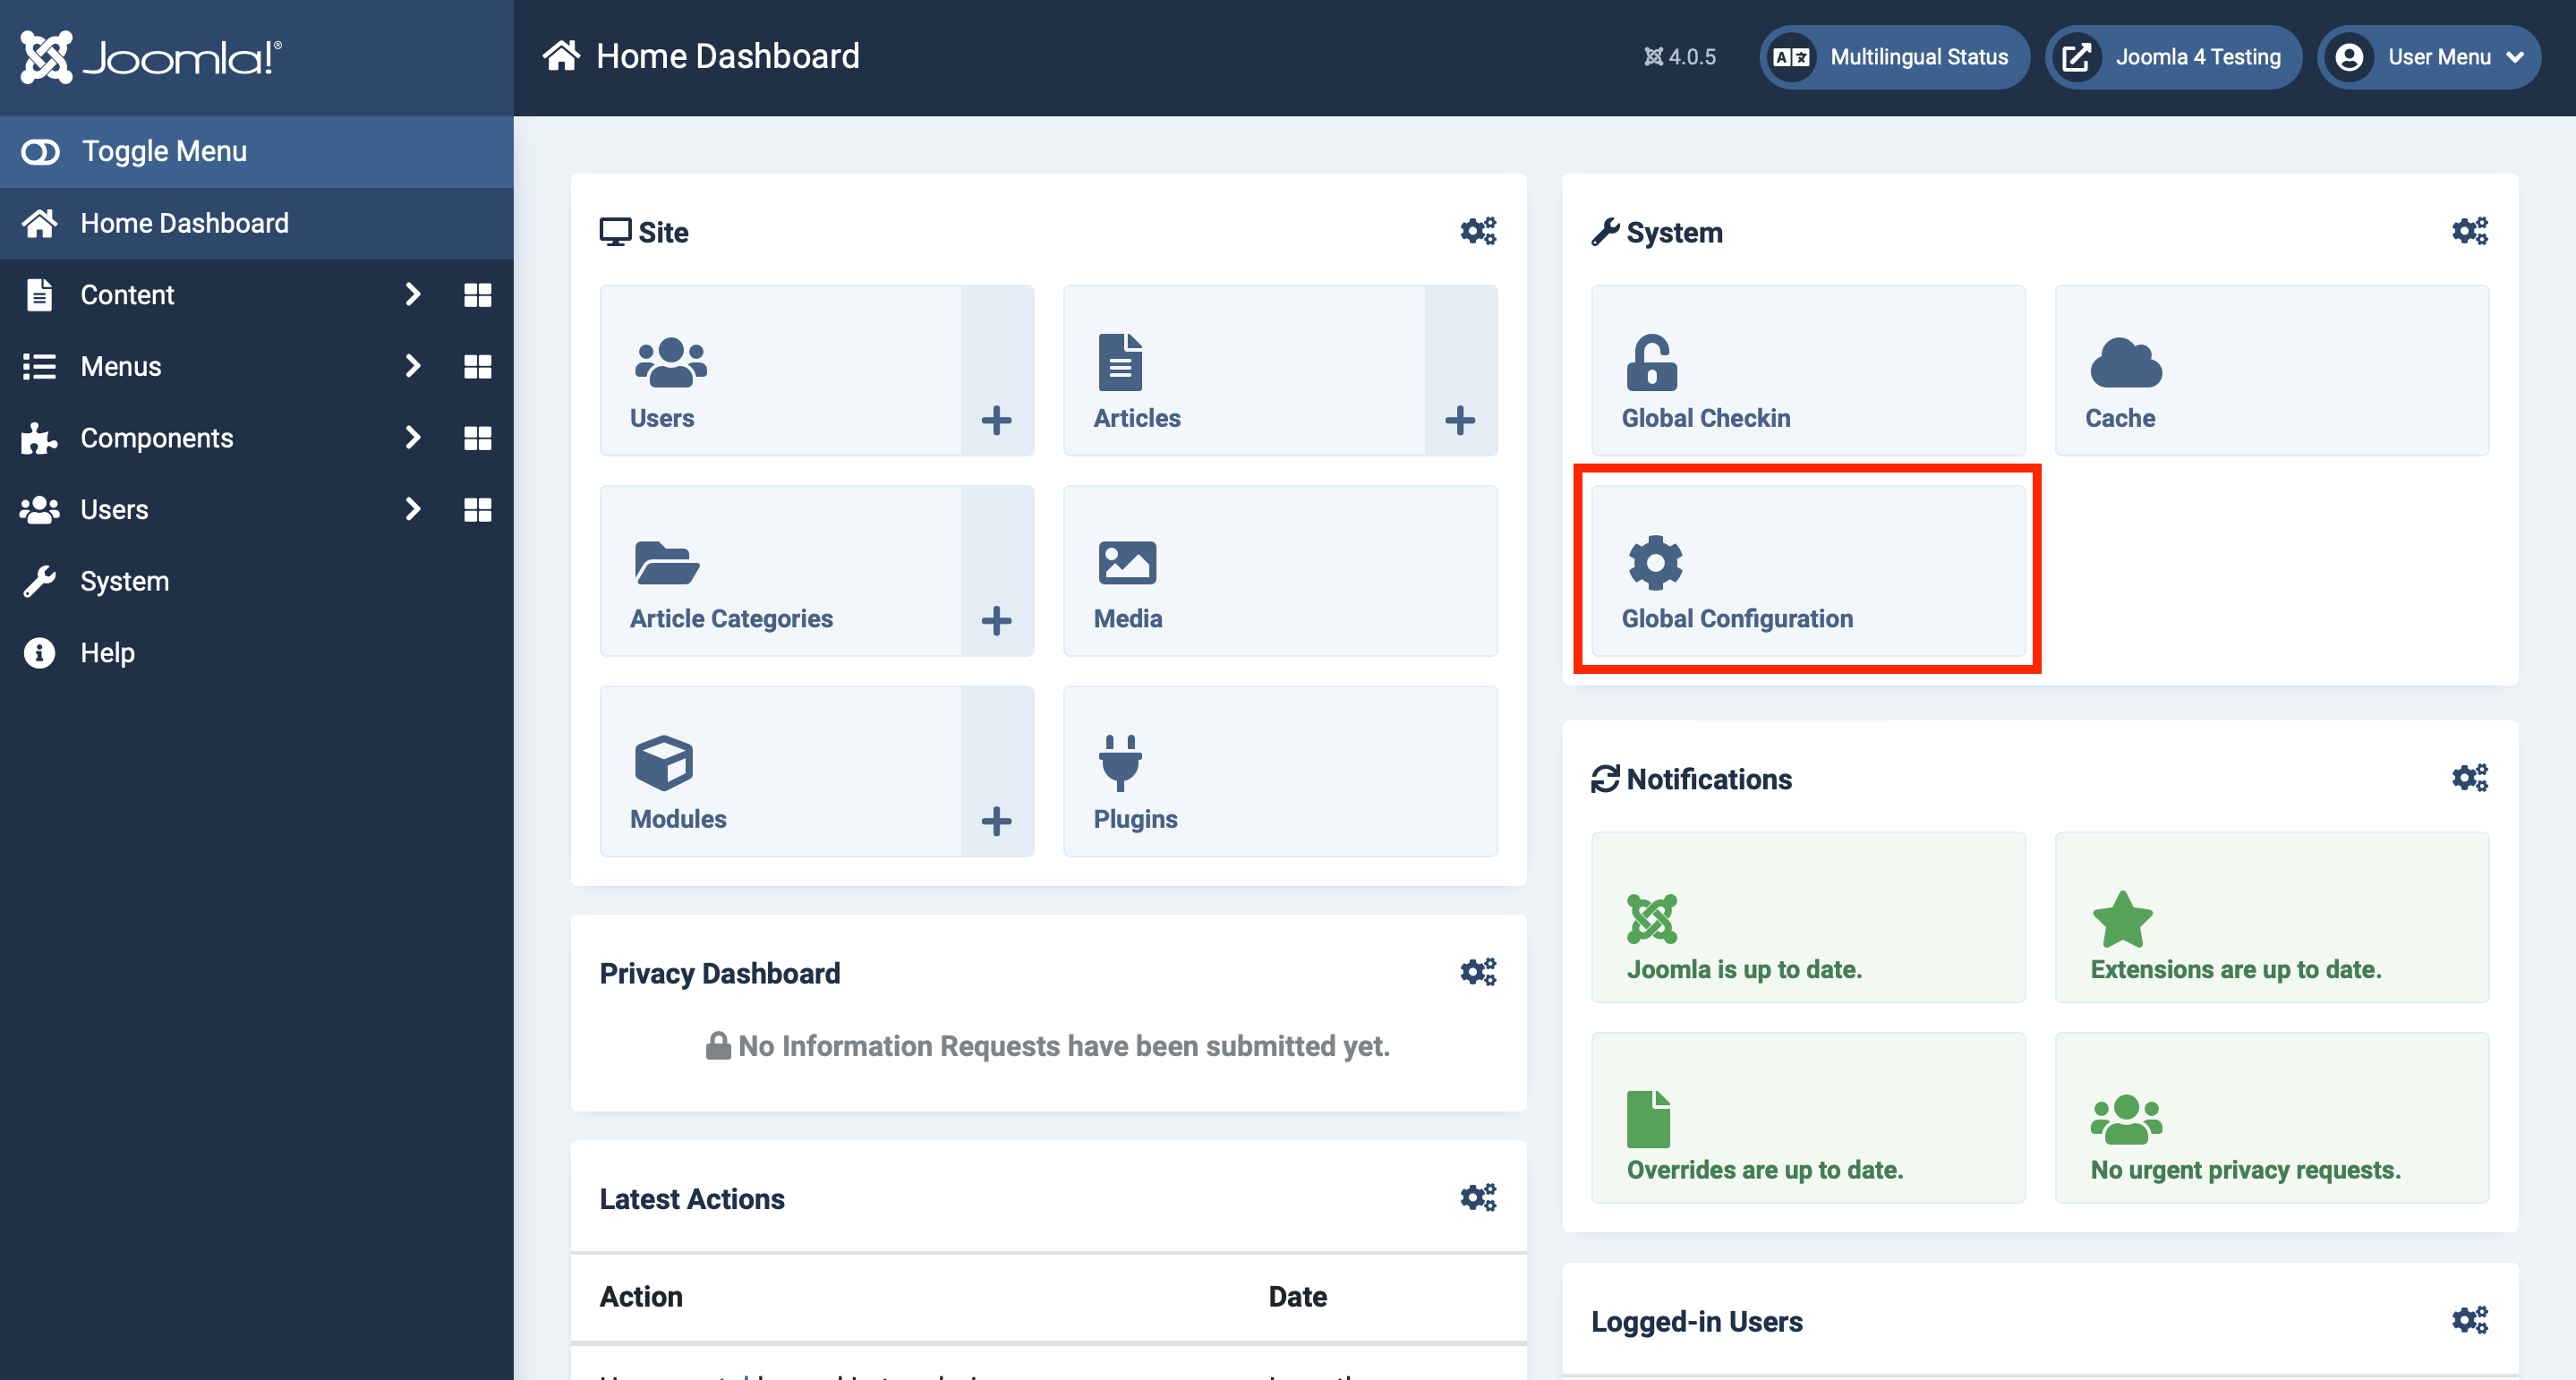
Navigate to Global Configuration & update the permissions
In Joomla 4, the quickest way to do that is to go to the Home Dashboard, and click on the Global Configuration quick icon.
Click on Permissions, and then click on "Client". You'll see right now everything is inherited, which means that nothing is allowed.
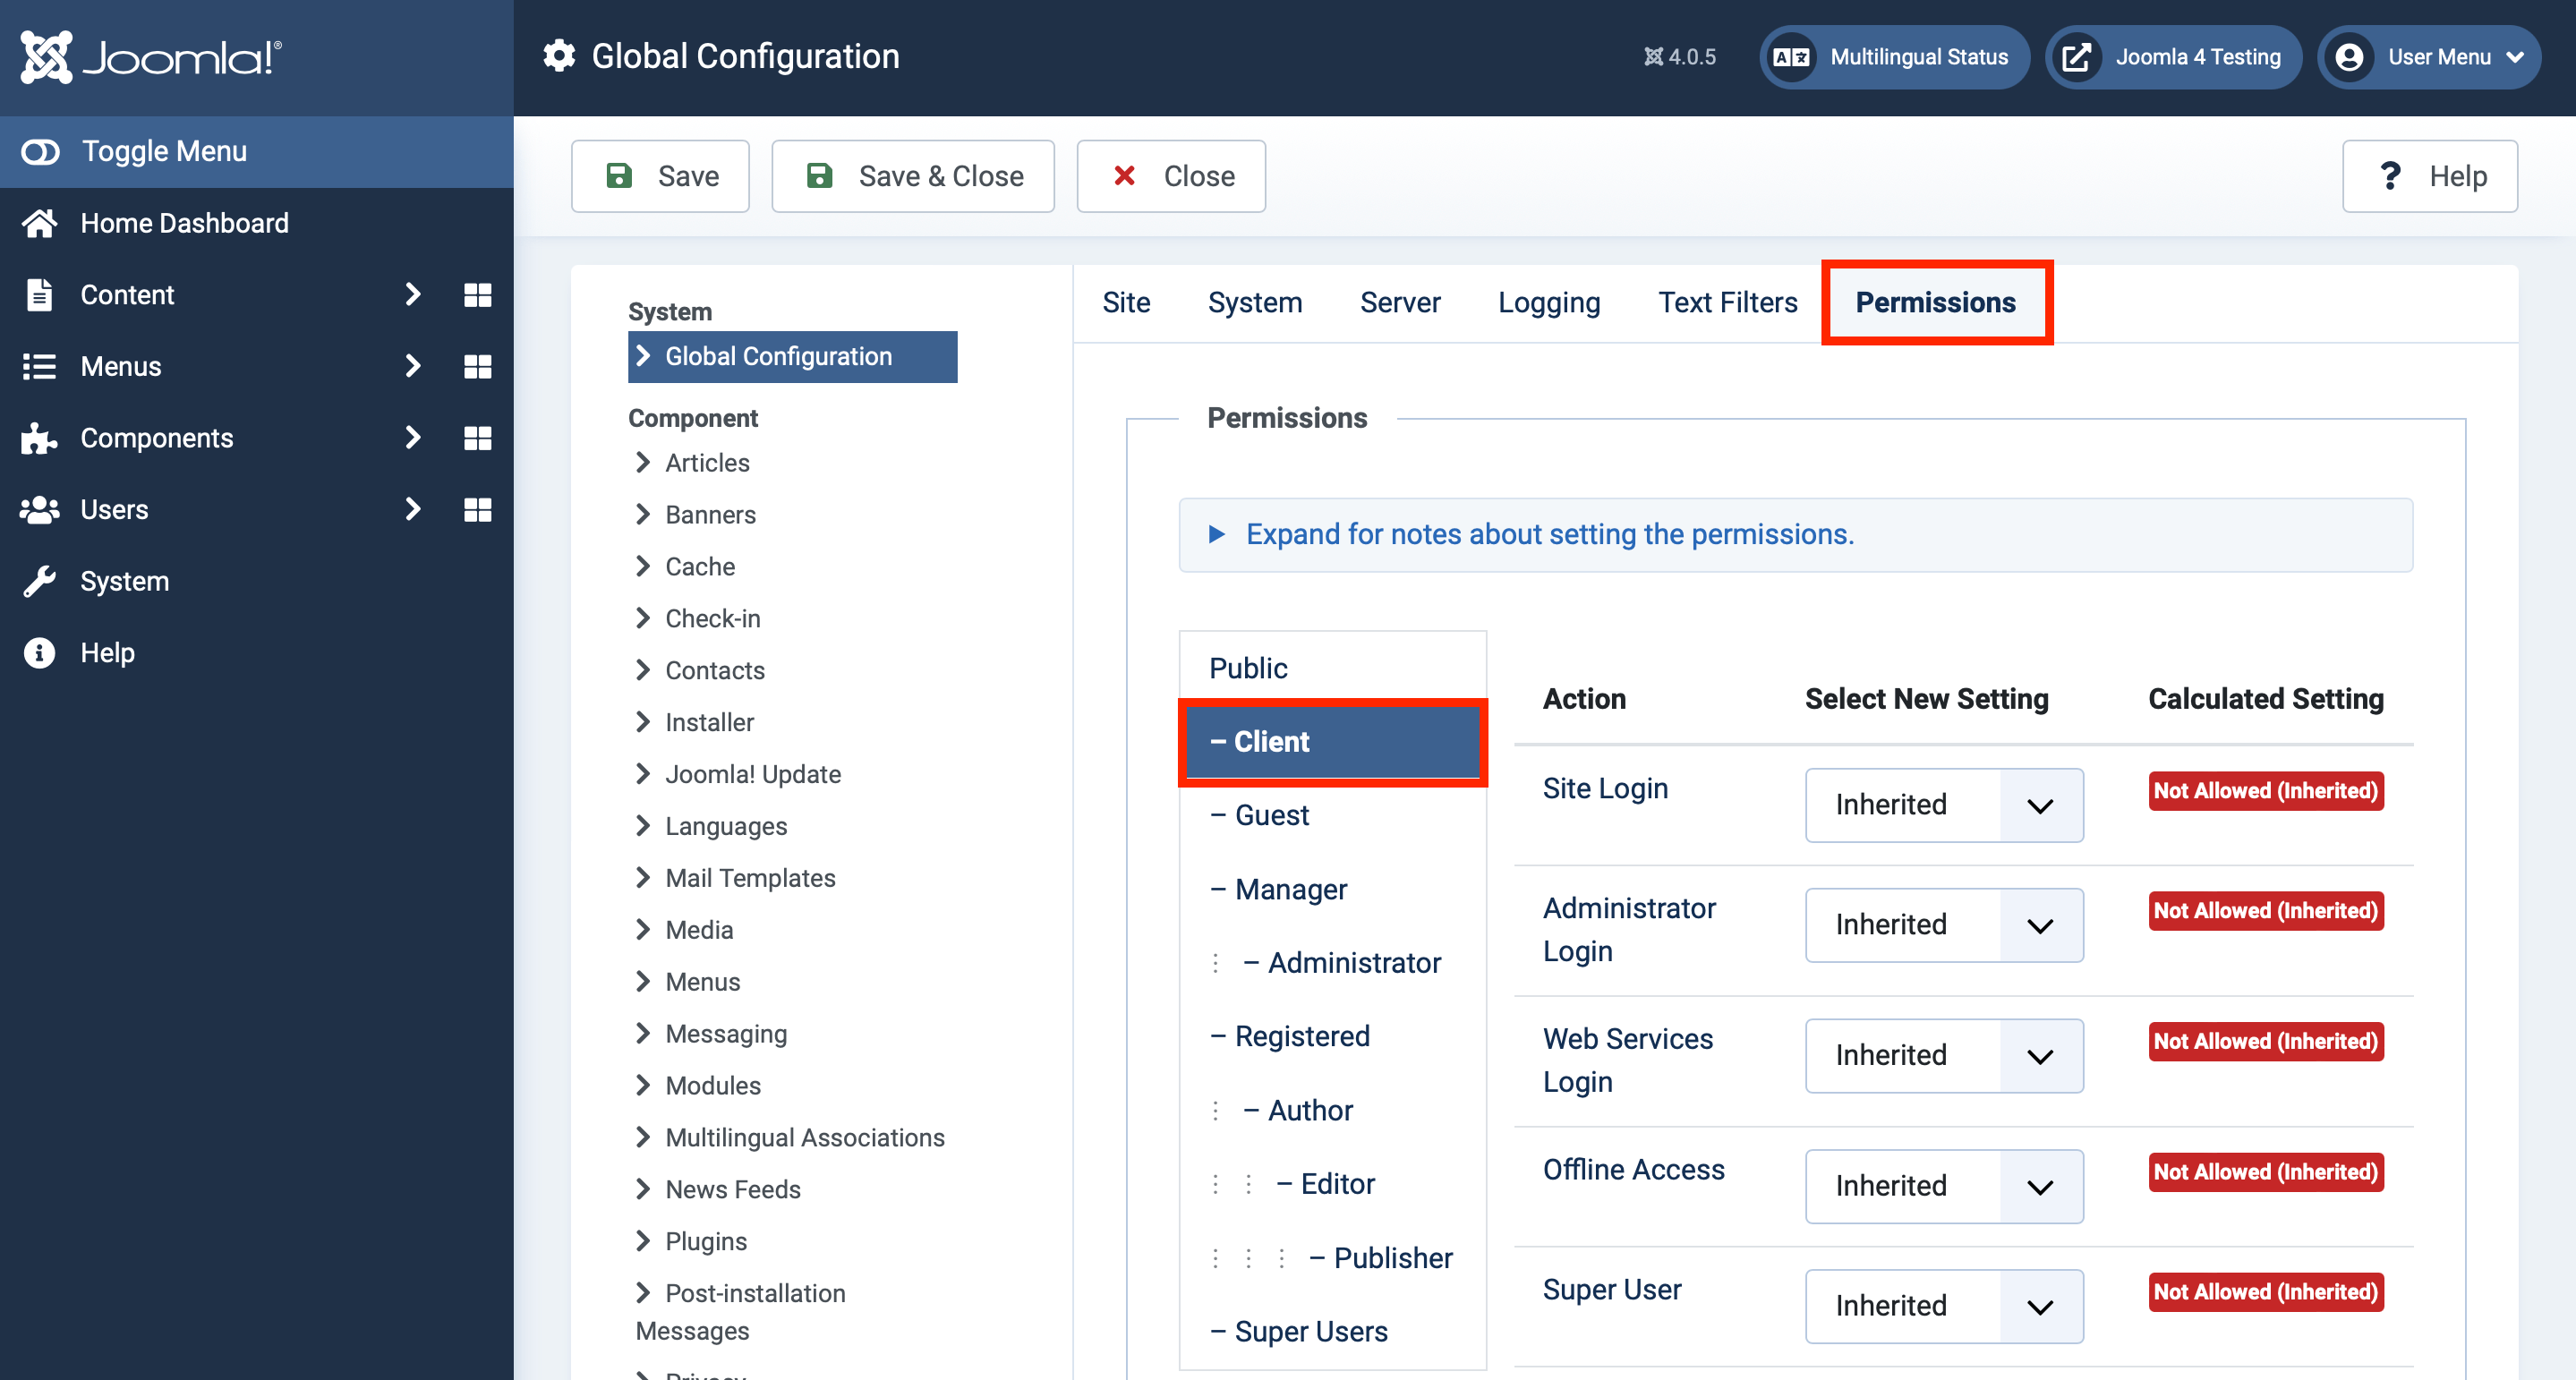
Select the settings that best suit your needs. For my clients, I set "Administrator Login", "Access Administration Interface", and "Edit Custom Field Value" to "Allowed", and I leave the rest as-is.
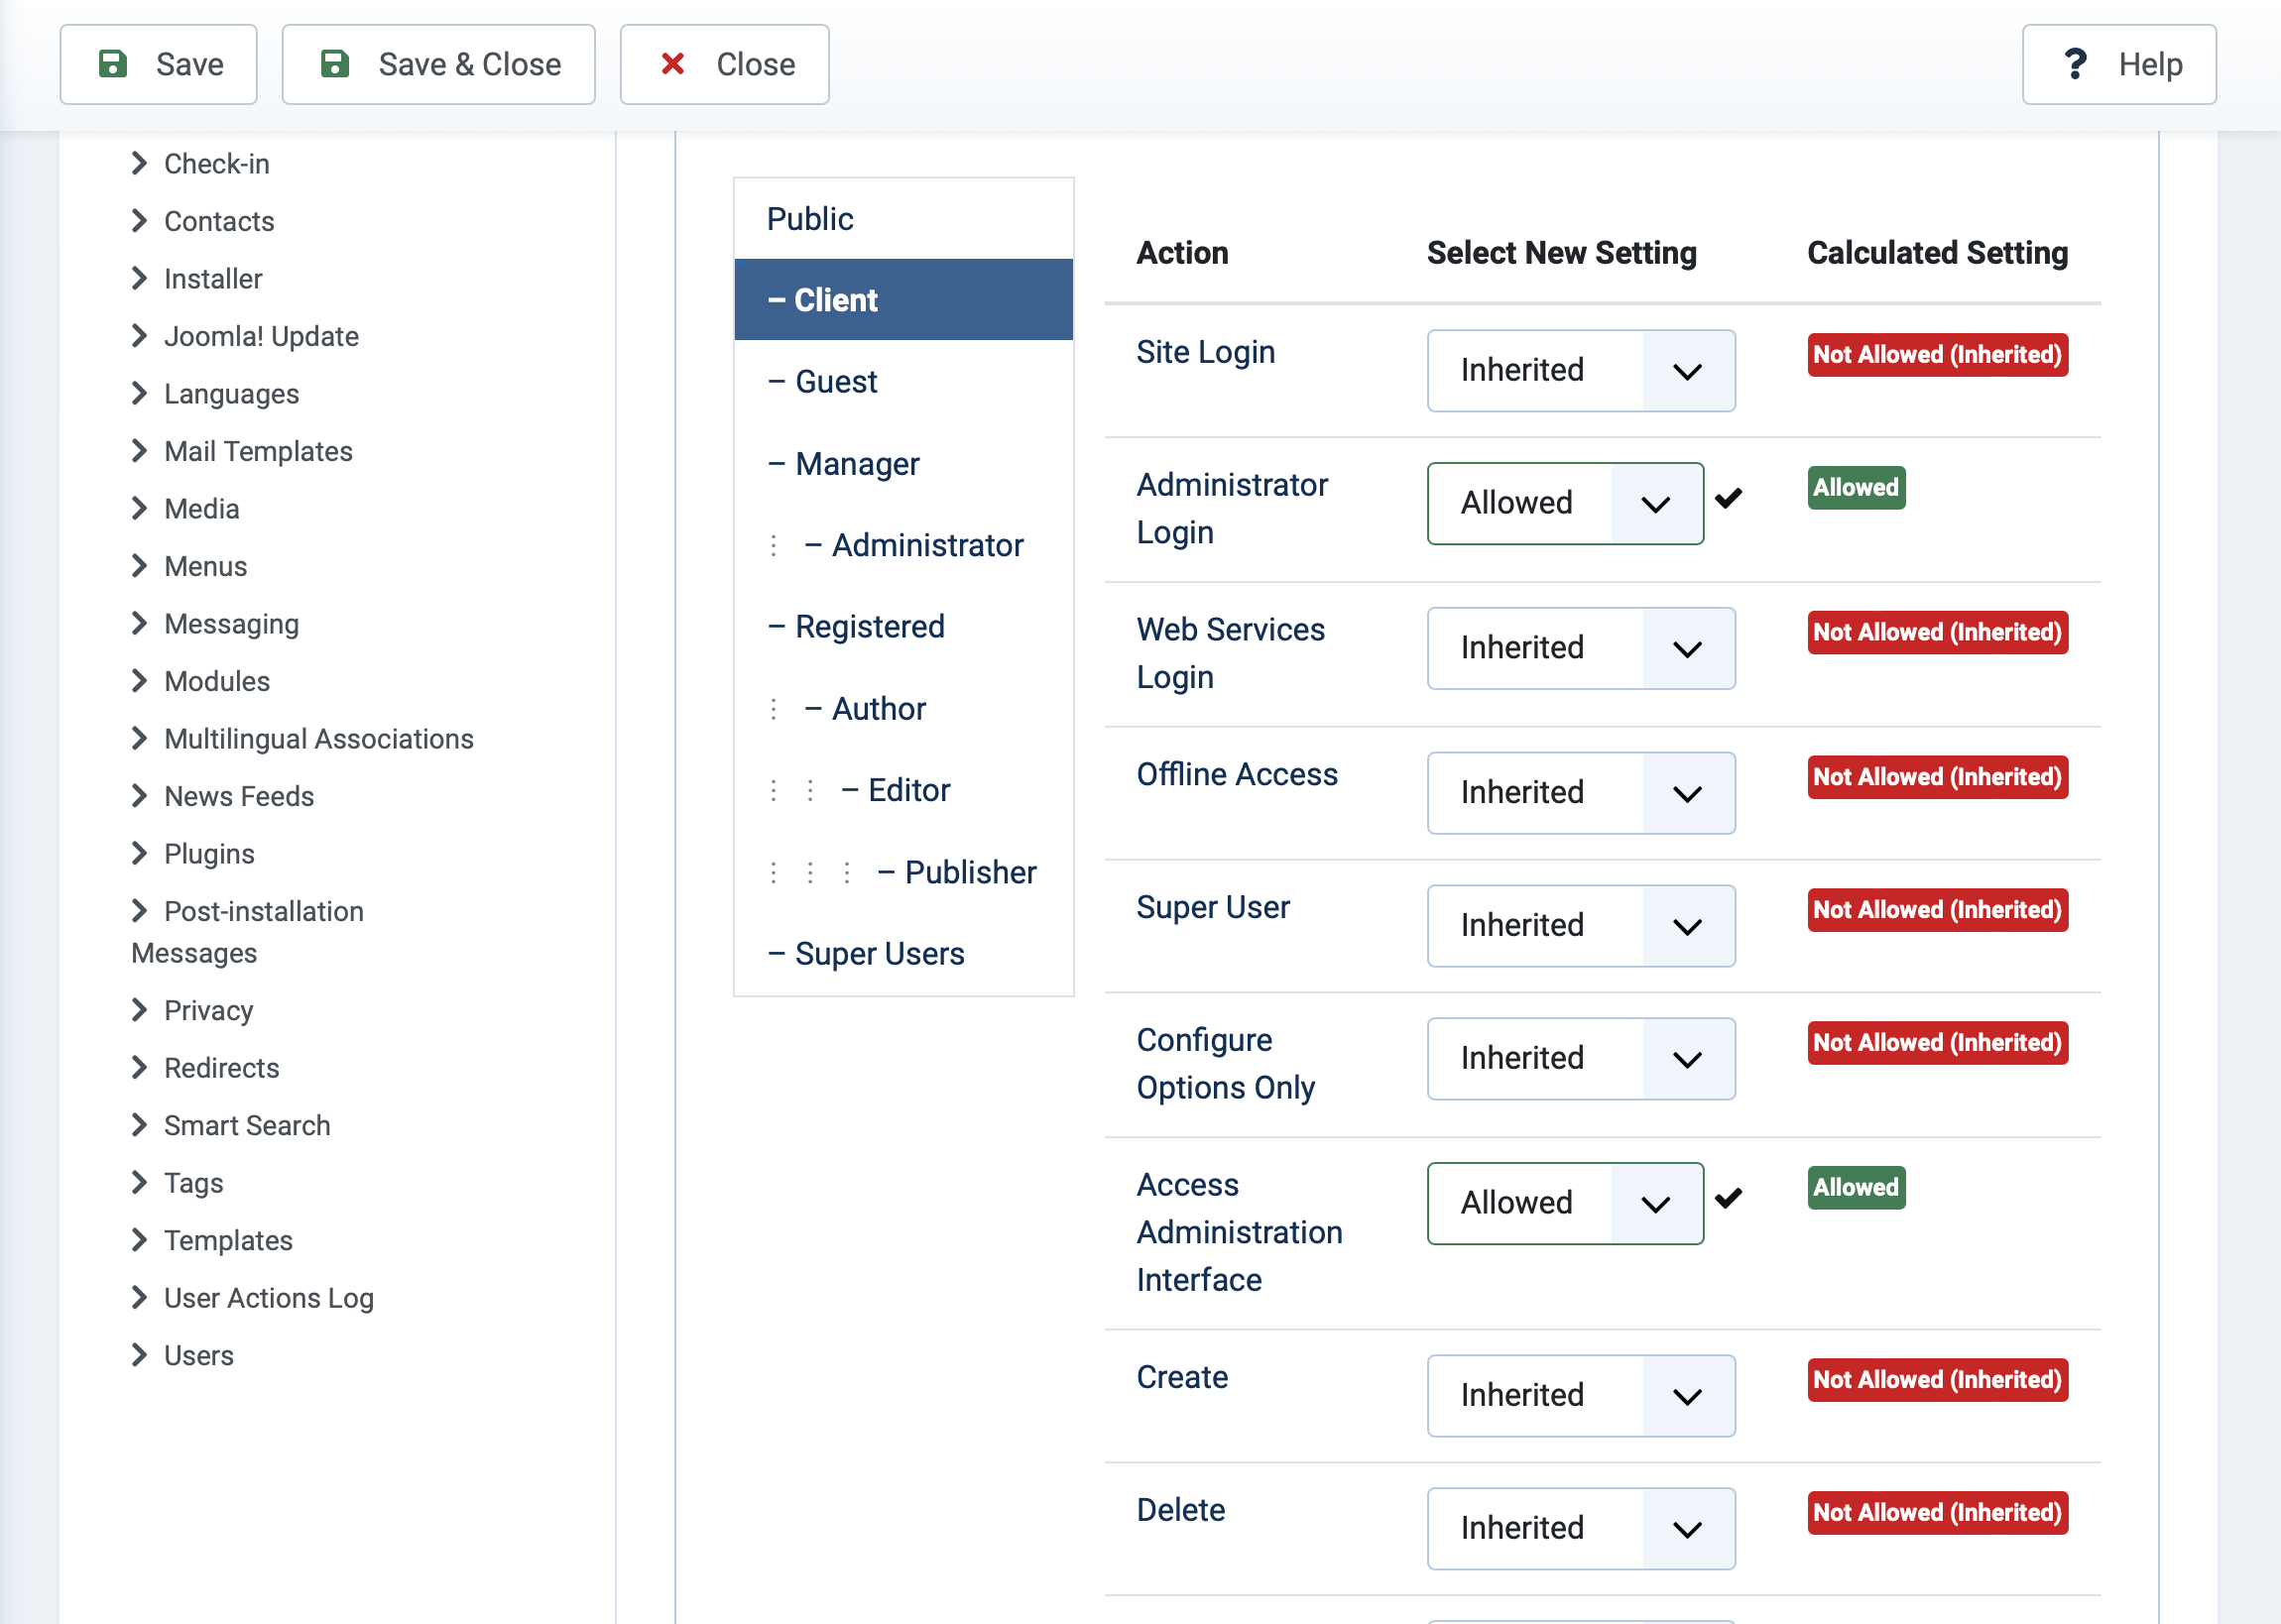
Click "Save" in the toolbar—not Save & Close. This is because it's easiest to update the permissions for the other components here instead of opening each one manually.
Update component permissions as necessary
This is where it really depends on your site and use case, so I won't take you through each component here. Just like global permissions, you need to click on the component name, click the "Permissions" tab, and then update them as necessary so your client has the access they need without overwhelming them.
As an example, here are the permissions I have set up for "Articles":
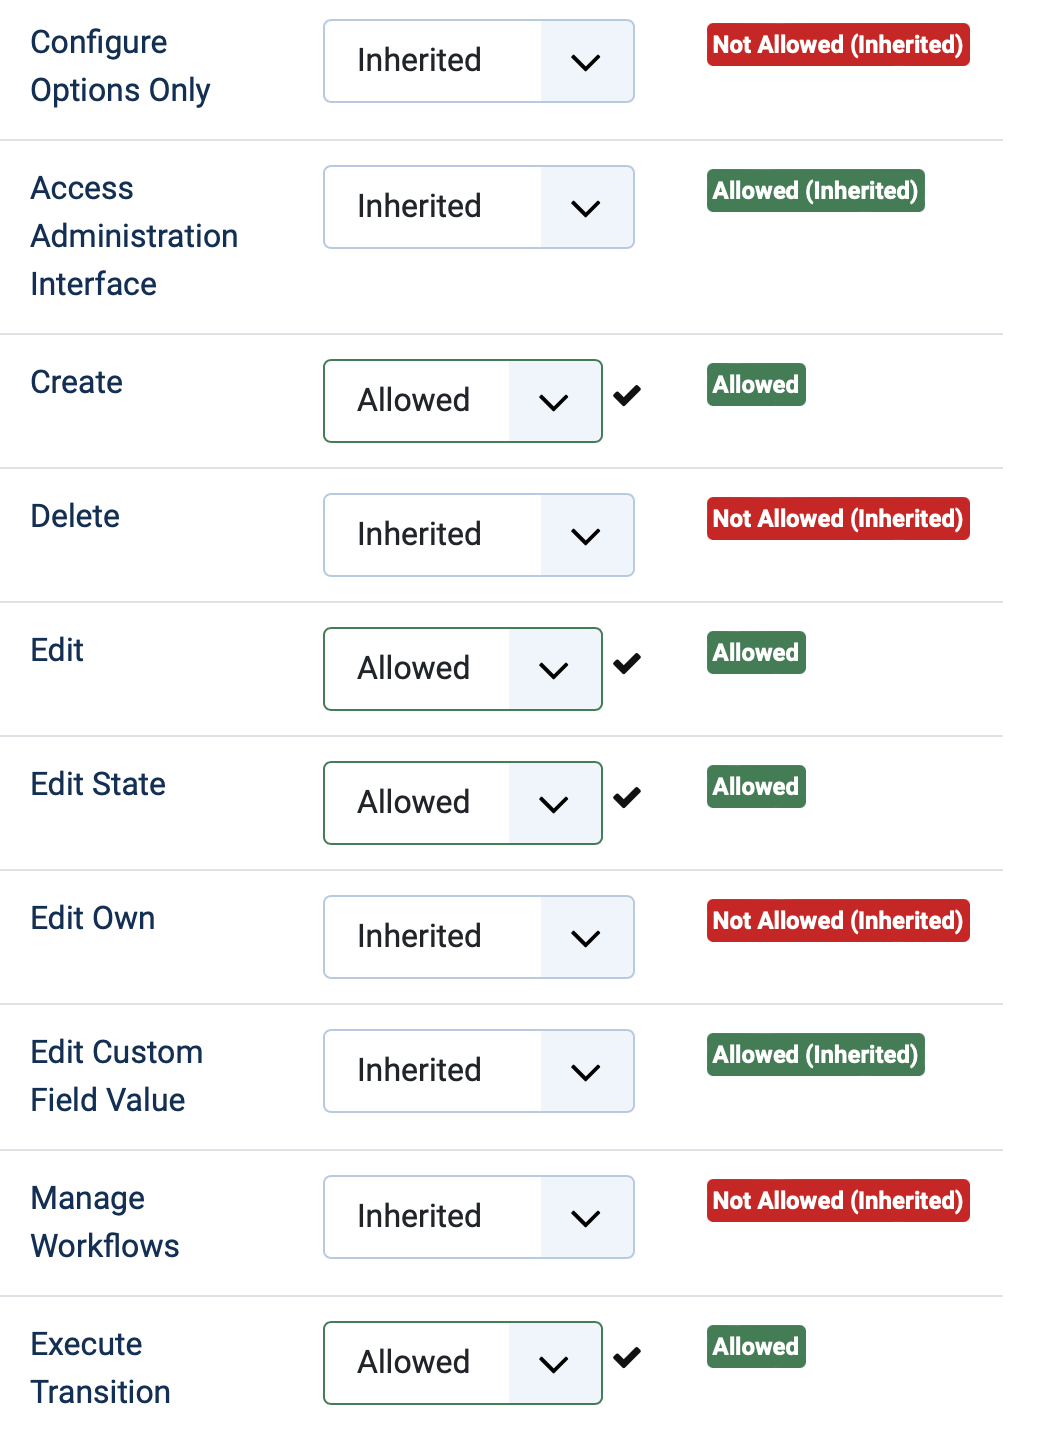
I recommend checking every installed component one by one before moving forward. Remember that if you don't want the client to be able to access the component at all, you need to change the permission for "Access Administration Interface" to "Denied".
Adding a test client user
At this point, I like to add a user to the client group so I can check and make sure everything is working as expected.
Step 1: Click on Users, then click the plus icon next to manage to create a new user.
If you'd rather not use the quick icon, you can also click "Manage", and then "New".
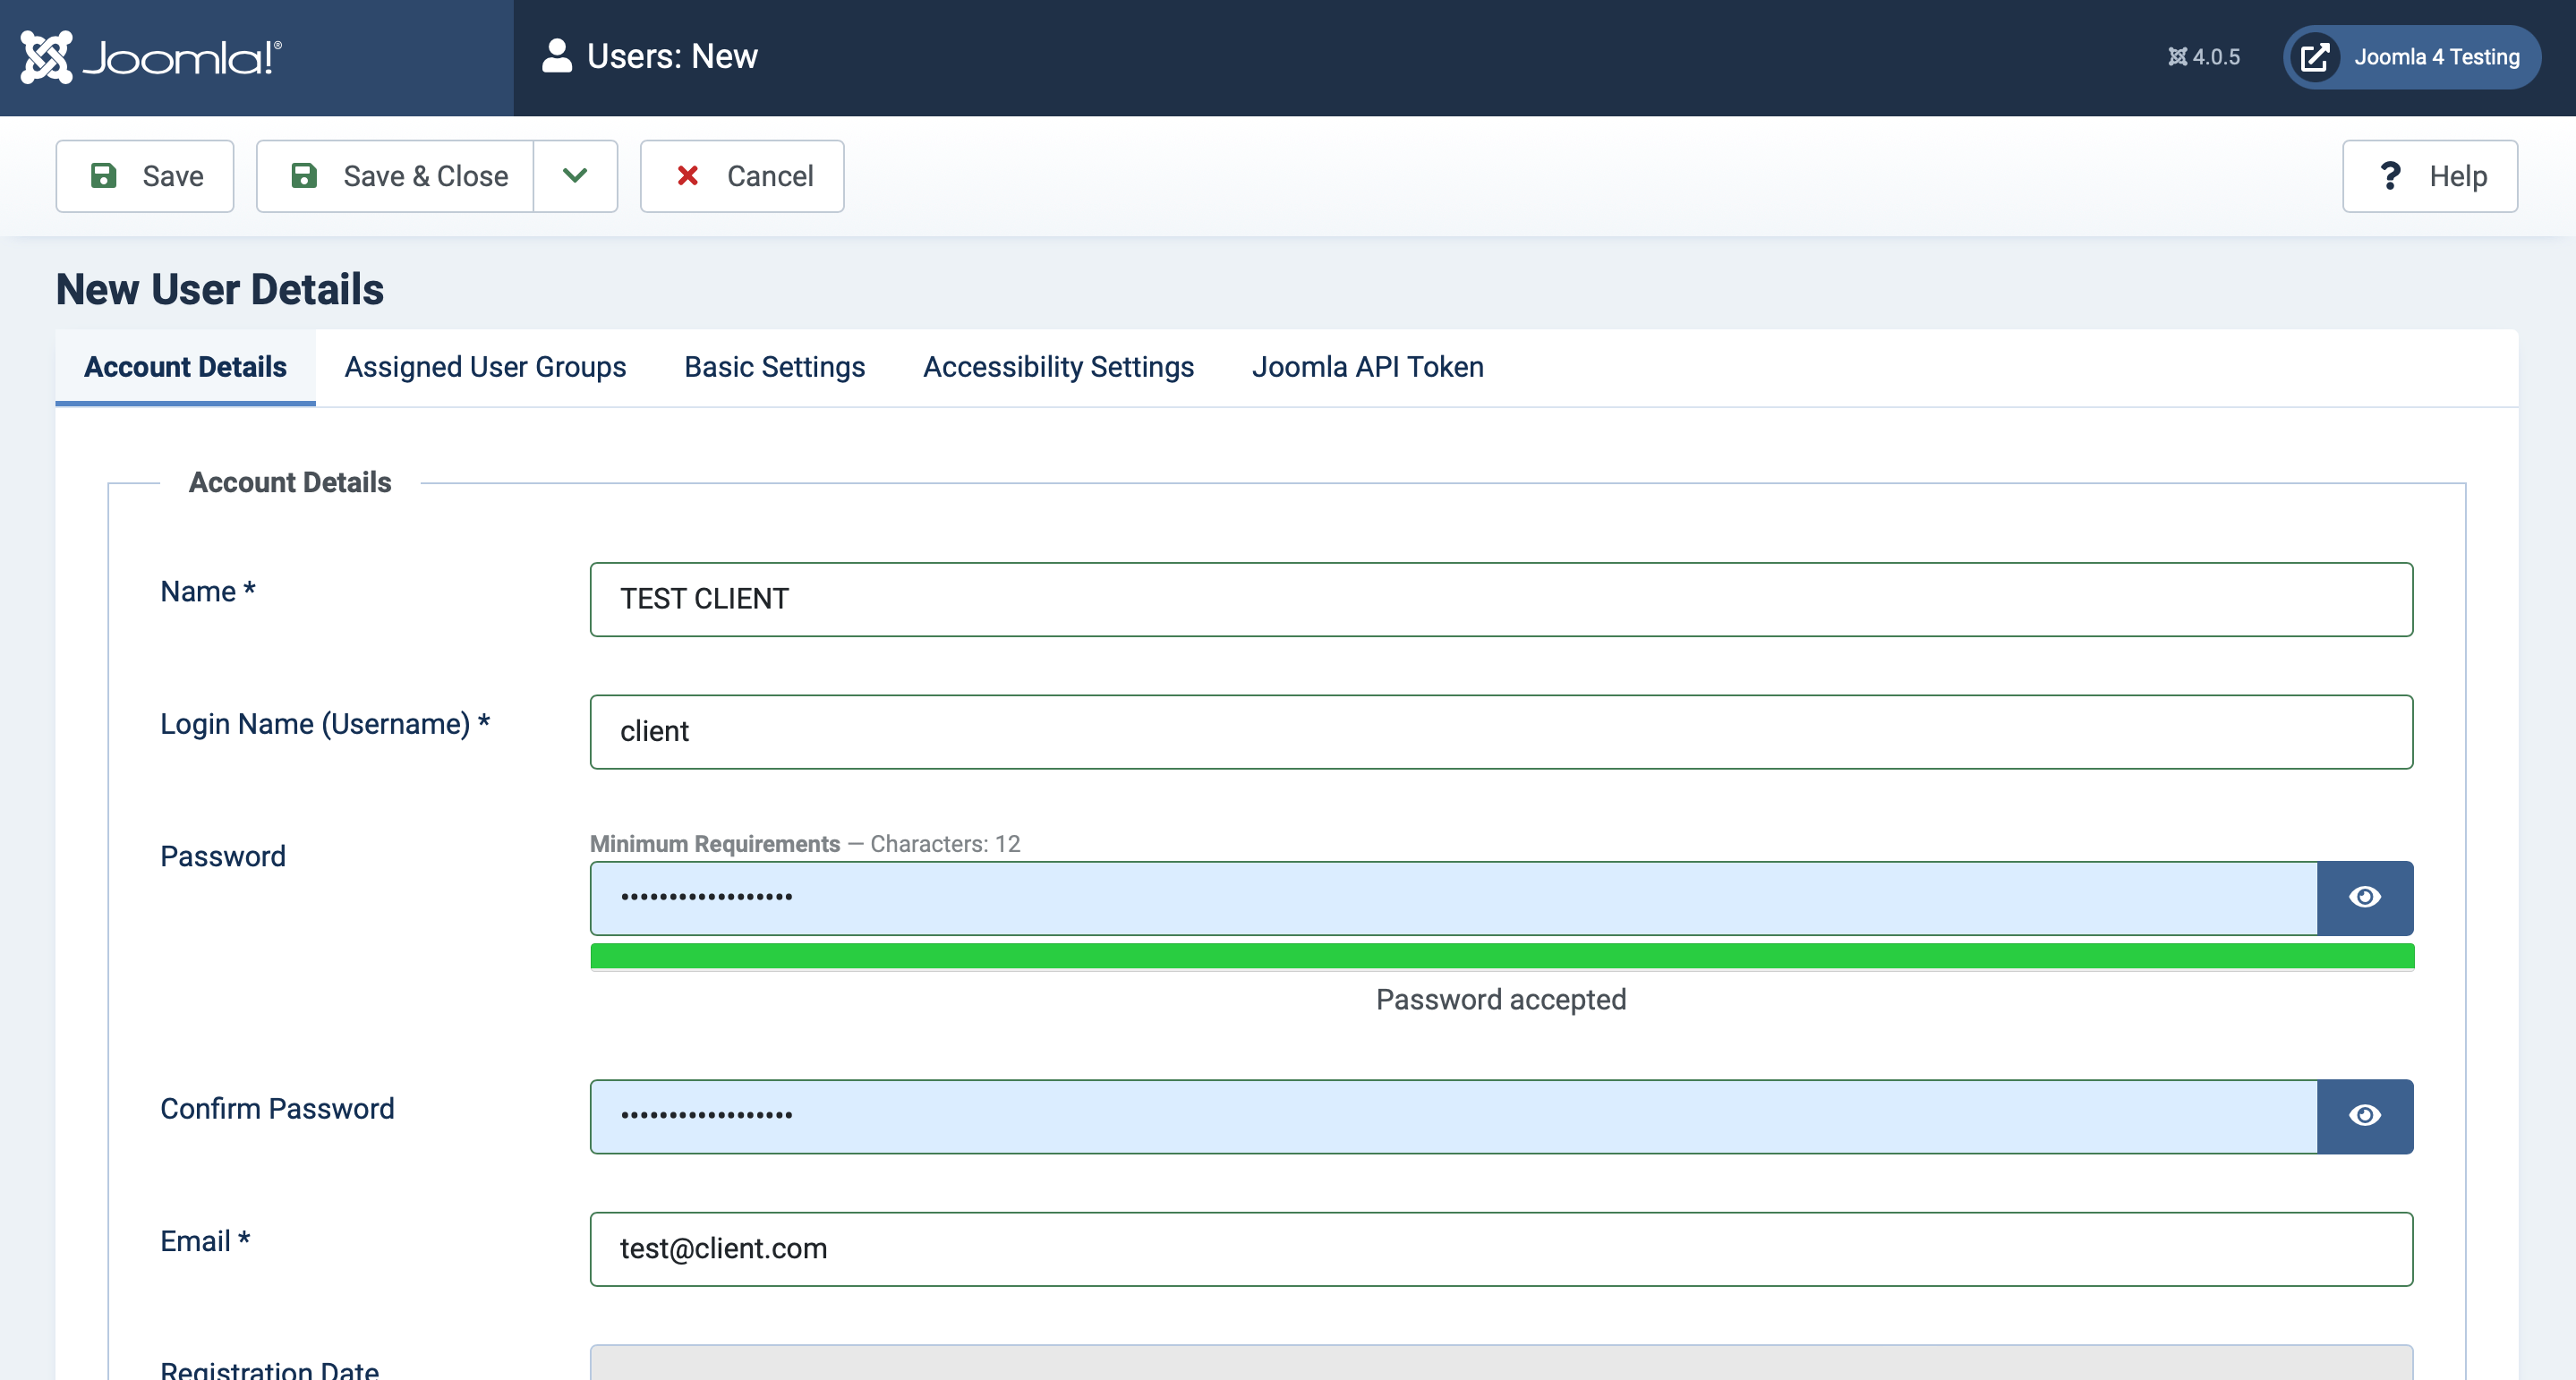
Step 2: Fill out fake account details.
I like to use all caps so it's clear it's a test user. Since it's not a "real" account, you can use a fake email address, and put in a password.
Make sure to save the username and password somewhere so you can login with it later.
Step 3: In the second tab, check the "Client" user group.
By default, Joomla will also assign a new user to "Registered". For simplicity's sake, I remove that, but it's optional.
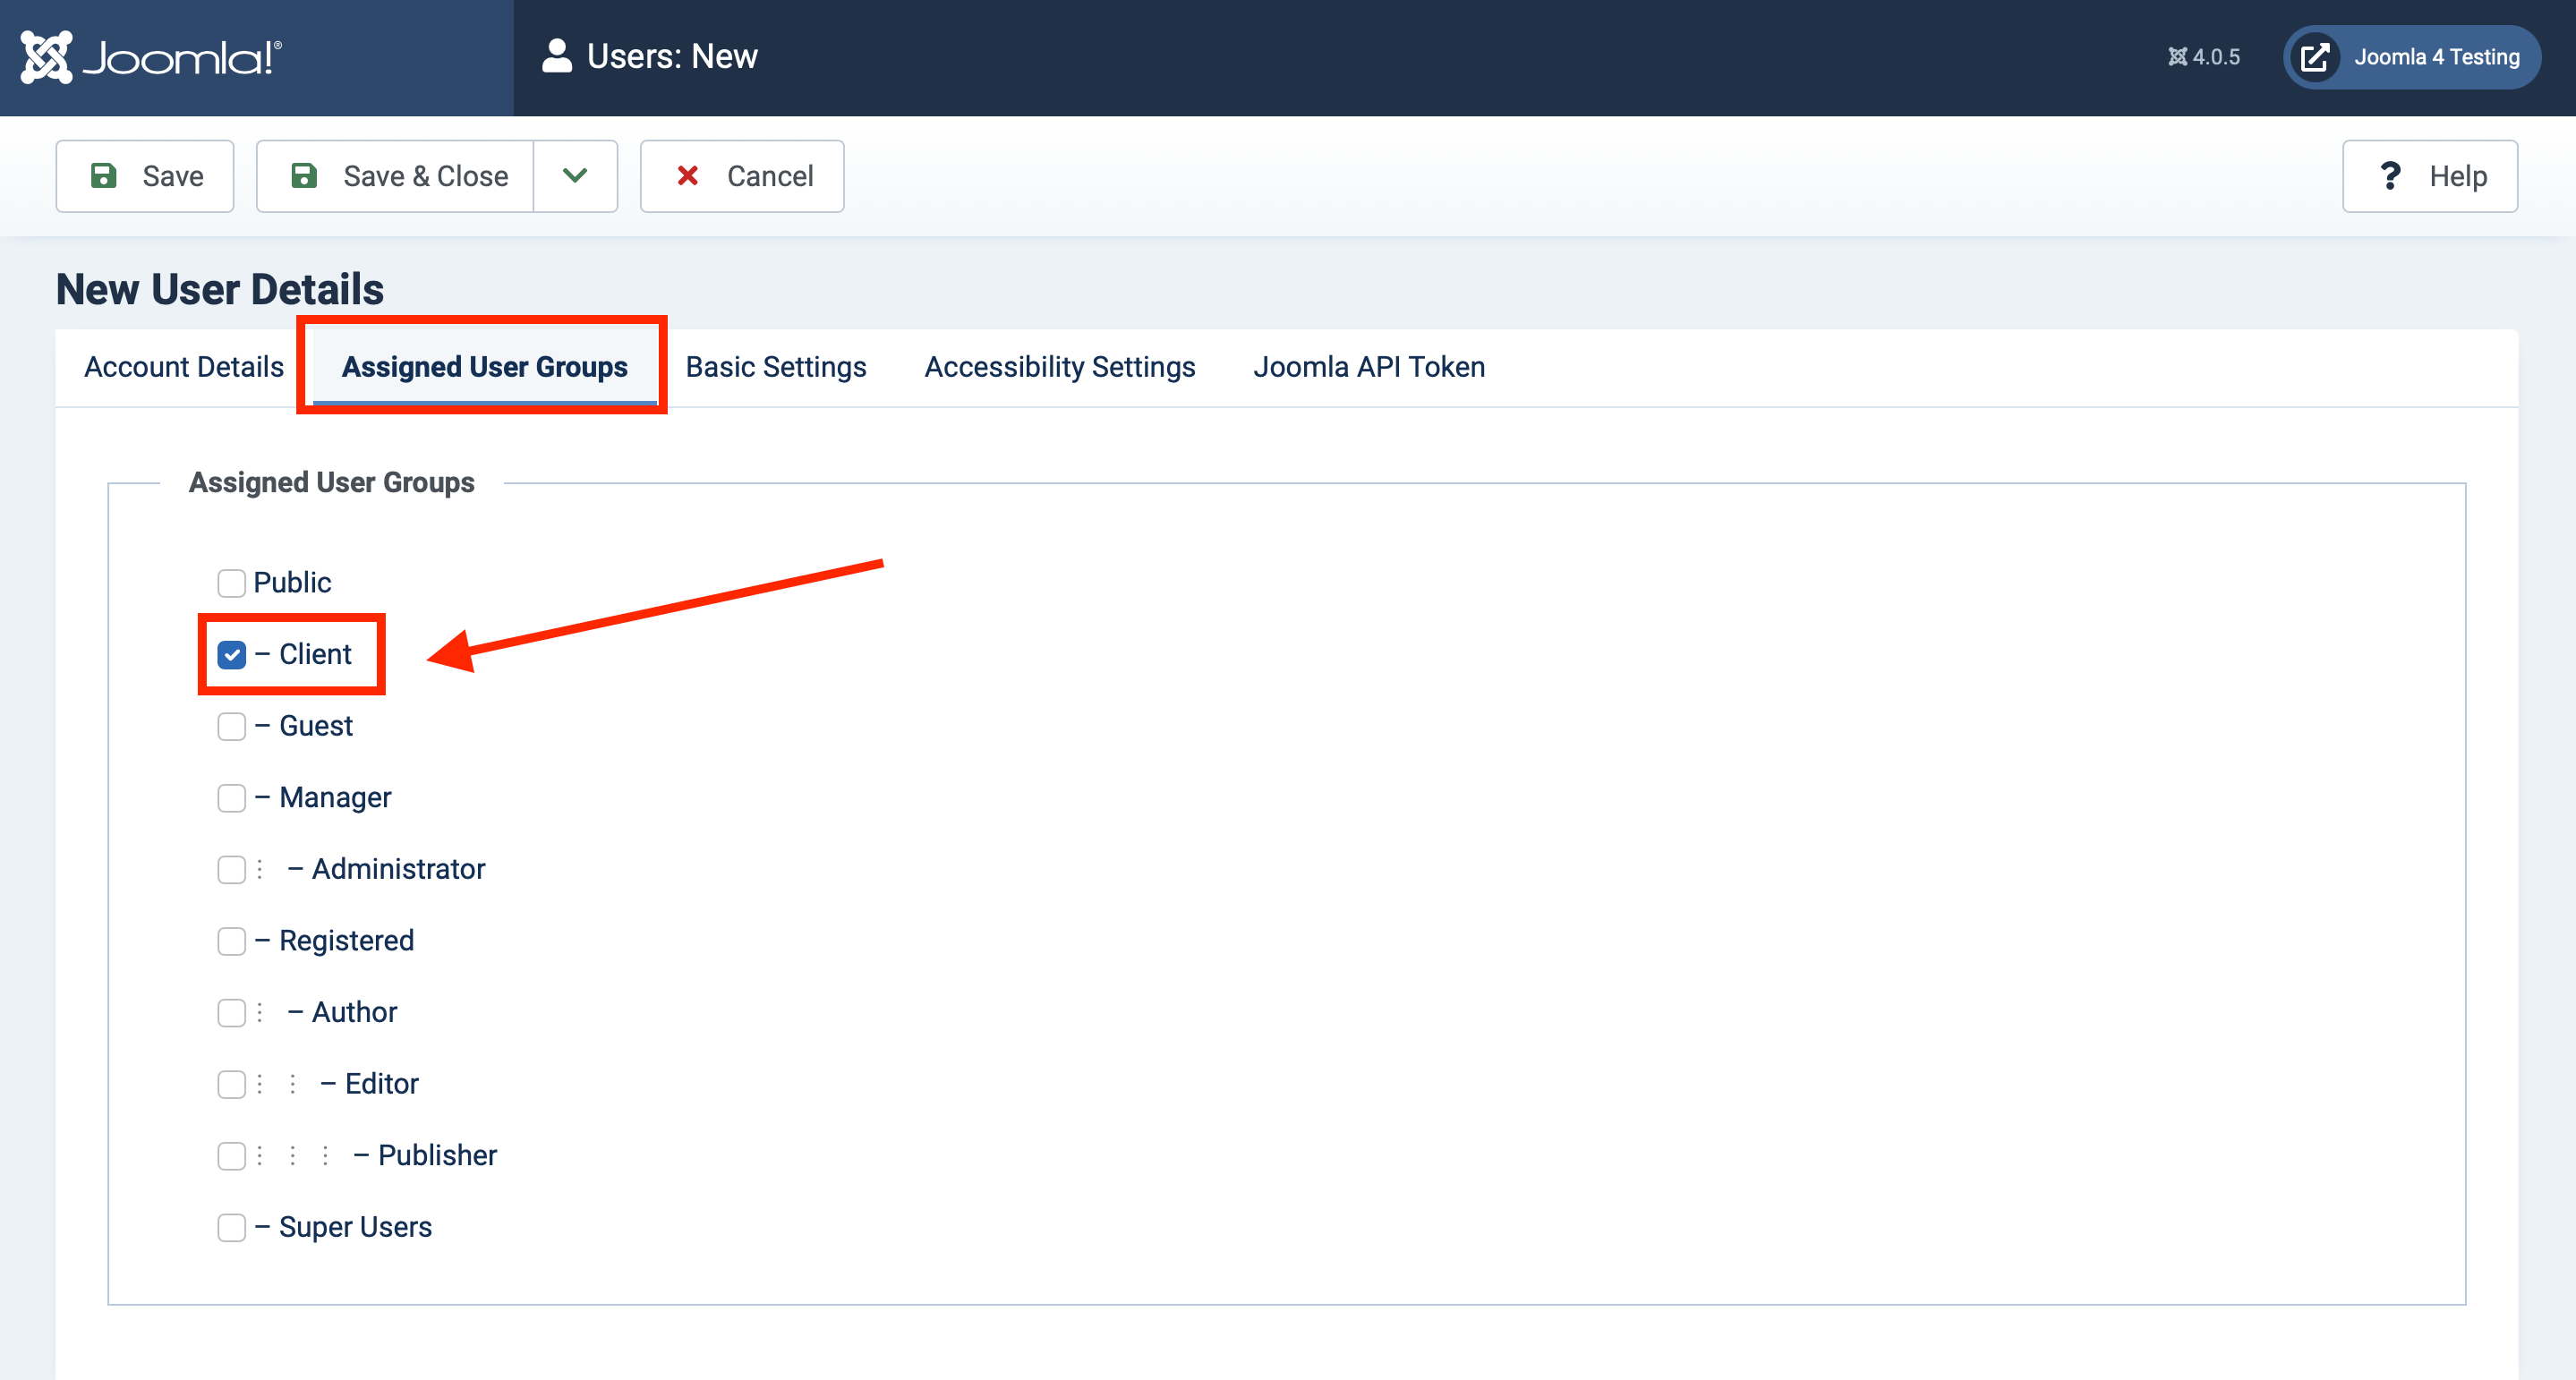
Save & Close.
That's it! Now you can customize the back end for your clients. I like to open a private window and log in as the client so I can check periodically that everything looks how I expect it.
This magazine article explores the default Joomla 4 dashboards, and gets into the basics of adding new modules.
In part two of this series, we'll learn how to create a custom admin menu for your clients, adding custom dashboard pages, and other improvements to fine-tune the client management experience.
What do you do to make managing Joomla easier for your clients? Let me know in the comments below!
German translation of this article: https://www.jug-zueri.ch/artikel/joomla-4-administration-fuer-kunden-teil-1

Comments