
Fourteen secrets of Joomla! templating
Over the past few months, Kyle and I have been compiling a killer list of Joomla! templating snippets that has the potential to change the way that you approach templating in Joomla!.
We had planned to publish this article well before the release of Joomla! 1.6, and to release the 1.6 version of this post to coincide with it going stable ... but alas, that is not to be. Given that the Joomla! 1.5 end life is still a long way off, I'm pretty sure you will find this list useful for your upcoming projects.
Most of you will know that Joomla! is enormously powerful and that there is often more than a single way to approach a design challenge. Depending on the problem you are trying to solve most solutions can be handled at the component, module, plugin or template level. The API is so flexible that one of the biggest decisions to make is where to address the challenge, rather than how to do it.
Being a template developer, I prefer to approach most design requirements at the template level. This gives me complete control over where and how something appears and also easy access to the files if I need to make further changes. It also helps to prevent any accidental over writing of changes made to component views when you update the component - that is if the extension uses the MVC format.
The following list is like hidden secrets or golden treasures of Joomla! (well, at least to us they are), that we think are worthy of any Joomla! template kit. Interestingly, a lot of the information below comes from the Joomla! wiki, which is an amazing resource for anyone looking to get their hands dirty with some custom code.
So, let's get started ...
1. Create homepage conditionals in Joomla!, or create the ability to target the default menu item.
Sometimes it's necessary to specify styling or some functionality that is specific to the front page. Joomla! provides a few different ways to do this. One of them is to place a check for the front page in the template code.
{codecitation}
// Detecting Home
$menu = & JSite::getMenu();
if ($menu->getActive() == $menu->getDefault()) {
$siteHome = 1;
}else{
$siteHome = 0;
}
{/codecitation}
In this snippet, we're grabbing the menu in the $menu variable, then checking if this menu item is the active menu item and if it's the default. We're then setting a variable $siteHome with a boolean value (1 or 0) i.e. whether the variable returns a true or false value.
Now you can place a simple conditional around any html element in the page:
{codecitation}
<?php if($siteHome) { ?>
<div id="home-banner">
This content will only show on the homepage!
</div>
<?php } ?>
{/codecitation}
2. Adding helpful page class info to your template's body rule.
Taxonomy helps designers use CSS to cascade styles and customize virtually any aspect of Joomla!. By adding a few simple variables, we can print all the Joomla! url info as body classes, which allows us to reach down into the different Joomla! views and specify styling for each element of any given view.
In your template's index.php file add the code:
{codecitation}
<?php
// Detecting Active Variables
$option = JRequest::getCmd('option', '');
$view = JRequest::getCmd('view', '');
$layout = JRequest::getCmd('layout', '');
$task = JRequest::getCmd('task', '');
$itemid = JRequest::getCmd('Itemid', '');
?>
{/codecitation}
Now update the body tag with the following:
{codecitation}
<body class="<?php echo $option . " " . $view . " " . $layout . " " . $task . " itemid-" . $itemid;?>"
{/codecitation}
This will print something like: <body class="com_content category blog itemid-78">
which can be very useful when trying to style elements in components that lack proper taxonomy.
For example, with the body class shown here, you can do something like: .com_content.itemid-53 a{color:#000; /* links only in articles from this one menu item will be black */}
3. Collapsible Module Positions
Collapsible columns are now commonplace in templates from all CMS's. This means that if there is no module or content present in a particular position, its surrounding div will be hidden, therefore allowing the rest of the content to expand.
One of the more popular methods in Joomla! templates is:
{codecitation}
<?php if ($this->countModules('left')) { ?>
<div id="sidebar">
<jdoc:include type="modules" name="left" style="xhtml" />
<div class="clr"></div>
</div>
<?php } ?>
{/codecitation}
This states that if there are any modules in the 'left' module position, then the markup for the 'sidebar' div will be displayed along with any of the output from the modules published to the 'left' module position. If there are no modules published to the left position then the sidebar markup will not be displayed.
4. Count, check and do crazy math stuff according to how many modules you have published at a given position.
You can extend the simple collapsible module check above to include even finer control over when certain markup is rendered on the page.
For instance if you wanted to display content on the page only if the left and right modules were published you would include the following code:
{codecitation}
<?php if ($this->countModules('left and right'')) { ?>
<p>This content only appears if both left and right modules are published.</p>
<?php } ?>
{/codecitation}
This content only appears if both left and right modules are published.
Or, if you wanted to check the numbers of modules present in a given position and then compare it to another position, you would use something like this:
{codecitation}
<?php if ($this->countModules('user1 < user2'')) { ?>
<p>This content only appears there are more modules published to user1 then there are in user2.</p>
<?php } ?>
{/codecitation}
5. General security stuff
The following snippets can help reduce the ability of a visitor to identify that you are using Joomla! on your site. In some cases you may want to do this in order to reduce exposure to any potential vulnerabilities that a potential hacker may look for. Please note though that there are many ways that a visitor can identify Joomla! as the cms you are using on your site beyond those mentioned here.
These snippets help to remove these markers, but it is also recommended that you investigate other resources for making sure that your Joomla! site is as secure as possible. The Vulnerable extensions list is a good place to visit, as well as Nick from Akeeba's master htaccess file for shutting down would-be hackers from your site. http://snipt.net/nikosdion/the-master-htaccess
Remove the Joomla! generator tag
{codecitation}<?php $this->setGenerator(''); ?>{/codecitation}
Disable the module view from the front end or prevent access to the index.php?tp=1 variable
{codecitation}<?php JRequest::setVar('tp',0); ?>{/codecitation}
6. Implementing MVC for specific modules and components
Joomla! 1.5 ushered in the era of Joomla! html overrides. This means that the core files from Joomla! or any MVC component can be overridden via the html folder in your template. The benefit of this is that you can significantly change the core layout and some functionality of Joomla! or an MVC component without interfering with its core files. Any change to the Joomla! core or even 3rd party files can represent a significant headache for you or your client when it comes time to upgrade.
For example, you may want to remove the tables from the Category Blog view.
This Joomla! view produces a url like:index.php?option=com_content&view=category&layout=blog&id=34&Itemid=53
To override this view, create the directory structure /html/com_content/category/blog.php inside your Joomla! template.
You'll copy this view file from /components/com_content/views/category/tmpl/blog.php
7. Removing mootools
In most cases you actually need to keep mootools in your site especially if you are using extensions that rely upon the library being present to create javascript enabled functionality. In the case that you don't need mootools to load on your site you can add the following to the head of the template to prevent it from loading on the page.
There are a few ways to do this, and the following comes from the mootools control plugin created by Kinespehere.
{codecitation}
// Removes Mootools
// Kinesphère "Mootools Control" Plugin for Joomla!! 1.5.x - Version 0.1
// License: http://www.gnu.org/copyleft/gpl.html
// Copyright (c) 2009 Kinesphère
// More info at http://www.kinesphere.fr
if ($removeMootools == '1') {
$doc =& JFactory::getDocument();
$headerstuff = $doc->getHeadData();
foreach ($headerstuff['scripts'] as $file => $type) {
if (preg_match("#mootools.js#s", $file)) unset($headerstuff['scripts'][$file]);
if (preg_match("#caption.js#s", $file)) unset($headerstuff['scripts'][$file]);
}
{/codecitation}
8. Add translatable language strings to your template.
There are some instances where you may want to output simple strings into your site's output. An example of this might be a title for a slider, or even just some simple text on the page. In multi-language sites this presents a problem as, by default, these strings will be rendered as per the settings in the template and not according to the active language on the page i.e. the string will not be translated by default into a different language.
There is a joomfish plugin that allows you to select a new template based on the active language for the site, but that solution means that you have to maintain two or more copies of the template.
A cleaner solution is to convert the string in the template into a translatable language string that is stored in a language file. This will mean that the string is automatically translated according to active language on the page.
As an example, if you wanted to output a string called Slidertitle on the page, you would use the following code in your template:
{codecitation}<?php echo JText::_('SLIDERTITLE');?> {/codecitation}
Then you would need to add the translation for the SLIDERTITLE to each language file you are using on your site. As a point of reference, the core English translation file can be found in the following location:
language/en-GB/en-GB.ini
The new translation would look like this:
SLIDERTITLE = This is the slider title
Please note that each new translation needs to be added on a new line.
9. Make module classes more flexible.
A simple way to make classes in your template more universal is to require the user to add a space before the module class suffix parameter. Module classes in templates are normally created to be used for specific instances, and will often follow a convention where a hyphen or underscore is used to precede the name of the class. Adding a space opens the css styling applied to the class suffix for other html elements to use, such as applying a border to an image, a div or table perhaps.
For instance, a module class of -border will rely on the following css to render a border around a module that uses the default Joomla! xhtml chrome.
.moduletable-border {border:1px solid #ddd;padding:10px}
The markup that gets created will look like this:
<div class="moduletable-border">
Now if we add a space to the class suffix we can use a more generic piece of css that can be used across any element on the page. So, if the module class is " border" (note the space) the css required is more general:
{codecitation}.border {border:1px solid #ddd;padding:10px}{/codecitation}
and the markup will look like this:
{codecitation}<div class="moduletable border">{/codecitation}
This now opens the class .border up across the whole site to be used on divs, images or any other html element that you want to apply the border to.
10. Override the core Joomla! images.
One of the first things that attracted me to Joomla! four years ago was the little email, printer and pdf buttons that I'm sure you are all familiar with. (Ironically. if I build a site today they are one of the first things that I disable).
Customising these images is actually very easy. It's simply a matter of adding your own images to the images folder of your template - making sure that they are named as per the rules below:
- Email button - emailButton.png
- Edit Button - edit.png
- Edit Unpublished button - edit_unpublished.png
- Pdf Button - pdf_button.png
- Print Button - printButton.png
- Breadcrumb image - arrow.png
11. Set specific markup for logged in users or guests
Once again, there are a few ways to do this. You can approach this via components like Juga, numerous other simple plugins that can be found on the JED, such as this nifty plugin from Rocket Theme, or by creating access variables at the template level.
If you feel like digging in, you can set the following variables to decide what content is available for specific sets of users, or even a single user.
{codecitation}<?php // If not logged in member
$user =& JFactory::getUser();
$user_id = $user->get('id');
if (!$user_id) {
?>
This will only be seen by users who are not logged in.
<?php } ?>
{/codecitation}
or if logged in:
{codecitation}
<?php // If not logged in member
$user =& JFactory::getUser();
$user_id = $user->get('id');
if ($user_id) {
?>
This will be seen by users who are logged in
<?php } ?>
{/codecitation}
There are also other options to have a more advanced ACL so you can target specific user groups but it's probably better to use one of the solutions I mentioned before to handle access control at such a fine tuned level. However, if you wanted to show information to a specific user, then you can use something along the lines of the following:
{codecitation}
<?php // If not logged in member
$user =& JFactory::getUser(99);
$user_id = $user->get('id');
if ($user_id) {
?>
This will only be seen by a user with the id 99
<?php } ?>
{/codecitation}
12. Easily add a modal (lightbox) window link in your template
First add a link to the script in the <head> of your index.php right below
{codecitation}
<jdoc:include type="head" />
<script type="text/javascript" src="/media/system/js/modal.js"></script>
<script type="text/javascript">
window.addEvent('domready', function(){ var JTooltips = new Tips($$('.hasTip'), { maxTitleChars: 50, fixed: false}); });
window.addEvent('domready', function() {
SqueezeBox.initialize({});
$$('a.modal').each(function(el) {
el.addEvent('click', function(e) {
new Event(e).stop();
SqueezeBox.fromElement(el);
});
});
});
</script>
{/codecitation}
Then add a link to the system css styling for the modal window
{codecitation}<link rel="stylesheet" href="/media/system/css/modal.css" type="text/css" /> {/codecitation}
Now for any link that either directly in your template or any Joomla! content, you can open a modal window with a link like this:
{codecitation}http://google.com/" class="modal" rel="{handler: 'iframe', size: {x: 900, y: 550}}">My link to google{/codecitation}
You can alter the width and height of the modal by changing the x and y values.
13. Add A Custom Module Chrome
Joomla! comes with several options for module output such as "xhtml", "rounded", etc. These are typically fine, but sometimes you may want to exercise more control over the output used in the template.
One great usage is printing the module name as a class on the module. Some devs don't include a div wrapper, which makes it hard to style elements in a particular module.
In your template directory, create an /html/modules.php, and in it include this code:
{codecitation}
<?php defined('_JEXEC') or die('Restricted access');
function modChrome_xhtml2($module, &$params, &$attribs) {
if (!empty ($module->content)) : ?>
<div class="moduletableget('moduleclass_sfx');?>
module);?>">
<?php if ($module->showtitle != 0) : ?>
<h3><?php echo $module->title; ?></h3>
<?php endif; ?>
<?php echo $module->content; ?>
</div>
<?php endif; } ?>
{/codecitation}
Now you can use this module style "xhtml2" in your template's index.php:
{codecitation}<jdoc:include type="modules" name="user5" style="xhtml2" /> {/codecitation}
14. Don't forget this stuff
a. Debug Module Position:
Many template devs forget to include a debug module position where you can insert code (like Google Analytics)
Right before the closing body tag insert:
{codecitation}<jdoc:include type="modules" name="debug" />{/codecitation}
b. System Message Position
Joomla!! gives users important messages such as incorrect login info. This message is printed where this tag is present (usually right before the component tag):
{codecitation}<jdoc:include type="message" /> {/codecitation}
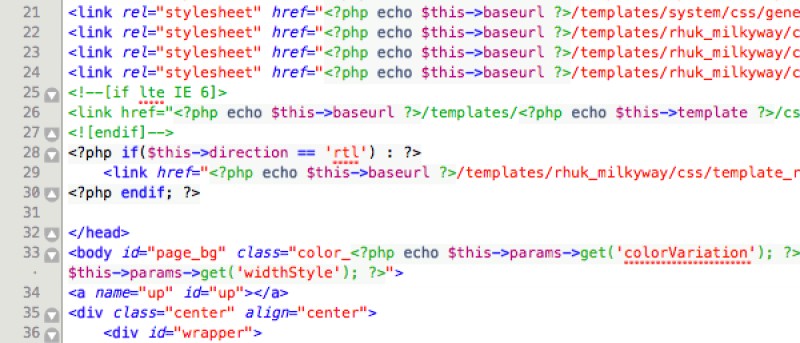
c. Global Styles
Styles for system messages and other various global styles are included in some the general and system css files, don't forget to include them!
{codecitation}<link rel="stylesheet" href="/baseurl; ?>/templates/system/css/general.css" type="text/css" />
<link rel="stylesheet" href="/baseurl; ?>/templates/system/css/system.css" type="text/css" /> {/codecitation}
component.php is needed for a view of your site without the template wrapper, or a fullscreen component view.
Some more resources for your Joomla! template kit:
- The Official Joomla Template Documentation
- Kyle Ledbetter's Joomla 1.6 tutorial
- Beauty in design Joomla 1.5 textmate bundle
- Yireo Template Helper
Some articles published on the Joomla Community Magazine represent the personal opinion or experience of the Author on the specific topic and might not be aligned to the official position of the Joomla Project
About the author
By accepting you will be accessing a service provided by a third-party external to https://magazine.joomla.org/
Comments