
Building Joomla! Web Help Systems - Part 3

Installing Joomla in learning environments - In this article, I describe the benefits of Joomla learning environments, list the software packages you'll need to build your own, and provide step-by-step instructions on installing the software on local computers and USB thumb drives.
When I was getting started with Joomla, I spent the majority of my time working on my learning environment. During this period, I tested a variety of plugins, figured out how to select a template and customize it, formulated a backup plan, and decided how to organize my help sites. While I am familiar with Joomla now, I still use my learning environment to test upgrades and new features instead of trying them blindly on my production sites.
I believe you will also benefit from setting up a learning environment on a spare computer or a USB thumb drive if you don't have a spare. A learning environment is a private space where you can get familiar with how Joomla works and try things that might go awry, look bad, or even "break" Joomla. If you really mess up, you can install another instance and try again. When you figure out how your web-help sites should look and function on your learning environment, you can easily recreate a final, formalized setup on your production environment.
Installing the server software
The first step in building a learning environment is installing a server package with Apache, PHP, and MySQL on a computer or USB thumb drive. A number of these packages are available for different operating systems. I know some writers in the corporate world use Macs, and a few may even work with Unix operating systems, but I suspect the vast majority of you work on Windows-based PCs - especially if you use one of the two major help-development tools available for creating online help.
If you are one of the many professional writers working on a Windows-based operating system, you'll find a server package called XAMPP Portable (formerly called XAMPP Lite) easy to install and use. Others are available, but I have been using this one for many years without issue. XAMPP Portable is a scaled-down version of the full XAMPP package. It includes Apache, PHP, MySQL, phpMyAdmin, and a few related packages, and takes up less space than a full XAMPP installation. In addition, you can install XAMPP Portable on USB thumb drives.
Note: For a list of additional server packages, see the Installing Joomla locally article on the Joomla documentation portal.
Downloading and installing XAMPP Portable
In the following sections I explain how to download and install XAMPP Portable version 1.8.2-5. While a more-current version is available (1.8.3-4), I was unable to install Joomla on it - I gave up after three failed attempts. I assume there is a compatibility issue, but this is just a guess. I know Joomla installs on XAMPP Portable 1.8.2-5 without issue, so I'm documenting it here to be safe.
To download XAMPP Portable:
- Start a browser and go to the XAMPP for Windows download page on SourceForge.net at the following address:
http://sourceforge.net/projects/xampp/files/XAMPP%20Windows/
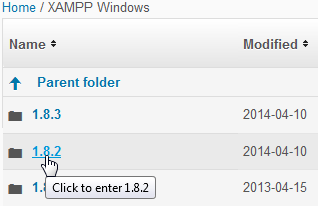
- Click the 1.8.2 folder to access the installation files:
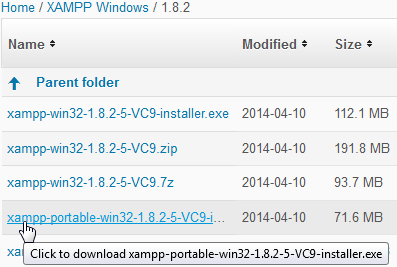
- Locate and click the XAMPP Portable installation package, xampp-portable-win32-1.8.2-5-VC9-installer.exe:
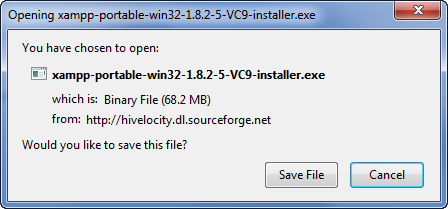
- Eventually, a download message like the following appears. Click Save File to save the installation file to your Downloads folder.
Prior to installing XAMPP Portable on your computer or USB flash drive, note the following:
- Skype uses ports 80 and 443 by default, which are the same ports used by Apache. If you are running Skype on your computer, disable it, or configure it to use different ports before installing XAMPP Portable.
- Some antivirus programs may not “like” the XAMPP Portable installation files. Consider temporarily disabling your antivirus program before installing.
Note: If you run into issues during or after the installation process, check the XAMPP for Windows support forum for solutions.
To install XAMPP Portable on a computer or USB thumb drive:
- Navigate to the folder containing the XAMPP Portable installation file you just downloaded.
- Double-click the file to start the installation process. Click Run if a Security Warning message appears. In a moment, the XAMPP Setup Wizard appears.
- Click Next to start the installation process. The Select Components screen appears.
- Since you are creating a learning environment for Joomla web-help sites, you only need to install Apache, PHP, MySQL, and phpMyAdmin. I recommend de-selecting Tomcat, Perl, and Fake Sendmail – you don’t need these packages and they will just take up space.
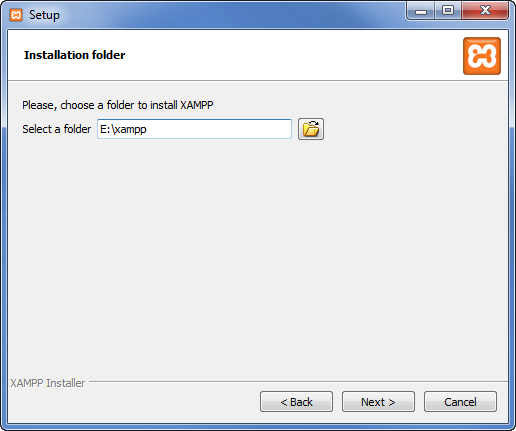
- Click Next to continue the installation process. The Installation folder screen appears showing the default installation location C:\xampp. Do one of the following, as required:
- If you are installing XAMPP Portable on your computer, the default location will work well. In this case, continue to Step 6 without making any changes.
- If you want to install XAMPP Portable in a different location on your hard drive, or on a USB thumb drive, click the Browse icon to open the Browse for Folder window. Select the desired location, whether another folder or a thumb drive, and then click OK:
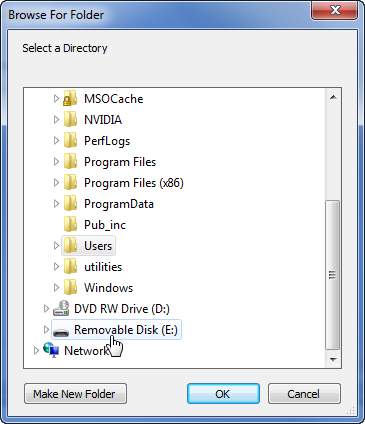
If you selected a USB thumb drive, the default installation path is the root of the drive (for example, E:\). Type a folder name, like xampp, after the drive letter (do not install XAMPP Portable directly on the root of your thumb drive), like the following example:
- Click Next. An informational message about Bitnami for XAMPP appears. Deselect the “Learn more..” option, unless you want to be redirected to the Bitnami for XAMPP site.
- Click Next to proceed to the Ready to Install screen.
- On the Ready to Install screen, click Next one more time to start installing XAMPP Portable. The installation process may take several minutes, as the files are first unpacked from the installer and then installed.
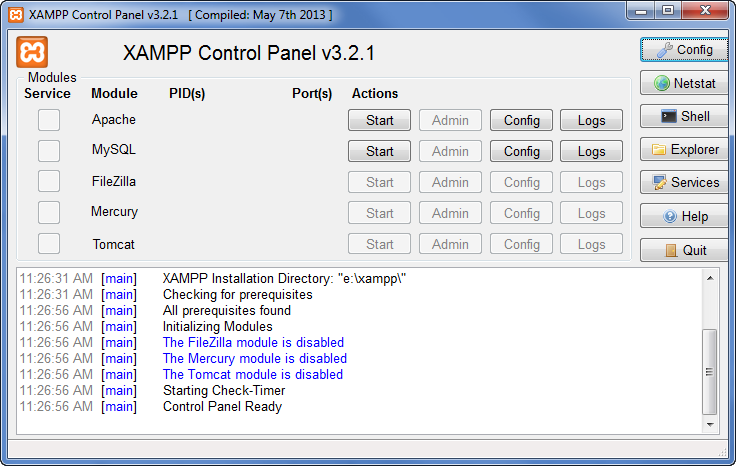
- When the installation process completes, the Completing the XAMPP Setup Wizard screen appears. The Control Panel startup option is selected by default – do not deselect it. Click Finish. The XAMPP Control Panel starts and, in a moment, appears on your desktop:
Starting the MySQL and Apache services
You can manage the MySQL and Apache services from the XAMPP Control Panel. When starting the services, start MySQL first, followed by Apache. When stopping them, stop Apache first, followed by MySQL.
To start the services:
- First, click Start to start MySQL. When started, MySQL is highlighted in green.
- Then, click Start to start Apache. Apache is also highlighted in green when started.
- After starting the services, open a browser, type the following in the Address field, and press Enter:
http://localhost
The XAMPP splash page appears.
- Click the desired language on the XAMPP splash page. After selecting a language, the XAMPP for Windows home page appears. You have successfully installed XAMPP Portable. You can now close your browser and install Joomla.
Stopping and starting the services on USB thumb drives
If you installed XAMPP Portable on a USB thumb drive, remember to stop the MySQL and Apache services before removing the thumb drive from your computer. You’ll also need to start them each time you insert the drive.
To stop the services before removing a USB thumb drive:
- Click Stop on the control panel to stop Apache first.
- After stopping Apache, click Stop to stop MySQL.
- It is now safe to remove your thumb drive.
To start the services after inserting a USB thumb drive:
- Open the xampp folder on your thumb drive.
- Double-click xampp-control.exe to start the XAMPP Control panel.
- Start MySQL first, followed by Apache.
Downloading and installing Joomla
After installing XAMPP Portable on your computer or USB thumb drive, you are ready to install Joomla. In the following steps, I explain how to download the Joomla software, extract it into a folder in the XAMPP directory structure, and start the installation process. I also reference the Joomla installation instructions on the documentation portal to avoid duplicating them here.
To download the Joomla software:
- Download the latest full Joomla installation .zip package from Joomla.org (currently version 3.3.0).
- Next, navigate to the htdocs folder in the xampp directory structure, which is Apache’s document root. For example, if you installed XAMPP Portable in C:\xampp, navigate to C:\xampp\htdocs.
- Create a new, empty folder in the htdocs directory. You can name it anything you want: joomla, bob, myProduct, etc. This is the folder in which you will be installing the Joomla software. Do not use spaces if you use more than two words for the folder name.
- Extract the contents of the Joomla installation package you downloaded in Step 1 into the new folder you created in the htdocs directory. This may take several minutes if you are working on a USB thumb drive. When the extraction process completes, you are ready to start installing Joomla.
To install Joomla:
- Start a browser, type the following in the Address field, and press Enter:
http://localhost/JoomlaFolderName
Where JoomlaFolderName is the name of the folder into which you extracted the contents of the Joomla installation package. For example:
http://localhost/joomla
The Joomla installation wizard launches and the Main Configuration page appears in your browser.
- Follow the installation instructions at the following location on the Joomla documentation portal:
http://docs.joomla.org/J3.3:Installing_Joomla#tab=Start_Install
- When you get to the database installation page, do the following:
- Enter localhost in the Host Name field.
- Enter root in the Username field.
- Do not enter anything in the Password field, because you did not set a password for the root MySQL user. You are working on a learning environment that you installed locally without taking any security precautions.
- Use whatever name you like for the database. I usually use a database name that matches the Joomla folder name in htdocs.
When you finish the installation process, you are ready to start learning about Joomla. The Getting Started with Joomla! page on the documentation portal is a good place to start.
Some articles published on the Joomla Community Magazine represent the personal opinion or experience of the Author on the specific topic and might not be aligned to the official position of the Joomla Project
About the author
By accepting you will be accessing a service provided by a third-party external to https://magazine.joomla.org/
Comments